Введение
Replacing the battery on your Nest couldn't be easier. Removing 4 screws gets you into the Nest's display and the battery comes right out. The only tools required are tweezers and a Phillips #0 screwdriver.
Выберете то, что вам нужно
-
-
Grasp the display's metal outer ring with your fingers and pull directly away from the wall.
-
-
-
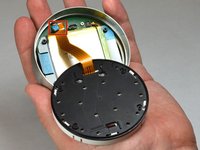
Turn the display over.
-
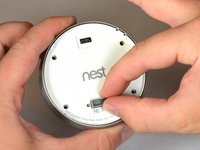
Remove the four 6 mm screws from the back of the display using a Phillips #0 screwdriver.
-
-
-
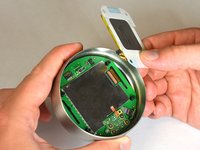
Pinch the gray 20-pin connector with your fingers and pull directly away from the display.
-
-
-
-
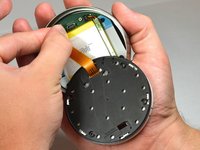
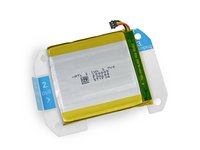
Locate the blue pull tab at the end of the ribbon which says, "1. Pull".
-
Grasp the tab with your fingers and pull directly away from the motherboard.
-
-
Инструмент, используемый на этом этапе:Tweezers$4.99
-
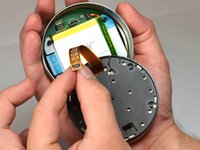
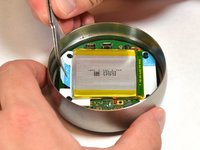
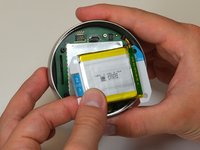
Locate the blue tab which says, "2. Pull".
-
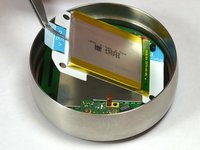
Use tweezers to pull the battery up and away from the display.
-
-
-
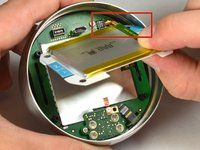
Locate the blue tab which says "3 unplug".
-
Grasp the battery with your fingers. Pull gently directly away from the display to unplug the battery from the motherboard.
-
-
-
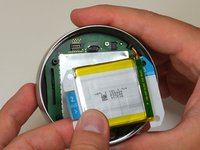
Grasp the battery with your fingers and pull directly away from motherboard to separate the battery from the display.
-


To reassemble your device, follow these instructions in reverse order.
Отменить: Я не выполнил это руководство.
44 человек успешно провели ремонт по этому руководству.
Команда

USF Tampa, Team 11-5, Blackwell Fall 2014 Участник USF Tampa, Team 11-5, Blackwell Fall 2014
USFT-BLACKWELL-F14S11G5
5 членов
Автор 12 руководств
15 Комментарии к руководству
It should be noted that doing this will void the warranty on your device. If you are having issues with the display battery you should call the tech support line and they will help you. Doing this risk damaging the device and making it to where they will not replace it if it is still under warranty.
ON MY NEST WHEN YOU "pull 2"...IT WAS GLUED TO THE METAL TOP OP THE MOTHERBOARD UNDERNEATH...SO IF THIS IS THE CASE BE VERY CAREFUL AS YOU DISLODGE THE BATTERY ....ALSO THE PLUG FOR THE BATTERY WAS TAPED DOWN WITH AMBER COLORED TAPE WHICH I HAD TO REMOVE BEFORE I WAS ABLE TO UNPLUG THE BATTERY...I REPLACED THE TAPE WITH SOME SCOTCH TAPE AFTER REINSTALLING THE BATTERY...ALL IN ALL...GOO INSTRUCTIONS...A FIVE MINUTE FIX !!!
I also am having a time finding the replacement battery
I am having trouble locating a replacement battery. Any idea where to look?
As of 12/28/17 this website has replacement batteries for $12 plus shipping:
www.batteryclerk.com
Here’s a direct link to the Gen1 battery page which has a link to the Gen2 battery page