Перейти к основному содержанию

Nexus 5 Battery Replacement

Выберете то, что вам нужно

  1. Nexus 5 Battery Replacement, Back Cover: шаг 1, изображение 1 из 3 Nexus 5 Battery Replacement, Back Cover: шаг 1, изображение 2 из 3 Nexus 5 Battery Replacement, Back Cover: шаг 1, изображение 3 из 3
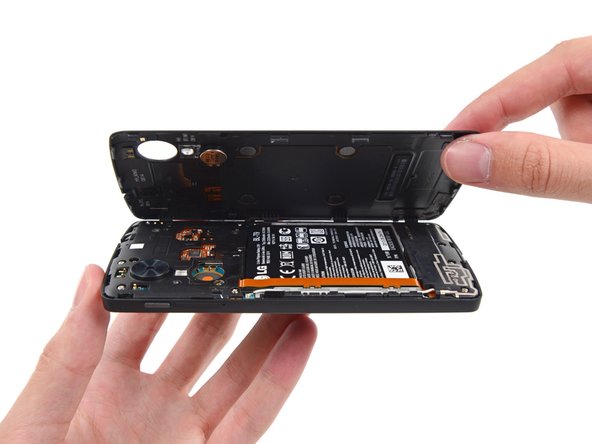
    • Use a plastic opening tool to free the clips on the top and each side of the back cover.

    • The bottom is secured with some adhesive foam. You should be able to finally free the back cover using an opening pick. The "snaps" at the bottom edge are more like hinges, so release all others then swing the back cover off outward from the top, and these fasteners will release without breaking.

    • It's best to avoid prying around the SIM card slot and volume controls, as the plastic in these areas is very thin and likely to break from prying.

    • When you replace the cover, there is a snap about even with the flash window that must also be attached (one of three that secure the back cover to the midframe). Qi (wireless) charging may not work if this isn't secure. Apply gentle but firm pressure over the "S" in "Nexus" and slide your thumb up towards the top, and the snap will engage.

  2. Nexus 5 Battery Replacement, Midframe: шаг 2, изображение 1 из 1
    • Remove the six 4.0 mm Phillips #00 screws that secure the midframe to the phone.

    • Ensure you retain all six of the 4.0mm screws! These hold the midframe securely and closely to the motherboard. The three small snaps on the back cover that attach to the midframe ensure the NFC antenna and wireless charging coil connectors contact securely with the motherboard, and work reliably.

    • To replace the LCD screen and digitizer, remove the additional four 4.0mm daughterboard cover screws with the same screwdriver. You may have to pierce through clear adhesive material to remove them.

  3. Nexus 5 Battery Replacement: шаг 3, изображение 1 из 2 Nexus 5 Battery Replacement: шаг 3, изображение 2 из 2
    • Remove the midframe from the phone.

    • Examine the midframe and the back cover and you'll find three very small snap attachment points for the back to the midframe. These ensure that the NFC and wireless charging antenna contacts connect with the corresponding spring connectors on the motherboard. Ensure the snaps are in good condition.

  4. Nexus 5 Battery Replacement, Battery: шаг 4, изображение 1 из 2 Nexus 5 Battery Replacement, Battery: шаг 4, изображение 2 из 2
    Инструмент, используемый на этом этапе:
    Spudger
    $2.99
    Купить
    • Use the flat end of a nylon spudger to disconnect the battery connector.

  5. Nexus 5 Battery Replacement: шаг 5, изображение 1 из 2 Nexus 5 Battery Replacement: шаг 5, изображение 2 из 2
    • Use the flat end of a spudger to disconnect the daughterboard ribbon cable and pull it away from the battery.

  6. Nexus 5 Battery Replacement: шаг 6, изображение 1 из 3 Nexus 5 Battery Replacement: шаг 6, изображение 2 из 3 Nexus 5 Battery Replacement: шаг 6, изображение 3 из 3
    • Use a plastic opening tool to pry the battery out of its housing.

    • You may need to use a heat gun to apply a small amount of heat to soften the adhesive below the battery.

    • Do not puncture or bend the battery.

    • If replacing the battery, bag the old battery up and recycle responsibly at a suitable location.

Заключение

To reassemble your device, follow these instructions in reverse order.

465 участников успешно повторили данное руководство.

Gaetan

Участник с: 12/26/12

9 574 Репутация

Автор 18 руководств

66 Комментариев

I have made this guide based on good quality teardown pictures. I run out of detail pictures for step 3 & 4. Feel free to upgrade the guide if you have a Nexus 5 open and a camera on your hands.

Gaetan - Ответить

Did it in less than 10 mins..

Already had experience with taking the backcover off...

Davor Bertovic - Ответить

In the start of the guide it says "Replace the battery in your iPhone 5s"

Thomas Novin - Ответить

After battery replacement my wireless charging was not working. Pay attention to settle holding clip in the middle of phone - just firmly press around the "S" from the back of phone until you hear it clicks in.

nextsux - Ответить

Thank you so much for this tip! I did it and it worked. Now Wireless charging is working again.

QNZ -

Добавить комментарий

Просмотр статистики:

За последние 24часов: 10

За последние 7 дней: 39

За последние 30 дней: 147

За всё время: 343,036