Введение
This guide explains how to replace the Nikon COOLPIX P7700 LCD display screen.
There may be problems or damage done to a Nikon COOLPIX P7700 LCD display screen. It could be scratched, broken, or damaged in any number of ways. This guide will help you replace the screen in just six steps and your camera will look brand new!
Выберете то, что вам нужно
-
-
Push down and slide the lock of the battery compartment to the unlock position.
-
Remove the battery.
-
-
-
Use a Phillips #00 screwdriver to remove the 4.3 screw on both the top and bottom of the screen's casing.
-
-
-
Place the camera lens-side down and twist the screen so that it is perpendicular to the camera.
-
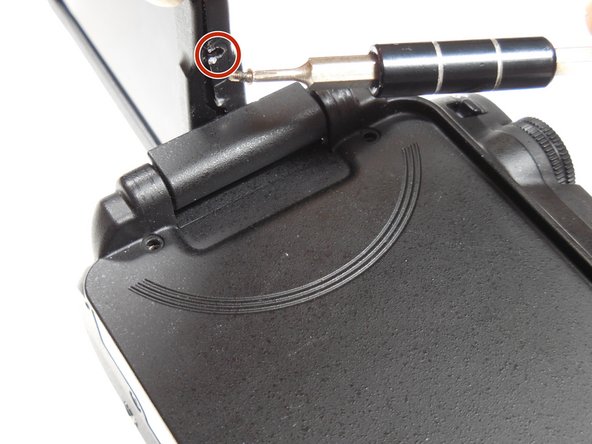
Remove the 4.3 mm screw on the side of the casing using the Phillips #00 screwdriver.
-
Twist the screen in the other direction and remove the other 4.3 mm screw.
-


To reassemble your device, follow these instructions in reverse order.
To reassemble your device, follow these instructions in reverse order.
Отменить: Я не выполнил это руководство.
2 участников успешно повторили данное руководство.
Команда

Colorado Springs, Team 2-7, Panko Spring 2015 Участник Colorado Springs, Team 2-7, Panko Spring 2015
UCCS-PANKO-S15S2G7
3 членов
Автор 10 руководств
Один комментарий
Do NOT follow this guide. There are numerous details left out of step 6 and there’s no troubleshooting guide. Most importantly, there’s no warning that this kind of repair really isn’t meant to be done by laypeople and that it’s to be done at the user’s own risk. These instructions don’t equip someone for this delicate task that, if done wrongly, can waste a lot of time and damage the camera, as happened in my case.