Введение
This guide is to show a user how to change a camera lens. One will need to take the camera completely apart. It is a pretty hard task but if one follow the guides it can be simple.
Выберете то, что вам нужно
-
-
Remove the four (3.20 mm) Phillips #00 screws at the bottom of the device.
-
-
-
Remove the top (4.10 mm) Phillips #00 screw adjacent to the battery compartment.
-
Remove the bottom (3.20 mm) Phillips #00 screw adjacent to the battery compartment.
-
-
-
Remove the top (4.20 mm) Phillips #00 screw adjacent to the mic side of the camera and opposite the battery side.
-
Remove the lower (3.20 mm) Phillips #00 screw adjacent to the mic side of the camera and opposite of the battery side.
-
-
-
Separate the case using the plastic prying tool. This can be done by placing the tool in the position that is shown and in the position on the left side of the camera.
-
-
-
-
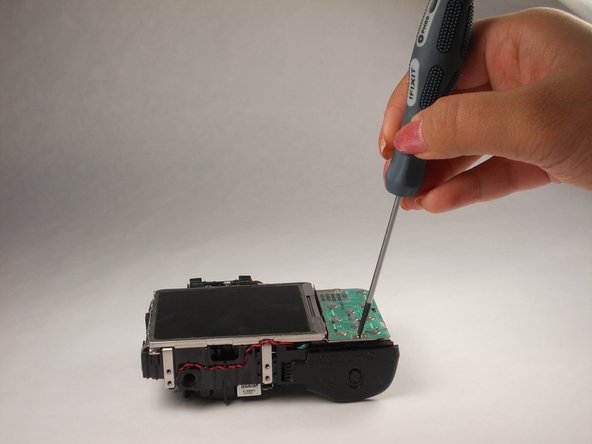
Carefully unscrew and remove the top and bottom (2.25 mm) screws from the control panel.
-
Carefully unscrew and remove the middle (3.20 mm) screws from the control panel.
-
-
-
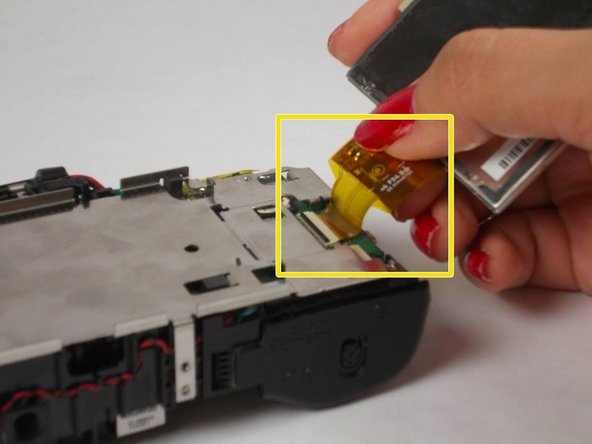
Carefully remove the ribbon connecting the control panel to the camera. The latch can be removed by sliding it down and pulling the ribbon down.
-
-
-
Using a prying tool, carefully lift up the LCD screen but do NOT pull it off.
-
-
-
While the LCD screen is loose and unattached, there is a latch that is holding the ribbon in place. Slide the latch down and pull the ribbon out.
-
-
-
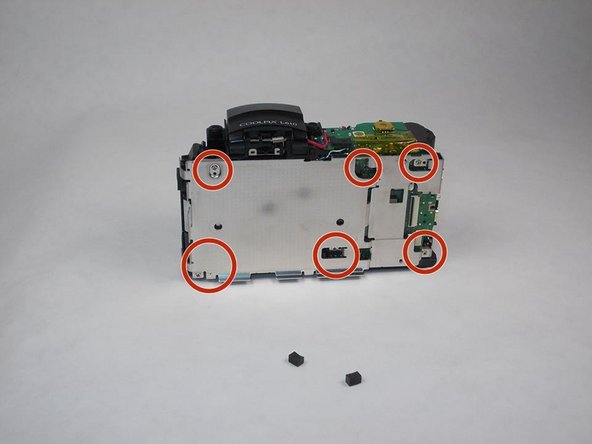
Remove the 6 (3.70 mm) screws on the metal cover. Two of those screws are covered by black plastic covers.
-
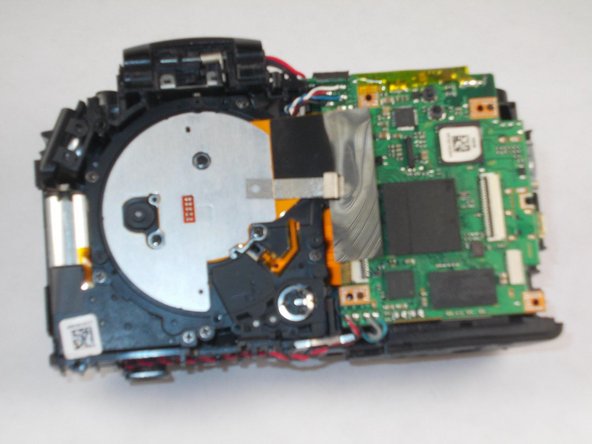
After removing the screws the panel should come off and will look like the final image.
-
-
-
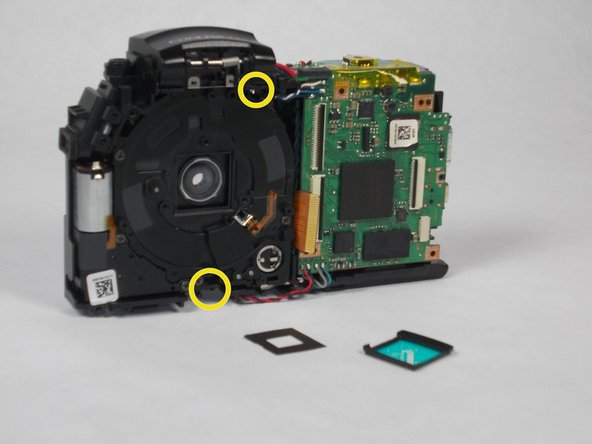
Unplug the two ribbons for the lens. There will be latch that will need to be slid down. After loosening the latch, the ribbon should be able to be easily pulled out.
-
-
-
There are two lens covers that will fall out after removing the back lens plate.
-
Remove the 6 (4.35 mm) screws surrounding the lens.
-
There are 2 more (3.70 mm) screws covered by a small black square located. Remove the black squares and proceed to unscrewing these final screws.
-
Remove the lens. It should just be free to pull it out.
-


To reassemble your device, follow these instructions in reverse order.
To reassemble your device, follow these instructions in reverse order.
Отменить: Я не выполнил это руководство.
2 участников успешно повторили данное руководство.
Команда

USF Tampa, Team 9-4, Brown Winter 2015 Участник USF Tampa, Team 9-4, Brown Winter 2015
USFT-BROWN-W15S9G4
4 членов
Автор 12 руководств