Введение
This guide will allow you to remove the LCD display that may be cracked or unresponsive and replace it with a new LCD display.
Выберете то, что вам нужно
-
-
Turn the camera upside down and remove the two 40mm JIS screws by using a JIS J000 screwdriver.
-
-
-
Turn camera on its left side and remove the two 40mm JIS screws by using a JIS J000 screwdriver.
-
-
-
Turn the camera on its right side and remove the two 40mm JISscrews by using a JIS J000 screwdriver.
-
-
-
-
Remove the two 20mm JIS screws using a JIS J000 screwdriver. They are responsible for keeping the keypad in place.
-
-
-
Carefully pull the LCD display up from the camera.
-
Fold the LCD display over the camera.
-
-
-
Using a JIS J000 screwdriver, remove the five 30mm JIS screws identified in the metal frame.
-
Once all of the screws are removed from the metal frame, gently lift up and remove the metal frame from camera.
-
-
-
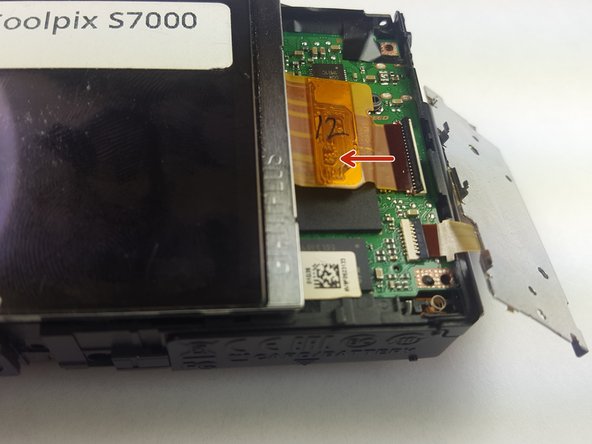
In order to disconnect the LCD display ribbon from the zero insertion force (ZIF) connector we must first flip up the little black tab with your fingernail.
-
Gently pull the out the LCD display ribbon from the connector. It should slide out pretty easy.
-


To reassemble your device, follow these instructions in reverse order.
To reassemble your device, follow these instructions in reverse order.
Отменить: Я не выполнил это руководство.
3 участников успешно повторили данное руководство.
Команда

USF Tampa, Team S2-G3, Lacy Spring 2017 Участник USF Tampa, Team S2-G3, Lacy Spring 2017
USFT-LACY-S17S2G3
4 членов
Автор 10 руководств
4 Комментариев
Hello,
thank you for this helpful instrucions. It was easy to follow, however in Step 11 when I tried to open the ZIF Connector, the little black tab jumped away and now I don’t know how to get it back in position. I tried nearly everything but even with precision tweezers I couldn’t fix it. Do you know any help.
By the way, is the Display only working, when the display ribbon is fixed properly with the ZIF connector?
Thank you very much.
Greetings
wasi
I did this today and it worked! Saved my self buying a new camera. For about $25 Got the screen from aliexpress. Bought the screwdriver from Jaycar electronics. I used a magnifying lamp over a clean white surface and had containers ready for 20, 30 , 40 mm screws. Taking the back off was tedious as it wracks easily and binds in one corner. Very satisfying. Thanks
Suzanne Newman
Just repaired my father’s camers with this instruction - tank you very much. One step might be added: My replacement display (EUR 17 via ebay) did not come with the upper glass (*) labeled “Nikon” at the bottom. It is glued to the original one, so I removed it and glued it to the new one.
*Please excuse my bad english.
Just finished replacing the screen; works a marvel; thank you for the clear instructions; mind you, it turned out this camera, same model as described, has 4 screws beneath the display instead of 5, and no need to remove them to dis/connect the ZIF connector.
Used a computer screwdriver, a magnet to hold the screws, at first a magnifying lens which turned out not necessary.