Перейти к основному содержанию

Nikon N2000 (F301) Communication Board Replacement

Выберете то, что вам нужно

  1. Nikon N2000 (F301) Communication Board Replacement, Lens Mount: шаг 1, изображение 1 из 1
    • Use a 00 Phillips head screwdriver to remove the four screws from the lens mount.

  2. Nikon N2000 (F301) Communication Board Replacement: шаг 2, изображение 1 из 1
    • Remove lens mount from the camera.

    • Be careful not to lose any of the three loose pieces that are under the lens mount.

  3. Nikon N2000 (F301) Communication Board Replacement, Communication Board: шаг 3, изображение 1 из 1
    • Remove the three loose parts (spring, small rod, and metal ring) that were under the lens mount and put them aside.

    • Make sure you remember the orientation of the metal ring so that it is easier to put back in the device later.

  4. Nikon N2000 (F301) Communication Board Replacement: шаг 4, изображение 1 из 1
    • Use 00 Phillips head screwdriver to remove the screw from the bottom of the front black case.

  5. Nikon N2000 (F301) Communication Board Replacement: шаг 5, изображение 1 из 3 Nikon N2000 (F301) Communication Board Replacement: шаг 5, изображение 2 из 3 Nikon N2000 (F301) Communication Board Replacement: шаг 5, изображение 3 из 3
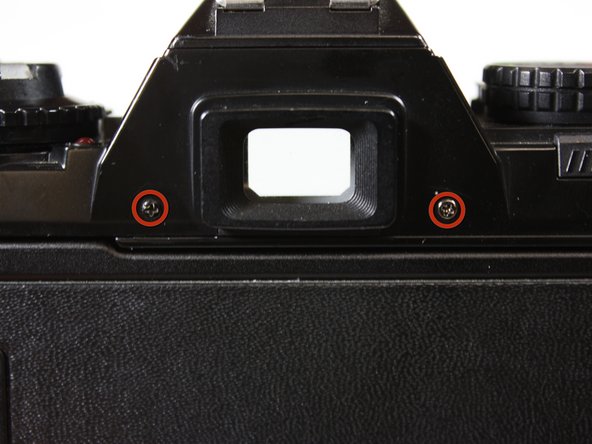
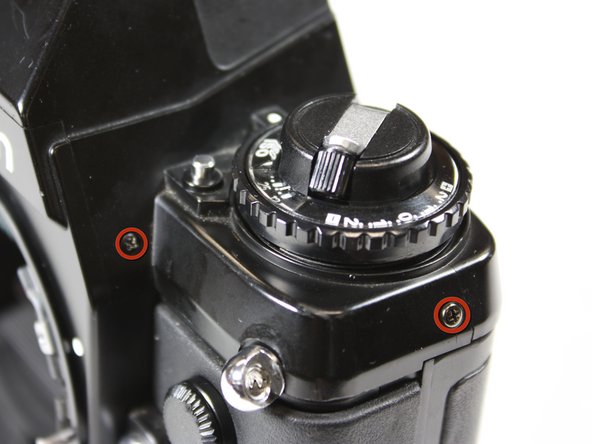
    • Use 00 Phillips head screwdriver to remove the screws from the top case (6 in all).

  6. Nikon N2000 (F301) Communication Board Replacement: шаг 6, изображение 1 из 1
    • Remove the front case from the camera.

    • There is a black plastic ring in the case. Be sure not to remove it, as it can be difficult to put back.

  7. Nikon N2000 (F301) Communication Board Replacement: шаг 7, изображение 1 из 1
    • Use a 00 Phillips head screwdriver to remove the screws from either side of the communication board.

  8. Nikon N2000 (F301) Communication Board Replacement: шаг 8, изображение 1 из 1
    • Desolder the wires and remove them from the communication board.

    • Note: If you are unfamiliar with soldering techniques, click here for a guide.

Заключение

To reassemble your device, follow these instructions in reverse order.

5 участников успешно повторили данное руководство.

Zachary Phillips

Участник с: 04/08/11

247 Репутация

Автор 5 руководств

Команда

Cal Poly, Team 25-26, Garner Spring 2011 Участник Cal Poly, Team 25-26, Garner Spring 2011

CPSU-GARNER-S11S25G26

3 членов

Автор 12 руководств

3 Комментариев

Doesn't work for the 301, although it looks similar I can't find any way to remove the top or the front case

John Chapple - Ответить

The F301 and N2000 are identical, so the guide should work. In this guide the top case isn't removed, as the film rewind knob is preventing it from coming off completely, and instead just lifted with the bit of leeway the popped up rewind knob provides.

Miles Kosik -

Is there a way to remove the plasticzek top cover, as comment above says, the knobs prevents me from removing this part. My plastic cover is broken and I want to change it for a new one, is there a way?

Filip N - Ответить

Добавить комментарий

Просмотр статистики:

За последние 24часов: 7

За последние 7 дней: 17

За последние 30 дней: 59

За всё время: 6,077