Введение
The communication board sends information about the aperture and focus of the lens. If you are having trouble with focus or aperture, then there may be a problem with the communication board.
Выберете то, что вам нужно
-
-
Use a 00 Phillips head screwdriver to remove the four screws from the lens mount.
-
-
-
Remove the three loose parts (spring, small rod, and metal ring) that were under the lens mount and put them aside.
-
-
-
-
Use 00 Phillips head screwdriver to remove the screw from the bottom of the front black case.
-
-
-
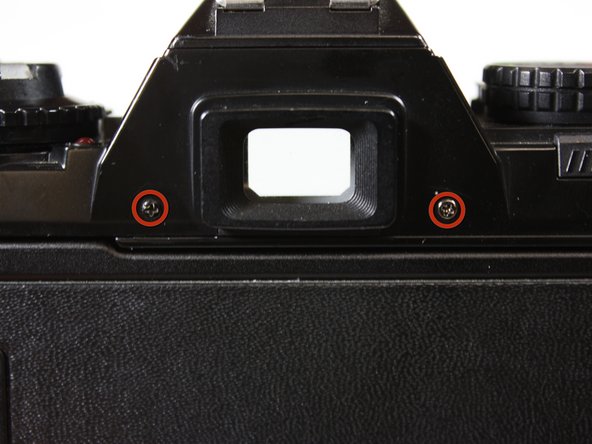
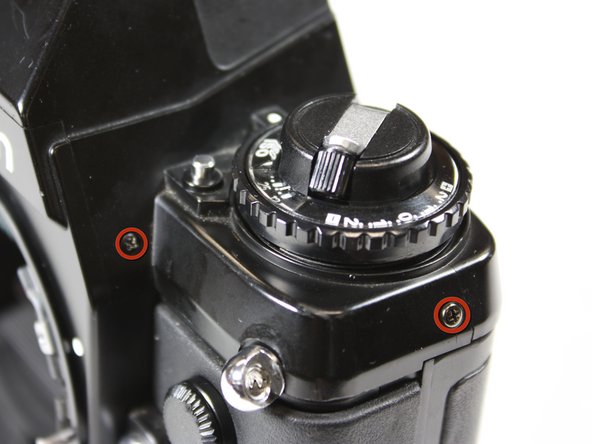
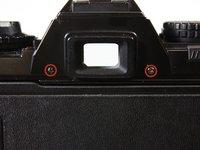
Use 00 Phillips head screwdriver to remove the screws from the top case (6 in all).
-
-
-
Use a 00 Phillips head screwdriver to remove the screws from either side of the communication board.
-


To reassemble your device, follow these instructions in reverse order.
Отменить: Я не выполнил это руководство.
6 человек успешно провели ремонт по этому руководству.
Команда

Cal Poly, Team 25-26, Garner Spring 2011 Участник Cal Poly, Team 25-26, Garner Spring 2011
CPSU-GARNER-S11S25G26
3 членов
Автор 12 руководств
6 Комментарии к руководству
Doesn't work for the 301, although it looks similar I can't find any way to remove the top or the front case
The F301 and N2000 are identical, so the guide should work. In this guide the top case isn't removed, as the film rewind knob is preventing it from coming off completely, and instead just lifted with the bit of leeway the popped up rewind knob provides.
The small metal post that was under the ring… where does this go? It moved as I lifted the ring and now for the life of me I can figure out where it’s meant to be… help. I opened it up because the black aperture ring was sticking and not springing back when I moved the aperture dial on the lens. My original problem is fixed but now I can’t reassemble my camera.
The only place I could imagine it fitting is inside the spring, just round from the screw at 2 o’clock… is that right?