Перейти к основному содержанию

Ninja Coffee Bar CF080 Power Module Replacement

Выберете то, что вам нужно

  1. Ninja Coffee Bar CF080 Power Module Replacement, Heated Plate: шаг 1, изображение 1 из 1
    • Face the machine bottom towards you.

  2. Ninja Coffee Bar CF080 Power Module Replacement: шаг 2, изображение 1 из 2 Ninja Coffee Bar CF080 Power Module Replacement: шаг 2, изображение 2 из 2
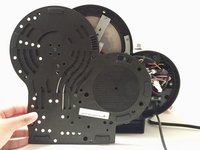
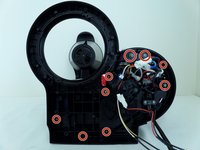
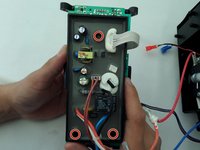
    • Unscrew six 0.6cm screws by holding the bottom board with Torx #10 screwdriver to remove the board.

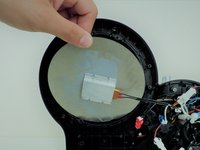
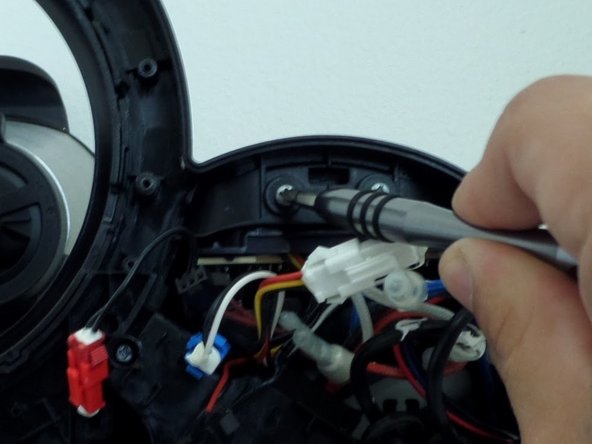
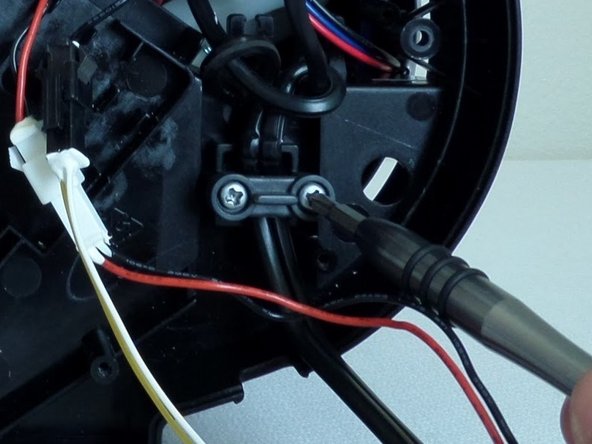
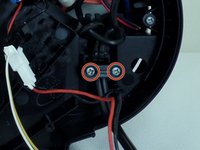
    • Unscrew one 0.6 cm screw with PH1 screwdriver to remove the board.

  3. Ninja Coffee Bar CF080 Power Module Replacement: шаг 3, изображение 1 из 3 Ninja Coffee Bar CF080 Power Module Replacement: шаг 3, изображение 2 из 3 Ninja Coffee Bar CF080 Power Module Replacement: шаг 3, изображение 3 из 3
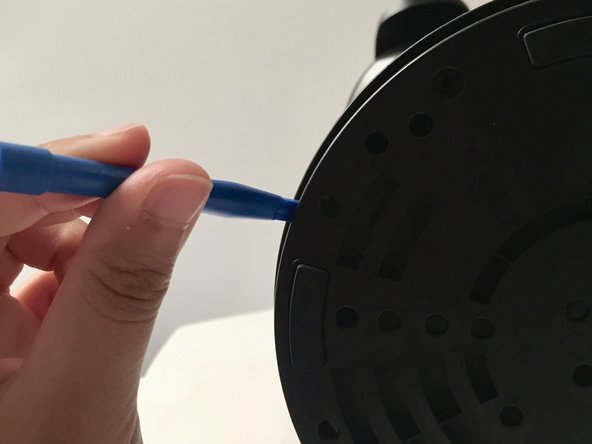
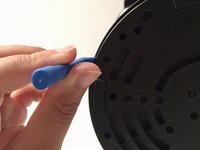
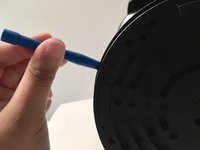
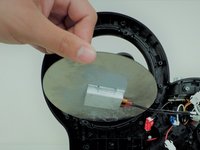
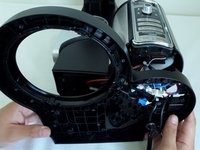
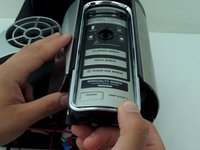
    • With moderate force remove and place the "plastic opening tool" between the divide in order to remove the bottom board.

  4. Ninja Coffee Bar CF080 Power Module Replacement: шаг 4, изображение 1 из 3 Ninja Coffee Bar CF080 Power Module Replacement: шаг 4, изображение 2 из 3 Ninja Coffee Bar CF080 Power Module Replacement: шаг 4, изображение 3 из 3
    • Remove the bottom board with moderate force.

  5. Ninja Coffee Bar CF080 Power Module Replacement: шаг 5, изображение 1 из 1
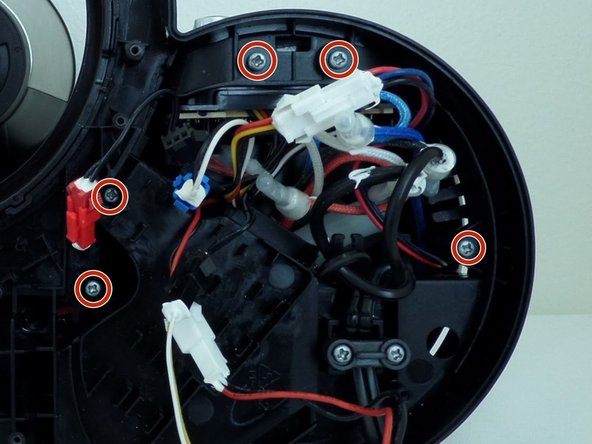
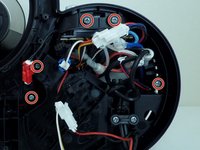
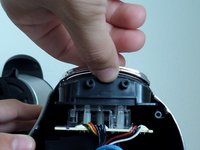
    • Unscrew eight 0.6cm sized screws with Phillips #1 screwdriver, holding the silver secures on the sides of the heated plate.

    • Four screws on each side, two silver secures to remove the securers, located on the sliver bar holding the heated plate (one on each end).

  6. Ninja Coffee Bar CF080 Power Module Replacement: шаг 6, изображение 1 из 1
    • Unscrew two 0.6cm sized screws Phillips #1 screwdriver.

    • The silver bar will fall off once screws are removed.

  7. Ninja Coffee Bar CF080 Power Module Replacement: шаг 7, изображение 1 из 2 Ninja Coffee Bar CF080 Power Module Replacement: шаг 7, изображение 2 из 2
    • Remove the heated plate from the machine with easy glide.

  8. Ninja Coffee Bar CF080 Power Module Replacement, Power Module: шаг 8, изображение 1 из 3 Ninja Coffee Bar CF080 Power Module Replacement, Power Module: шаг 8, изображение 2 из 3 Ninja Coffee Bar CF080 Power Module Replacement, Power Module: шаг 8, изображение 3 из 3
    • Remove the nine 0.5cm screws with Phillips #2 screwdriver.

    • Some screws are harder to see due to how deep the holes are.

    • Recommend using Extender 4 with Phillips #2 screwdriver to help unscrew the screws within the deep holes of the machine.

  9. Ninja Coffee Bar CF080 Power Module Replacement: шаг 9, изображение 1 из 2 Ninja Coffee Bar CF080 Power Module Replacement: шаг 9, изображение 2 из 2
    • Remove the two 0.6cm with Phillips #2 screwdriver.

  10. Ninja Coffee Bar CF080 Power Module Replacement: шаг 10, изображение 1 из 3 Ninja Coffee Bar CF080 Power Module Replacement: шаг 10, изображение 2 из 3 Ninja Coffee Bar CF080 Power Module Replacement: шаг 10, изображение 3 из 3
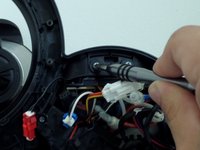
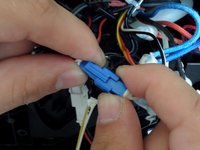
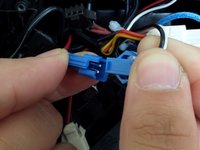
    • Detach various colored cords from one another, using both hands to place thumb and index finger to hold each grip then separate by pulling with the degree of force.

    • There with be 1 blue, 1 black, 1 red and 2 white.

  11. Ninja Coffee Bar CF080 Power Module Replacement: шаг 11, изображение 1 из 2 Ninja Coffee Bar CF080 Power Module Replacement: шаг 11, изображение 2 из 2
    • Remove the black board by maneuvering it through the cords.

  12. Ninja Coffee Bar CF080 Power Module Replacement: шаг 12, изображение 1 из 3 Ninja Coffee Bar CF080 Power Module Replacement: шаг 12, изображение 2 из 3 Ninja Coffee Bar CF080 Power Module Replacement: шаг 12, изображение 3 из 3
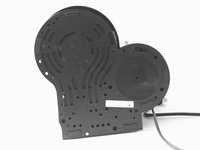
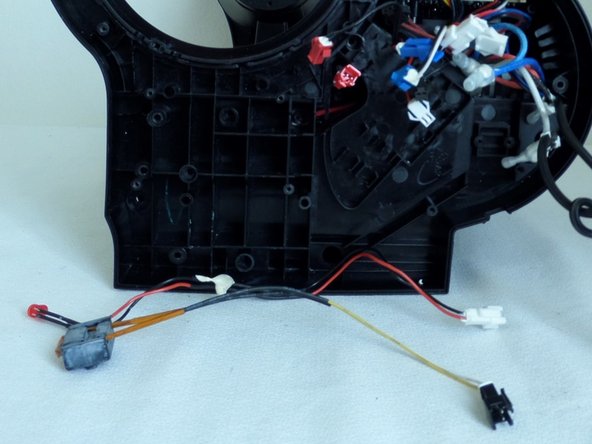
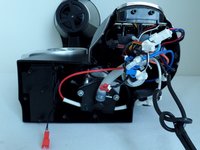
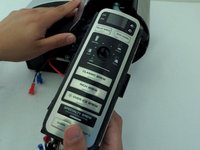
    • Grip the bottom end of the panel and pull it towards you to remove the module from the machine.

  13. Ninja Coffee Bar CF080 Power Module Replacement: шаг 13, изображение 1 из 2 Ninja Coffee Bar CF080 Power Module Replacement: шаг 13, изображение 2 из 2
    • Remove the three 0.6cm screws with Phillips #1 screwdriver.

    • They are in the black holes, 1 at the top and two at the bottom.

  14. Ninja Coffee Bar CF080 Power Module Replacement: шаг 14, изображение 1 из 1
    • Remove the black board attached to the module.

Заключение

To reassemble your device, follow these instructions in reverse order.

2 участников успешно повторили данное руководство.

Elizabeth Nguyen

Участник с: 09/11/17

416 Репутация

Автор 3 руководств

Команда

CSU Fullerton, Team S1-G1, Bruce Fall 2017 Участник CSU Fullerton, Team S1-G1, Bruce Fall 2017

CSUF-BRUCE-F17S1G1

4 членов

Автор 5 руководств

0 Комментариев

Добавить комментарий

Просмотр статистики:

За последние 24часов: 0

За последние 7 дней: 1

За последние 30 дней: 21

За всё время: 3,456