Эта версия возможно содержит некорректные исправления. Переключить на последнюю проверенную версию.
Выберете то, что вам нужно
-
Этот шаг не переведен. Помогите перевести
-
Unscrew the four Phillips #00 screws along the top of the back cover.
-
-
Этот шаг не переведен. Помогите перевести
-
Grab the top edge of the back cover with your opposite hand so that the cover does not fall back into place.
-
Pull the back cover up and away from the rest of the device to remove it.
-
-
Этот шаг не переведен. Помогите перевести
-
Insert a plastic opening tool into the notch in the lower case above the battery.
-
Pry the battery up with the plastic opening tool.
-
Grab the top edge of the battery and lift it out of the lower case.
-
-
-
Этот шаг не переведен. Помогите перевести
-
Remove the nine 6.3 mm black Phillips screws from the lower case.
-
Remove the 2.4 mm silver Phillips screw above the game cartridge slot.
-
-
Этот шаг не переведен. Помогите перевести
-
Lift the bottom edge of the lower case off the rest of the 3DS.
-
Use a plastic opening tool to pry the shoulder button ribbon cables off their sockets on the motherboard.
-
Remove the lower case from the device.
-
-
Этот шаг не переведен. Помогите перевести
-
Remove the two 4.5 mm Phillips screws securing the SD board to the motherboard.
-
-
Этот шаг не переведен. Помогите перевести
-
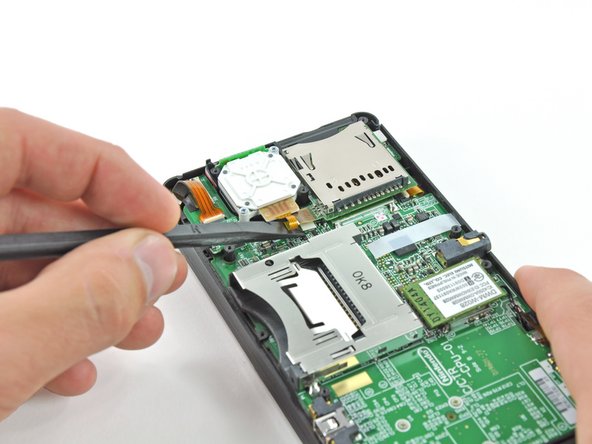
Use the flat end of a spudger to pry the SD board ribbon cable connector off its socket on the motherboard.
-
-
Этот шаг не переведен. Помогите перевести
-
Insert the flat end of a spudger between the SD board and the motherboard.
-
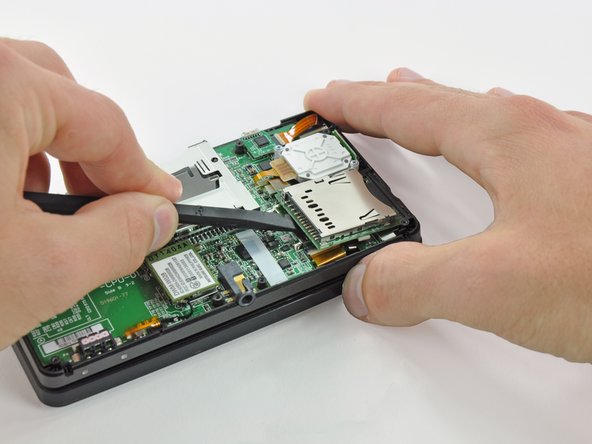
Run the spudger along the sides of the SD board to free it from the adhesive pad holding it in place.
-
Once completely freed, lift the SD board straight off the motherboard.
-


Отменить: Я не выполнил это руководство.
21 участников успешно повторили данное руководство.

8 Комментариев
You can usually find them on ebay to around $3 to $6 dollars (non oem and oem)
Is there a way to do this with the older 3ds xl version? I didn't see any screws holding the sd board in when I opened it up.
Would this work for my problem? My problem is that the SD Card won't stay in, it just pops back out. Would this method still work? I'm not that experienced or knowledgeable about fixing these sort of things, so I'm not sure if the spring is part of it or not, lol. Also, where could I buy an SD Card board replacement part for cheap in Canada?
Usually that is the locking mechanism, you can replace the SD card slot for around $6 or $3 if you buy the non oem part.