Эта версия возможно содержит некорректные исправления. Переключить на последнюю проверенную версию.
Выберете то, что вам нужно
-
Этот шаг не переведен. Помогите перевести
-
Place the 3DS upside down. Remove the game card, headphones, charging cable, stylus, or anything else that may be connected to the device.
-
-
Этот шаг не переведен. Помогите перевести
-
Using a JIS #0 screwdriver, loosen the two black screws on the back.
-
-
Этот шаг не переведен. Помогите перевести
-
The battery is located on the left hand side of the 3DS - to remove, use the small gap located at the top-middle and pull up with a non metal pointed tool.
-
-
-
Этот шаг не переведен. Помогите перевести
-
Remove six 6mm screws on secondary panel using a JIS #000 screwdriver.
-
-
Этот шаг не переведен. Помогите перевести
-
Remove two upper rubber bumpers locates on either side of the charging port.
-
Using JIS #00 screwdriver, carefully remove the two 6mm screws that have now been exposed.
-
-
Этот шаг не переведен. Помогите перевести
-
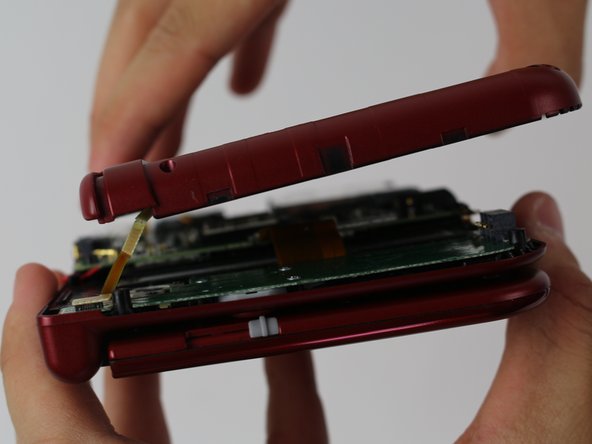
Use non-conductive tweezers to disconnect the two ribbon plugs that connect the L/R/ZL/ZR buttons on the cover to the motherboard, then remove it completely.
-
-
Этот шаг не переведен. Помогите перевести
-
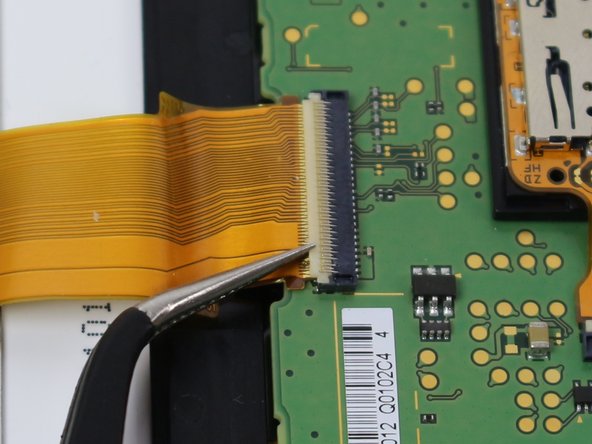
Locate the ribbon connector between the motherboard and the left circuit board (it should be the widest) and use a pair of tweezers to pivot up the ZIF clasp upward.
-
The ribbon can be removed using non-conductive tweezers by pulling out parallel with the board.
-
-
Этот шаг не переведен. Помогите перевести
-
Next, locate the five 3mm screws on the left board and remove them using a JIS #000 screwdriver.
-
-
Этот шаг не переведен. Помогите перевести
-
Carefully flip the board over and use tweezers to remove the blue-black ribbon located underneath.
-
-
Этот шаг не переведен. Помогите перевести
-
Remove the gray rubber diamond to reveal the A/B/X/Y buttons and/or the rubber rectangle to reveal the Start/Select button.
-
Remove the buttons using tweezers.
-


Отменить: Я не выполнил это руководство.
25 участников успешно повторили данное руководство.
Команда

Cal Poly, Team 24-4, Lancaster Spring 2015 Участник Cal Poly, Team 24-4, Lancaster Spring 2015
CPSU-LANCASTER-S15S24G4
4 членов
Автор 25 руководств
10 Комментариев
It will work, since the only difference between them is the size of screen and shell, but size of buttons and other pieces should be of the same.
If anyone else comes on this, I can confirm the small 3ds buttons do not quite work right they are slightly smaller and the cut outs that keep the buttons from spinning around are not the same
Can someone provide further information about replacement of the entire C stick?
Or is it just as simple as pull the ribbon carefully, take the old one out and put the new one in?