Введение
If your controllers are not broken but are not working, then you should replace the controller outlets. Follow our guide for further information.
Выберете то, что вам нужно
-
-
Remove the six 13.25mm Phillips screws on the bottom of the game console with a #2.5 flathead screwdriver.
-
Flip the game console right side up and take off the top by pulling it up and away from the rest of the device with your hands.
-
-
-
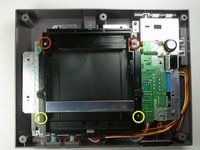
Remove the seven 13.25mm Phillips screws from the metal cover with a Phillips head #2 screwdriver.
-
Remove the metal cover by pulling it up and away from the rest of the console with your hands.
-
-
-
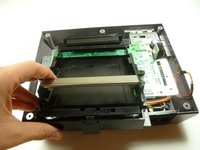
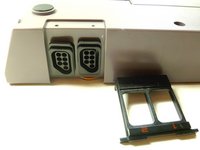
Remove the two silver 17.45mm Phillips screws from the cartridge tray using a Phillips head #2 screwdriver.
-
Remove the two bronze 13.25mm Phillips screws from the cartridge tray using a Phillips head #2 screwdriver.
-
Slide the cartridge tray toward you, away from the 72-PIN connector, and off the motherboard assembly.
-
-
-
-
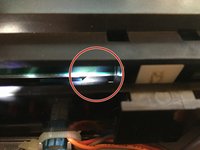
Note: Underneath the cartridge tray is a black trapezoid-shaped tab/lip (see marker). When properly assembled this tab/lip goes below the motherboard and shielding as seen here.
-
-
-
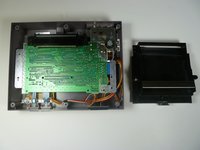
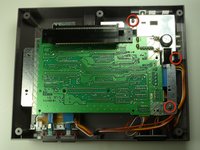
Remove the three 13.25mm Phillips screws that secure the motherboard to the lower case with a Phillips head #2 screwdriver.
-
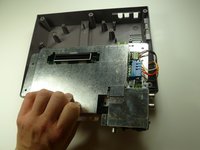
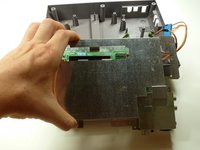
Pull the motherboard assembly straight up and out of the plastic case with your hands.
-
-
-
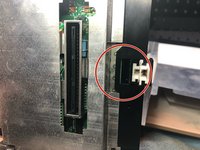
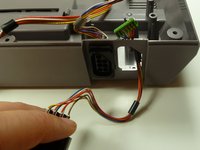
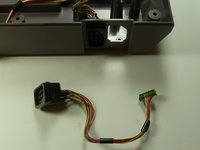
Disconnect the wire harnesses from the motherboard assembly:
-
Controller 1 (left)
-
Controller 2 (right)
-
Power
-
-
-
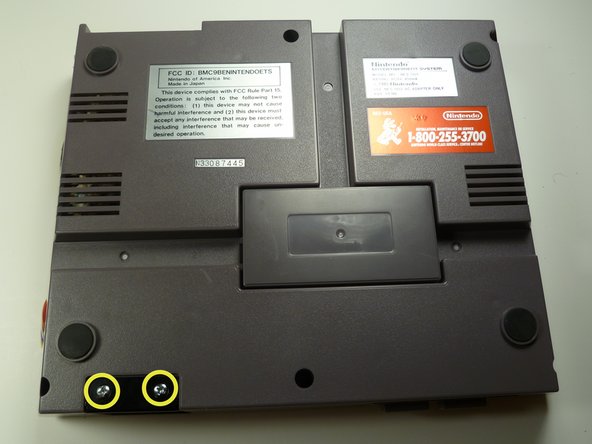
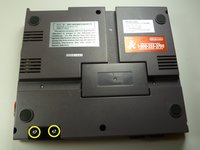
Remove the two 7.6mm Phillips screws that secure the plastic controller outlet cover with a Phillips head #2 screwdriver.
-
Pull the plastic cover off of the plastic NES case with your hands.
-
-
-
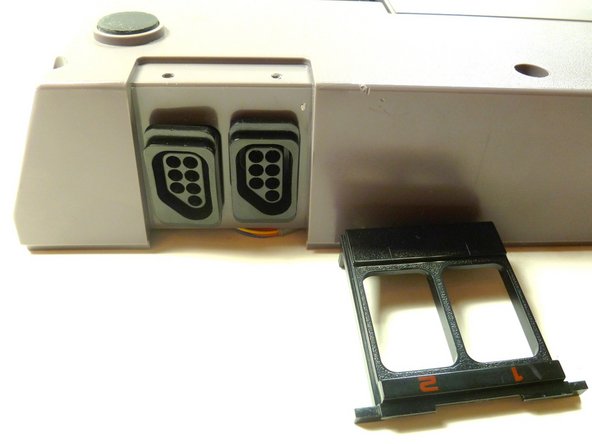
Pull the controller outlet straight out with your hands, leaving an open hole in the plastic NES case.
-


To reassemble your device, follow these instructions in reverse order.
Отменить: Я не выполнил это руководство.
8 человек успешно провели ремонт по этому руководству.
Команда

Cal Poly, Team 14-40, Forte Fall 2010 Участник Cal Poly, Team 14-40, Forte Fall 2010
CPSU-FORTE-F10S14G40
4 членов
Автор 28 руководств