Эта версия возможно содержит некорректные исправления. Переключить на последнюю проверенную версию.
Выберете то, что вам нужно
-
Этот шаг не переведен. Помогите перевести
-
Remove the six 13.25mm Phillips screws on the bottom of the game console with a #2.5 flathead screwdriver.
-
Flip the game console right side up and take off the top by pulling it up and away from the rest of the device with your hands.
-
-
Этот шаг не переведен. Помогите перевести
-
Remove the seven 13.25mm Phillips screws from the metal cover with a Phillips head #2 screwdriver.
-
Remove the metal cover by pulling it up and away from the rest of the console with your hands.
-
-
-
Этот шаг не переведен. Помогите перевести
-
Remove the two silver 17.45mm Phillips screws from the cartridge tray using a Phillips head #2 screwdriver.
-
Remove the two bronze 13.25mm Phillips screws from the cartridge tray using a Phillips head #2 screwdriver.
-
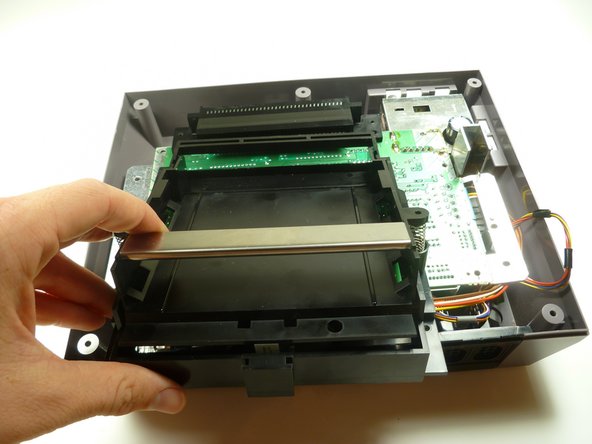
Slide the cartridge tray toward you, away from the 72-PIN connector, and off the motherboard assembly.
-
-
Этот шаг не переведен. Помогите перевести
-
Note: Underneath the cartridge tray is a black trapezoid-shaped tab/lip (see marker). When properly assembled this tab/lip goes below the motherboard and shielding as seen here.
-
-
Этот шаг не переведен. Помогите перевести
-
Use your fingernail to squeeze down on one side of the spring and reposition the spring back on to the plastic nipple attached to the smaller part of the game cartridge frame.
-


Отменить: Я не выполнил это руководство.
4 участников успешно повторили данное руководство.
Команда

Cal Poly, Team 14-40, Forte Fall 2010 Участник Cal Poly, Team 14-40, Forte Fall 2010
CPSU-FORTE-F10S14G40
4 членов
Автор 20 руководств