Перейти к основному содержанию

Nokia 2128i Power Unit Replacement

Выберете то, что вам нужно

  1. Nokia 2128i Power Unit Replacement, Battery: шаг 1, изображение 1 из 3 Nokia 2128i Power Unit Replacement, Battery: шаг 1, изображение 2 из 3 Nokia 2128i Power Unit Replacement, Battery: шаг 1, изображение 3 из 3
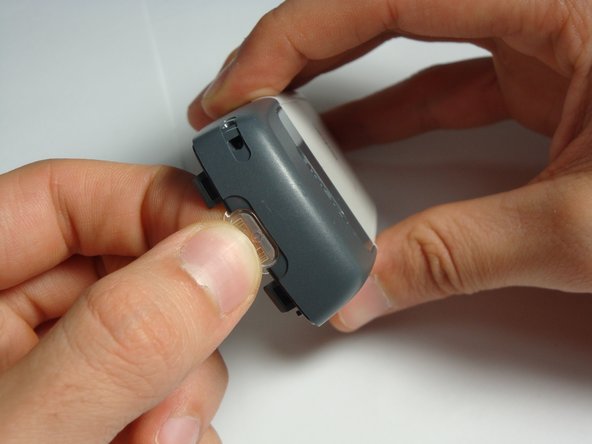
    • Be sure cell phone is off before you begin to disassemble the phone.

    • Press the button on the bottom of the back of the cell phone.

    • Slide rear panel down and remove it.

  2. Nokia 2128i Power Unit Replacement: шаг 2, изображение 1 из 3 Nokia 2128i Power Unit Replacement: шаг 2, изображение 2 из 3 Nokia 2128i Power Unit Replacement: шаг 2, изображение 3 из 3
    • Using your fingernail, pry the back of the battery upwards and pull out.

  3. Nokia 2128i Power Unit Replacement, Faceplate: шаг 3, изображение 1 из 3 Nokia 2128i Power Unit Replacement, Faceplate: шаг 3, изображение 2 из 3 Nokia 2128i Power Unit Replacement, Faceplate: шаг 3, изображение 3 из 3
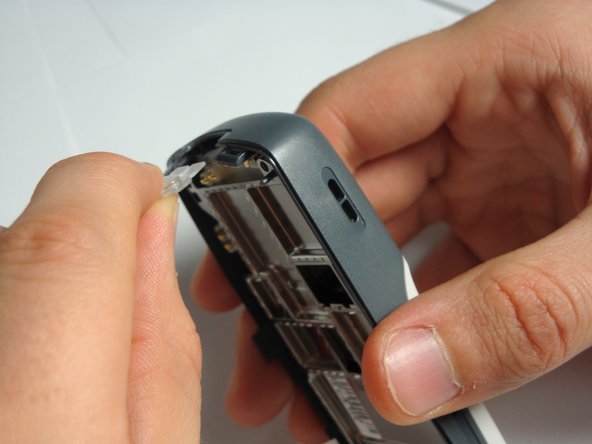
    • Insert the plastic opening tool under the faceplate.

    • Separate the faceplate from main body by twisting the prying tool with some force.

    • The faceplate is held by three plastic fasteners, so pry evenly on both sides of phone.

  4. Nokia 2128i Power Unit Replacement, Keypad: шаг 4, изображение 1 из 3 Nokia 2128i Power Unit Replacement, Keypad: шаг 4, изображение 2 из 3 Nokia 2128i Power Unit Replacement, Keypad: шаг 4, изображение 3 из 3
    • With the faceplate removed, simply peel off rubber key pad and remove.

  5. Nokia 2128i Power Unit Replacement, Motherboard Assembly: шаг 5, изображение 1 из 3 Nokia 2128i Power Unit Replacement, Motherboard Assembly: шаг 5, изображение 2 из 3 Nokia 2128i Power Unit Replacement, Motherboard Assembly: шаг 5, изображение 3 из 3
    • Locate and remove the six screws on the front of the phone using a T6 Torx.

    • All 6 screws are 6.9mm long.

  6. Nokia 2128i Power Unit Replacement: шаг 6, изображение 1 из 3 Nokia 2128i Power Unit Replacement: шаг 6, изображение 2 из 3 Nokia 2128i Power Unit Replacement: шаг 6, изображение 3 из 3
    • After removing screws, lift the motherboard assembly straight off the cell phone body.

  7. Nokia 2128i Power Unit Replacement, Power Button: шаг 7, изображение 1 из 3 Nokia 2128i Power Unit Replacement, Power Button: шаг 7, изображение 2 из 3 Nokia 2128i Power Unit Replacement, Power Button: шаг 7, изображение 3 из 3
    • With the motherboard and LCD unit removed, gently pull the power button out of its housing.

  8. Nokia 2128i Power Unit Replacement, Power Unit: шаг 8, изображение 1 из 3 Nokia 2128i Power Unit Replacement, Power Unit: шаг 8, изображение 2 из 3 Nokia 2128i Power Unit Replacement, Power Unit: шаг 8, изображение 3 из 3
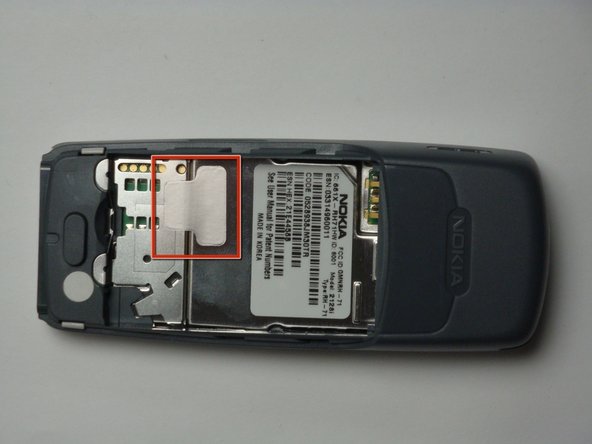
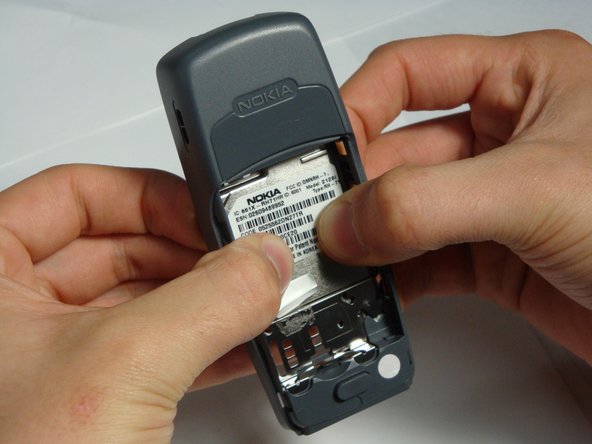
    • Flip phone over and find the sticker that holds the metallic plating together with the phone's case.

    • Pry off the portion of the sticker that is attached to the phone's case. Do not worry about removing the sticker from the metallic plate.

  9. Nokia 2128i Power Unit Replacement: шаг 9, изображение 1 из 3 Nokia 2128i Power Unit Replacement: шаг 9, изображение 2 из 3 Nokia 2128i Power Unit Replacement: шаг 9, изображение 3 из 3
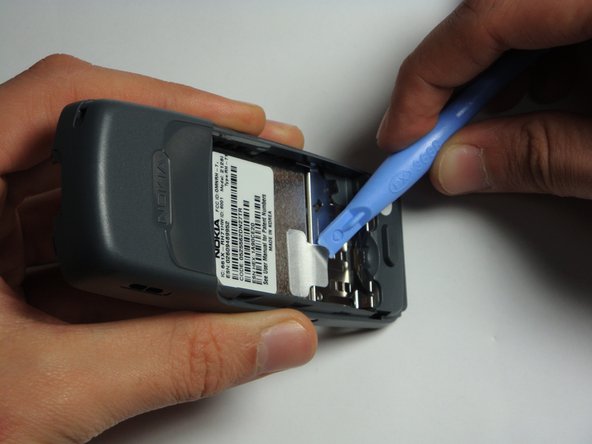
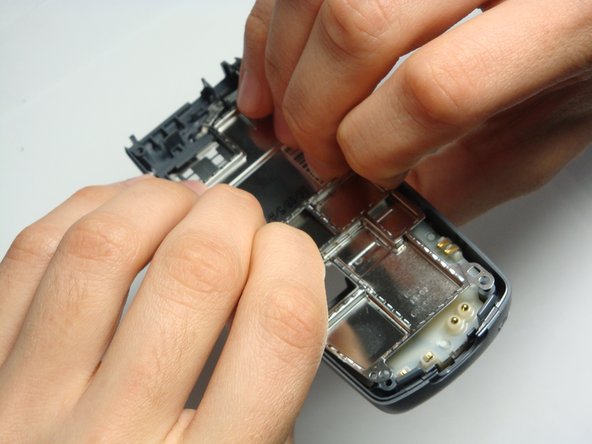
    • Locate the small hook that holds the metallic plate and phone case together on the front side of the phone

    • Place your thumbs on the backside of the metallic plate.

    • Stretch phone casing outward to detach hook from metallic plating. Simultaneously push metallic plate outward to remove.

  10. Nokia 2128i Power Unit Replacement: шаг 10, изображение 1 из 3 Nokia 2128i Power Unit Replacement: шаг 10, изображение 2 из 3 Nokia 2128i Power Unit Replacement: шаг 10, изображение 3 из 3
    • Pry out the power unit once the metallic plate has been removed.

  11. Nokia 2128i Power Unit Replacement: шаг 11, изображение 1 из 1
    • Be sure to place the power unit back into the phone's case with the gold hardware pointing upward.

Заключение

To reassemble your device, follow these instructions in reverse order.

Еще один человек закончил это руководство.

Andres Echeverria

Участник с: 10/29/10

4 Репутация

1 руководство автора

Команда

Cal Poly, Team 20-8, Maness Fall 2010 Участник Cal Poly, Team 20-8, Maness Fall 2010

CPSU-MANESS-F10S20G8

4 членов

Автор 24 руководств

0 Комментариев

Добавить комментарий

Просмотр статистики:

За последние 24часов: 0

За последние 7 дней: 2

За последние 30 дней: 2

За всё время: 630