Перейти к основному содержанию

Nokia Lumia 530 Touch screen, LCD Display Replacement

Выберете то, что вам нужно

Видео обзор

  1. Nokia Lumia 530 Touch screen, LCD Display Replacement, Loudspeaker and Earpiece: шаг 1, изображение 1 из 3 Nokia Lumia 530 Touch screen, LCD Display Replacement, Loudspeaker and Earpiece: шаг 1, изображение 2 из 3 Nokia Lumia 530 Touch screen, LCD Display Replacement, Loudspeaker and Earpiece: шаг 1, изображение 3 из 3
    • Turn off the phone.

    • Remove the battery and any installed SIM and memory cards. There are two tapes screws:

    • 4x Torx T6

    • 5x Torx T5

    • Remove the middle bezel.

    • Earpiece

    • Earpiece Flex Cable

    • Loudspeaker / Ringer

  2. Nokia Lumia 530 Touch screen, LCD Display Replacement, Logic Board: шаг 2, изображение 1 из 3 Nokia Lumia 530 Touch screen, LCD Display Replacement, Logic Board: шаг 2, изображение 2 из 3 Nokia Lumia 530 Touch screen, LCD Display Replacement, Logic Board: шаг 2, изображение 3 из 3
    • Disconnect the touch screen & display flex cable.

    • Remove the main board.

  3. Nokia Lumia 530 Touch screen, LCD Display Replacement, Touch screen or LCD Display Replacement: шаг 3, изображение 1 из 3 Nokia Lumia 530 Touch screen, LCD Display Replacement, Touch screen or LCD Display Replacement: шаг 3, изображение 2 из 3 Nokia Lumia 530 Touch screen, LCD Display Replacement, Touch screen or LCD Display Replacement: шаг 3, изображение 3 из 3
    • If the glass is broken, put some scotch tape to prevent it breake to pieces.

    • Use a hot air to make adhesive tape more soften.

    • For this operation you can use a hairdryer.

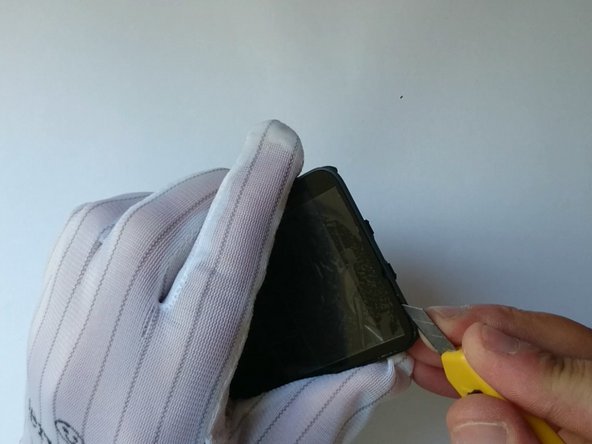
    • Use a cutter and make small room to insert a plastic pick.

  4. Nokia Lumia 530 Touch screen, LCD Display Replacement: шаг 4, изображение 1 из 3 Nokia Lumia 530 Touch screen, LCD Display Replacement: шаг 4, изображение 2 из 3 Nokia Lumia 530 Touch screen, LCD Display Replacement: шаг 4, изображение 3 из 3
    • Continue with the separation by using a plastic tools.

    • If necessary, use the hot air again

  5. Nokia Lumia 530 Touch screen, LCD Display Replacement: шаг 5, изображение 1 из 2 Nokia Lumia 530 Touch screen, LCD Display Replacement: шаг 5, изображение 2 из 2
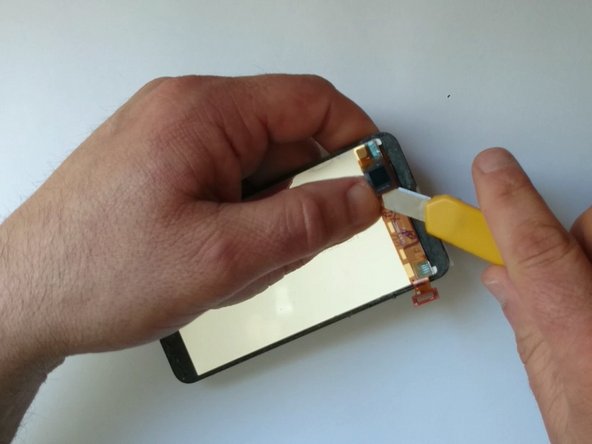
    • Unstuck the Touch screen flex cable from the display.

    • If you have a broken glass, you can cut the touch screen flex cable, otherwise unsolder it careful like in the next step.

  6. Nokia Lumia 530 Touch screen, LCD Display Replacement: шаг 6, изображение 1 из 3 Nokia Lumia 530 Touch screen, LCD Display Replacement: шаг 6, изображение 2 из 3 Nokia Lumia 530 Touch screen, LCD Display Replacement: шаг 6, изображение 3 из 3
    • The display edges are glued to the glass with adhesive tape.

    • Use only thin plastic tools for the separation.

  7. Nokia Lumia 530 Touch screen, LCD Display Replacement: шаг 7, изображение 1 из 3 Nokia Lumia 530 Touch screen, LCD Display Replacement: шаг 7, изображение 2 из 3 Nokia Lumia 530 Touch screen, LCD Display Replacement: шаг 7, изображение 3 из 3
    • Remove the blue sticker.

    • With a soldering iron, remove the touch screen flex cable and install the new one.

    • Put back the blue sticker.

  8. Nokia Lumia 530 Touch screen, LCD Display Replacement: шаг 8, изображение 1 из 3 Nokia Lumia 530 Touch screen, LCD Display Replacement: шаг 8, изображение 2 из 3 Nokia Lumia 530 Touch screen, LCD Display Replacement: шаг 8, изображение 3 из 3
    • If the spare part is without tape, install a new one.

    • Carefully put the display in place, then install the glass.

    • Start with reassembling.

  9. Nokia Lumia 530 Touch screen, LCD Display Replacement: шаг 9, изображение 1 из 1
    • That's all.

    • .

    • .

    • .

    • .

    • .

    • Did you do it successfully?

Заключение

To reassemble your device, follow these instructions in reverse order.

15 участников успешно повторили данное руководство.

ZFix

Участник с: 12/09/13

191 182 Репутация

Автор 330 руководств

Команда

Master Techs Участник Master Techs

Community

322 членов

Автор 2 521 руководств

10 Комментариев

What did you apply in the first frame of step 7? 4:15 in the video.

Paul Reich - Ответить

soldering flux

ZFix -

Thanks for confirming

Paul Reich -

I didn't end up doing it correctly - it didn't work.

I think the mistake I made was not heating the old flex cable off the connector. I didn't follow instructions correctly and I pulled it off. I was able to heat the leftover connectors off but after soldering the new flex onto the board and sealing up it didnt work - screen still unresponsive :-(

It was my first attempt at replacing a screen (and I don't have any experience) so I'm not too bummed.

I just ordered a complete LCD and digitizer instead :-)

Paul Reich - Ответить

Failed miserably... Soldering iron not adapted. Might want to emphasise that is critical. At least I tried...

ricochapuis - Ответить

Добавить комментарий

Просмотр статистики:

За последние 24часов: 0

За последние 7 дней: 6

За последние 30 дней: 12

За всё время: 37,156