Перейти к основному содержанию

Nokia Lumia 610 Touchscreen Glass / Digitizer Assembly Replacement

Выберете то, что вам нужно

  1. Nokia Lumia 610 Touchscreen Glass / Digitizer Assembly Replacement, Touchscreen Glass / Digitizer Assembly: шаг 1, изображение 1 из 1
    • The first thing you'll need is a Nokia Lumia 610 with a broken front glass

  2. Nokia Lumia 610 Touchscreen Glass / Digitizer Assembly Replacement: шаг 2, изображение 1 из 2 Nokia Lumia 610 Touchscreen Glass / Digitizer Assembly Replacement: шаг 2, изображение 2 из 2
    • Slide the back cover off, and remove the battery

  3. Nokia Lumia 610 Touchscreen Glass / Digitizer Assembly Replacement: шаг 3, изображение 1 из 2 Nokia Lumia 610 Touchscreen Glass / Digitizer Assembly Replacement: шаг 3, изображение 2 из 2
    • There are 8 Torx 5 screws you have to remove, 4 on each side

  4. Nokia Lumia 610 Touchscreen Glass / Digitizer Assembly Replacement: шаг 4, изображение 1 из 3 Nokia Lumia 610 Touchscreen Glass / Digitizer Assembly Replacement: шаг 4, изображение 2 из 3 Nokia Lumia 610 Touchscreen Glass / Digitizer Assembly Replacement: шаг 4, изображение 3 из 3
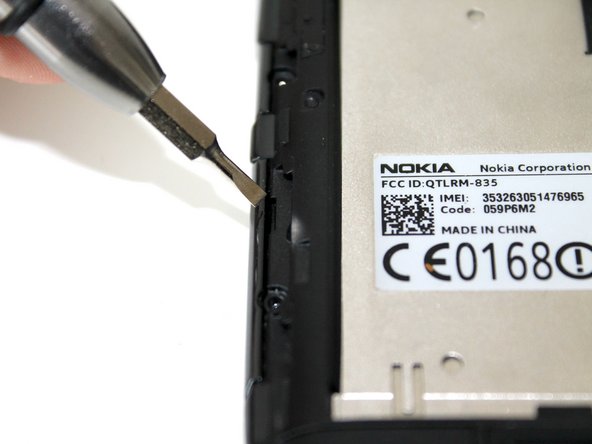
    • After removing all 8 screws, proceed to prying off the back cover

    • This is done very easily, by prying it from the 3 grooves depicted

    • This step might also be done using your nails, as the clips are not strong at all

  5. Nokia Lumia 610 Touchscreen Glass / Digitizer Assembly Replacement: шаг 5, изображение 1 из 1
    • Watch out - the buttons easily fall out; just make sure you don't loose any, a'aight ?!

  6. Nokia Lumia 610 Touchscreen Glass / Digitizer Assembly Replacement: шаг 6, изображение 1 из 2 Nokia Lumia 610 Touchscreen Glass / Digitizer Assembly Replacement: шаг 6, изображение 2 из 2
    • Lift the back cover up, and pull it back - most likely, the 2 sided tape sealing the camera module will be the last thing to break loose

    • Make sure you stick it back to the rear case assembly after this step

  7. Nokia Lumia 610 Touchscreen Glass / Digitizer Assembly Replacement: шаг 7, изображение 1 из 3 Nokia Lumia 610 Touchscreen Glass / Digitizer Assembly Replacement: шаг 7, изображение 2 из 3 Nokia Lumia 610 Touchscreen Glass / Digitizer Assembly Replacement: шаг 7, изображение 3 из 3
    • Disconnect the 2 ribbon cables connecting the LCD & Digitizer to the motherboard

  8. Nokia Lumia 610 Touchscreen Glass / Digitizer Assembly Replacement: шаг 8, изображение 1 из 1
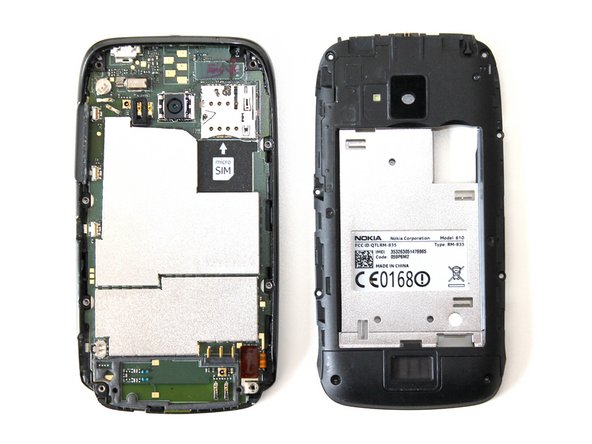
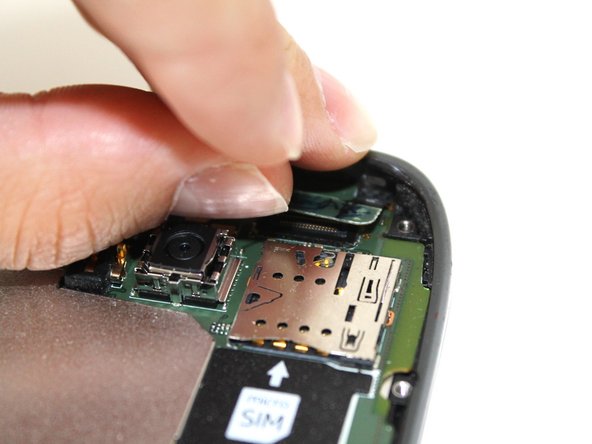
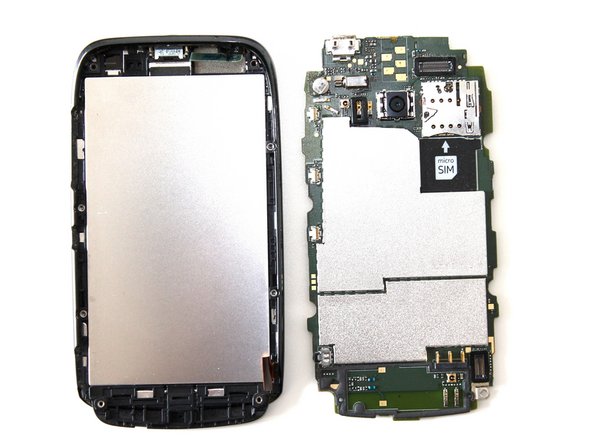
    • Now to separate the Motherboard from the front assembly !

    • Gently pry on the 2 hooks depicted in the picture to release the motherboard

    • Again - using your nails should be just fine !

  9. Nokia Lumia 610 Touchscreen Glass / Digitizer Assembly Replacement: шаг 9, изображение 1 из 2 Nokia Lumia 610 Touchscreen Glass / Digitizer Assembly Replacement: шаг 9, изображение 2 из 2
    • Lift the motherboard up from the back, and pull it backwards

    • Apply the same motion as with the back casing

    • You should now have separated the motherboard from the LCD/Digitizer Assembly

  10. Nokia Lumia 610 Touchscreen Glass / Digitizer Assembly Replacement: шаг 10, изображение 1 из 2 Nokia Lumia 610 Touchscreen Glass / Digitizer Assembly Replacement: шаг 10, изображение 2 из 2
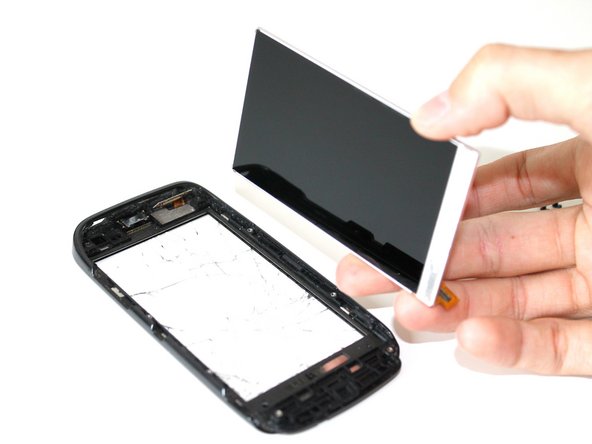
    • To detach the LCD, gently lift it from the sides - be careful, and don't pull too hard on the ribbon cable !

    • It's secured in with pretty weak double-sided tape, so this step shouldn't be a problem

  11. Nokia Lumia 610 Touchscreen Glass / Digitizer Assembly Replacement: шаг 11, изображение 1 из 2 Nokia Lumia 610 Touchscreen Glass / Digitizer Assembly Replacement: шаг 11, изображение 2 из 2
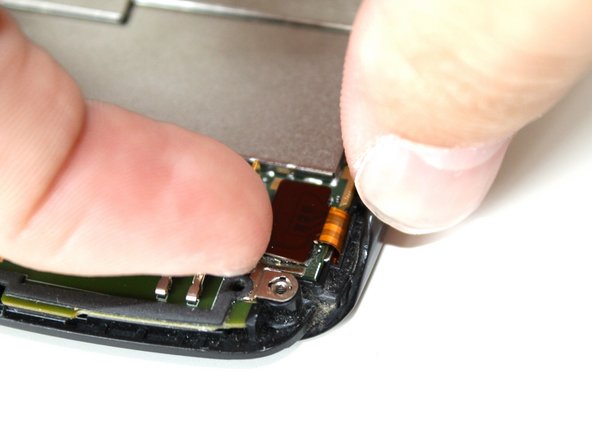
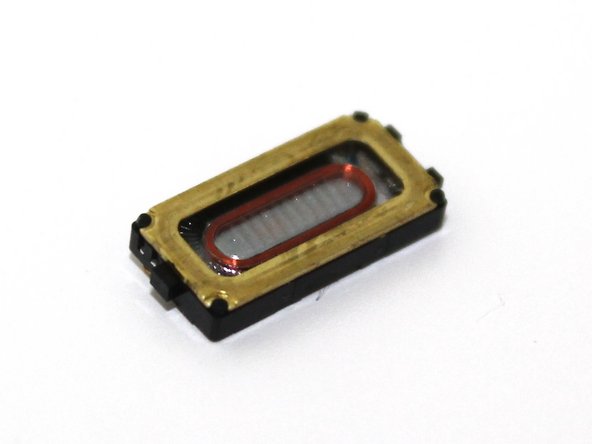
    • Remove the ear-piece speaker from the Digitizer Assembly

    • It's held in by - again - pretty weak double-sided tape

    • 2nd picture gives you a look of the front of the speaker unit - it's pretty hard to damage the membrane - though, you can never be too careful !

  12. Nokia Lumia 610 Touchscreen Glass / Digitizer Assembly Replacement: шаг 12, изображение 1 из 2 Nokia Lumia 610 Touchscreen Glass / Digitizer Assembly Replacement: шаг 12, изображение 2 из 2
    • Something very easy to forget - remove the tiny rubber gasket for the microphone, and place it in the new front panel

  13. Nokia Lumia 610 Touchscreen Glass / Digitizer Assembly Replacement: шаг 13, изображение 1 из 1
    • To put everything back together, just follow the same steps backward, and you should have yourself a good-as-new Nokia Lumia 610

    • The last step in this guide - is trying not to break it again :)

Заключение

To reassemble your device, follow these instructions in reverse order.

6 участников успешно повторили данное руководство.

Darie H

Участник с: 11/20/12

4 550 Репутация

Автор 5 руководств

0 Комментариев

Добавить комментарий

Просмотр статистики:

За последние 24часов: 0

За последние 7 дней: 3

За последние 30 дней: 3

За всё время: 5,708