Перейти к основному содержанию

NuVision 10.1 Atom Camera Replacement

Выберете то, что вам нужно

  1. NuVision 10.1 Atom Camera  Replacement, Camera: шаг 1, изображение 1 из 3 NuVision 10.1 Atom Camera  Replacement, Camera: шаг 1, изображение 2 из 3 NuVision 10.1 Atom Camera  Replacement, Camera: шаг 1, изображение 3 из 3
    • Turn the device screen side down.

    • Carefully remove the back piece with the iFixit opening tool.

  2. NuVision 10.1 Atom Camera  Replacement: шаг 2, изображение 1 из 1
    • Remove the yellow tape covering the motherboard gently with your fingers.

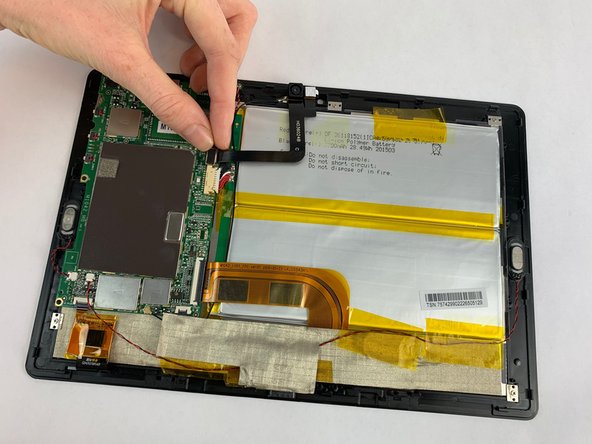
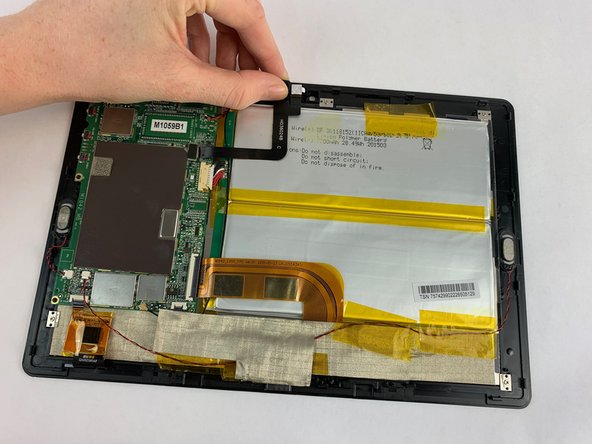
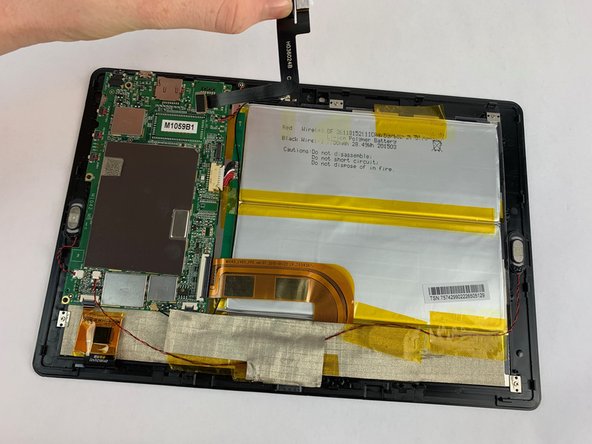
  3. NuVision 10.1 Atom Camera  Replacement: шаг 3, изображение 1 из 3 NuVision 10.1 Atom Camera  Replacement: шаг 3, изображение 2 из 3 NuVision 10.1 Atom Camera  Replacement: шаг 3, изображение 3 из 3
    • Pull the camera plug upward and away from the motherboard with your fingers.

    • Gently pull the camera from the device. The camera is held by tension.

Заключение

To reassemble your device, follow these instructions in reverse order.

Carly Daniele

Участник с: 02/14/19

567 Репутация

Автор 5 руководств

Команда

USF Tampa, Team S1-G5, Leahy Spring 2019 Участник USF Tampa, Team S1-G5, Leahy Spring 2019

USFT-LEAHY-S19S1G5

5 членов

Автор 6 руководств

0 Комментариев

Добавить комментарий

Просмотр статистики:

За последние 24часов: 0

За последние 7 дней: 1

За последние 30 дней: 2

За всё время: 164