Введение
This guide will show how to replace the LCD display screen on the back panel.
Выберете то, что вам нужно
-
-
Push the gray tab down, using a spudger if necessary, and the battery will come out.
-
-
-
There are a total of six screws that must be removed using the the #000 Philips screwdriver.
-
As per picture one: there is one 4.9 mm Philips head screw on the left side of the camera.
-
As per picture two: on the bottom of the camera, there are three 3.4 mm Philips head screws; these are located on the darker area of the case.
-
As per picture three: there are two 5.3 mm Philips head screws on the right side, one is beneath the USB cover.
-
-
-
-
As per picture one: peel back the black strip.
-
As per picture two: peel back the Copper strip.
-
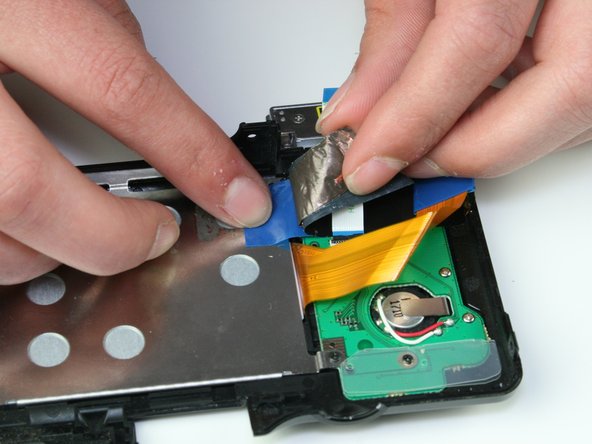
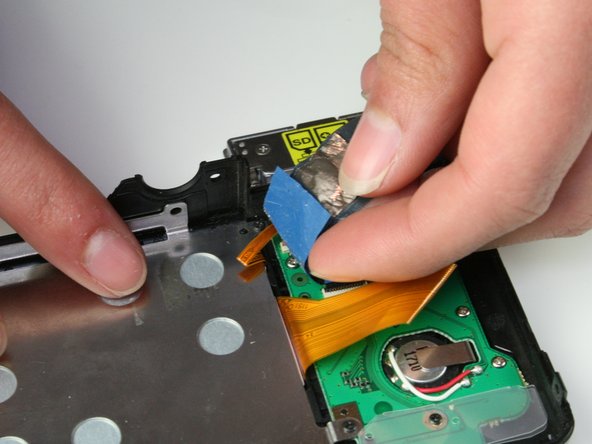
As per picture three: peel back the blue tape.
-
-
-
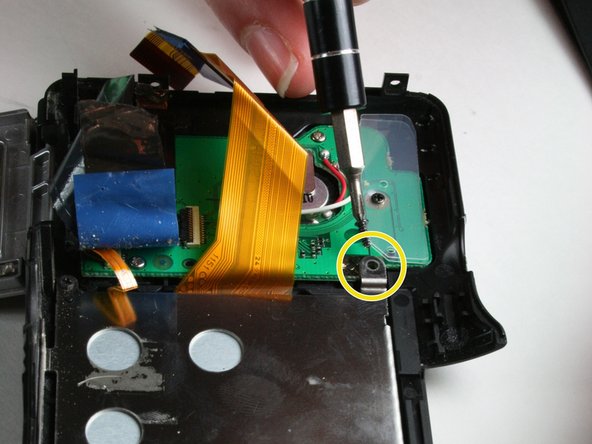
There are four screws that need to be removed using the #000 Philips screwdriver.
-
Remove the three 3.4 mm screws on the silver panel.
-
Now remove the 4.3 mm screw located on the green board.
-
-
-
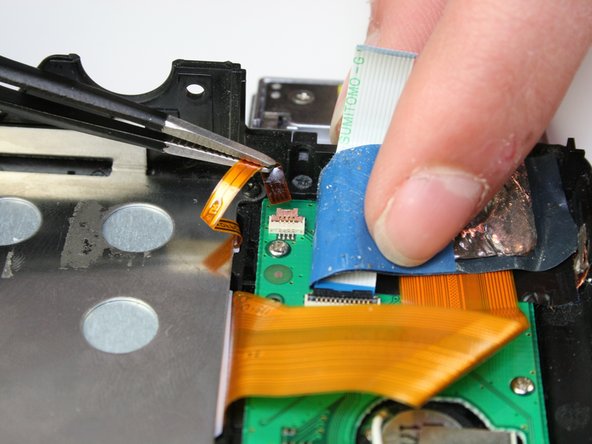
Use a spudger to lift the brown lock tab.
-
Using tweezers, lift the ribbon cable from the brown lock tab.
-


To reassemble your device, follow these instructions in reverse order.
To reassemble your device, follow these instructions in reverse order.
Отменить: Я не выполнил это руководство.
4 участников успешно повторили данное руководство.

Команда

Colorado Springs, Team 9-1, Panko Spring 2015 Участник Colorado Springs, Team 9-1, Panko Spring 2015
UCCS-PANKO-S15S9G1
3 членов
Автор 12 руководств
5 Комментариев
Same thing happened to me. Avoid purchasing DHcamera replacements, either the small ribbon is missing or the large ribbon is too short. In addition, the model missing the small ribbon is the glass only, and does not have the metal housing.
BTW, your instructs are perfect!!! Good work. Now, if I only knew where to find the right part.
I have the same problem. Bought a LCD screen in Ebay and sent from China. The backlight is missing.
It seems like complete assembly screen is very hard to find. Searched in Google but nothing. The problem with my camera's screen is that borders and corners had been becoming dark progressively, perhaps to backlight problem.
Perfect instructions/guide! Only bit that may be missing is highlighted by the questions above - most replacement screens that you can buy online come without the silver metal casing and backlight.
The additional step therefore is to gently pull the top of the silver frame apart - perhaps a thin chisel screwdriver or blade will help ease it out. Then gently prise the old LCD screen from the white coloured backlight. I used a blade to start the seperation. Then I just laid the new screen on and pushed the silver flame back together