Введение
Have you tried all the other manuals and still can't figure out what is wrong with your camera? Try replacing the motherboard by following these steps.
Выберете то, что вам нужно
-
-
Locate the two latches on the battery compartment.
-
First, move the "lock" switch left to reveal red indicator.
-
Next, move the "cover latch" switch downward to reveal red indicator.
-
-
-
Allow the battery compartment latch to completely open.
-
Insert battery with the writing face up.
-
-
-
Orient the camera so you are looking at the bottom.
-
Remove the three 3.85mm Phillips #00 screws from the bottom of the camera.
-
-
-
-
Orient the camera so you are looking at the side plate.
-
Remove the two 3.15mm Phillips #00 screws from the side plate of the camera.
-
-
-
Orient the camera so you are looking at the front plate.
-
Remove the two 3.8mm with the Phillips H1.5 from the front plate.
-
Remove the "Olympus" plate.
-
-
-
Locate three small black screws inside of the battery compartment.
-
Remove the 3.85mm Phillips #00 screw on the far left side.
-
Remove the two 5mm Phillips #00 screws on the right side
-
-
-
Orient the camera to be look at the top.
-
Remove the 5.4mm Phillips #00 screw on the top left side.
-
Remove the 7.4mm Phillips #00 screw next to the "ON/OFF" label.
-
Pry off top button plate with black nylon spudger.
-
-
-
Rotate to bottom of camera and locate bottom latch.
-
Wedge black nylon spudger in between bottom latch and camera base to release LCD Screen from camera.
-
Push firmly apart.
-
-
-
Orient the camera to the LCD screen side that is now wedged open.
-
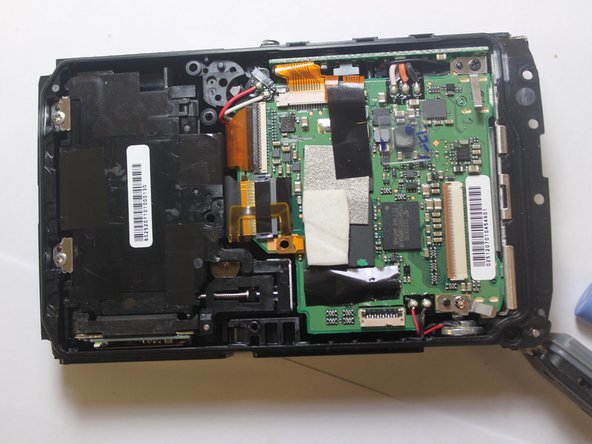
Locate the white ribbon cable and pull out from motherboard.
-
Locate the brown ribbon cable and pull out from motherboard.
-
-
-
Remove the four 3mm Phillips #000 screws.
-
Use tweezers to remove metal plate
-
There is now full access to the motherboard which you can replace components on by soldering.
-


To reassemble your device, follow these instructions in reverse order.
To reassemble your device, follow these instructions in reverse order.
Команда

Clemson, Team 7-2, Benson Spring 2016 Участник Clemson, Team 7-2, Benson Spring 2016
CLEM-BENSON-S16S7G2
4 членов
Автор 16 руководств