Введение
The front case of the Omaker M4 provides a protective layer for the speaker cone. Once the front case is removed, the speaker can be accessed.
Выберете то, что вам нужно
-
-
Flip the device over so the front of the device is facing upwards. Make sure to place the speaker on a flat surface
-
-
-
Use a T6 Torx Screwdriver to remove the four screws from the front of the device.
-
-
-
-
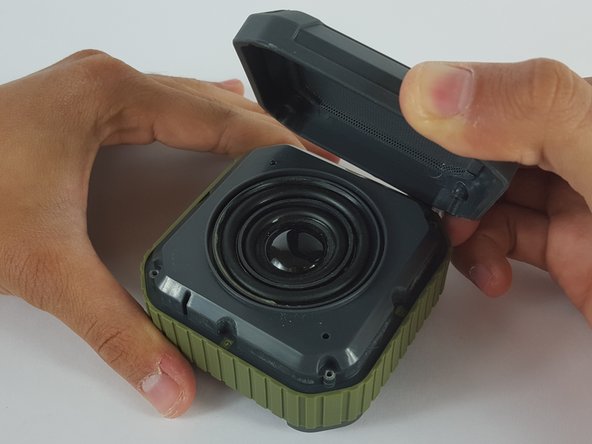
Carefully remove the front case by gently pulling it from the body of the device.
-


To reassemble your device, follow these instructions in reverse order.
To reassemble your device, follow these instructions in reverse order.
Отменить: Я не выполнил это руководство.
3 участников успешно повторили данное руководство.