Выберете то, что вам нужно
-
-
Remove the SIM tray.
-
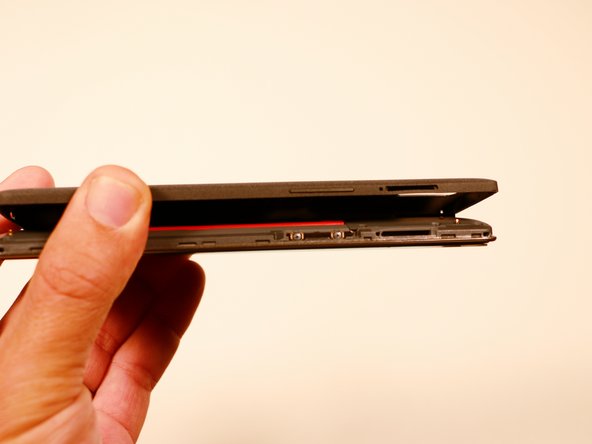
Using a plastic opening tool, carefully separate the back panel from the main body assembly of the phone. Be extra careful around the SIM slot or other weak areas.
-
You may encounter some resistance due to hidden locking clips around the inside edge of the phone. Not to worry; just move in one consistent direction around the phone as opposed to jumping from spot to spot!
-
Top to bottom, left to right, clockwise or counter clockwise, once we make it about half way around the device, the panel is easily removable by hand.
 Спросите у FixBot
-
-
Инструмент, используемый на этом этапе:Tweezers$4.99
-
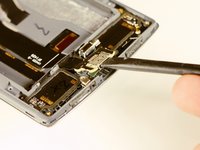
Using a pair of tweezers, remove the plastic plugs.
-
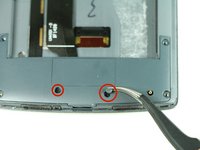
Once the hidden screws are revealed, use a PH #00 screwdriver to remove the three 3.175mm screws.
-
Use the PH #00 screwdriver to remove the remaining six 3.175 screws.
-
-
-
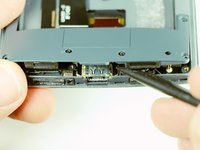
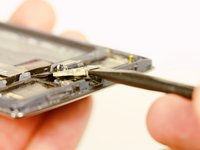
Using a plastic opening tool, gently pry up the black plastic cover and remove it from the device.
-
-
-
-
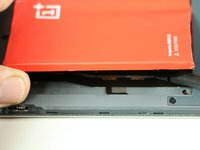
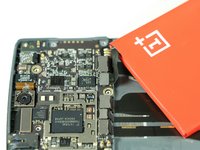
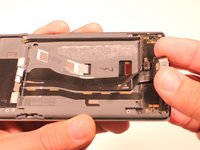
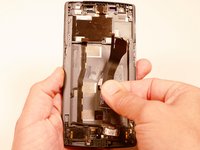
After we have removed the motherboard cover, we notice that the battery is intact and has a black ribbon attached to it, which is mounted on the logic board.
-
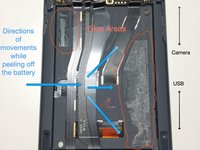
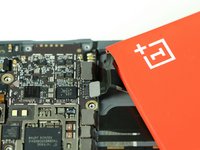
Using the spudger, carefully begin to lift the the battery up from the side opposite the ribbon. Be aware that there is high-grade adhesive holding the battery in its bay, so proceed with caution.
-
-
-
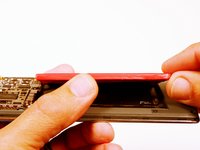
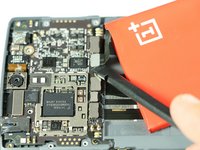
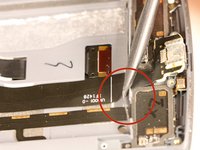
Once the battery has been freed, we use the ever handy black spudger to pry up and free the battery ribbon from its dock.
-
-
Инструмент, используемый на этом этапе:Tweezers$4.99
-
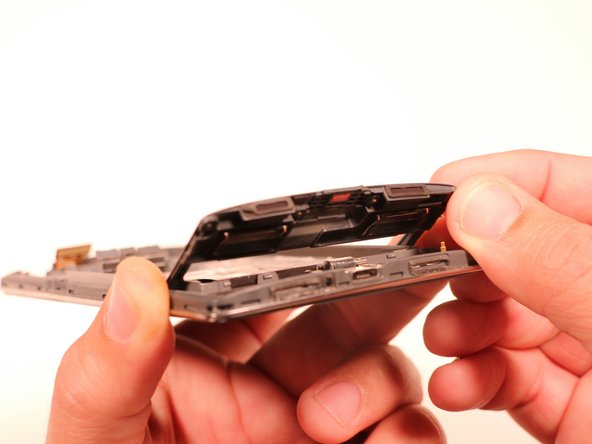
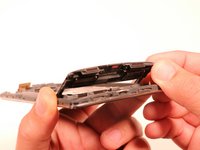
Once the battery has been removed, we shift our attention to the back panel assembly. This piece is held together by six screws. See info note below.
-
Luckily, the OnePlus One was assembled with all of the same size screws save for the one holding down the motherboard. All of these screws are philips 00 and 3.175 mm. in lenght.
-
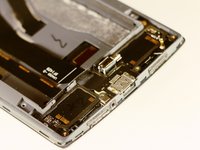
Using the spudger we pry open the panel assembly and, behold, we have access to the micro usb port. You can also use a blue opening tool if you prefer.
-
-
-
Now that we have access to the usb port, we use the flat end of or spudger and lift it off of its connector and free it from the daughterboard.
-
-
-
Now it is time to remove the ribbon. You will notice that there is a small strip of black tape keeping us from from completely freeing it. Not to worry. Simply use the spudger to maneuver the tape out of the way.
-
Your micro USB and attached ribbon are now free to be removed.
-


To reassemble your device, follow these instructions in reverse order.
Отменить: Я не выполнил это руководство.
33 человек успешно провели ремонт по этому руководству.
Команда

USF Tampa, Team 3-3, Brown Fall 2014 Участник USF Tampa, Team 3-3, Brown Fall 2014
USFT-BROWN-F14S3G3
3 членов
Автор 24 руководств
4 Комментарии к руководству
Thanks back up and working should get a few more years out of it
cheers
Pretty easy, just be really careful when removing battery from glue ;)
Thanks a lot for this guide which is really complete !
I was able to successfully follow these instructions. Pretty sure I damaged the battery during removal though. I intended to replace the battery anyways, so I’m not too worried about it, but it would be nice to to have some technique listed for removing it less destructively.
For me USB was not charging because it seems that one of the 2 USB plugs above the battery were loose. I did replace the battery already sometime far in the past so this might have been the cause. If you just want to re-plug on the upper side and lift the port on the lower side, you don't even need to remove the battery. Just make sure that all plugs, not just USB, are tight before screwing everything back together.
Thanks a lot for this guide!