Введение
Sony’s PSP 300x is well-equipped with powerful built-in speakers. But, these speakers do wear out overtime due to over usage or sometimes, from anger in slamming the device on your desk after getting shot in Grand Theft Auto! You may have slammed it so hard that the tragic result is your speakers needing to be replaced. While this is only one instance resulting in broken speakers, other signs of bad or broken speakers are buzzing, crackling, distorted sounds, or no sound at all from your PSP 300x.
If any of this has happened, this guide will surely aide in teaching you how to easily remove the damaged speakers so that you are able to replace them with new or working speakers.
Выберете то, что вам нужно
-
-
Place the PSP face down and locate the battery cover on the left side of the device.
-
Lift and remove the battery cover to reveal the battery.
-
Remove the battery.
-
-
-
Peel back the warranty sticker that is behind the battery with a spudger or your fingernail.
-
-
-
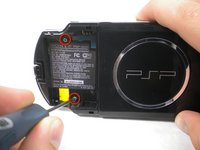
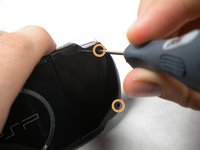
Unscrew all four screws from the back of the PSP with the Phillips #00 Screwdriver.
-
Two are located behind the battery's warranty sticker.
-
Two are located on the right side of the PSP.
-
-
-
-
Then, remove the single screw from the bottom edge of the PSP (which is positioned next to the barcode).
-
-
-
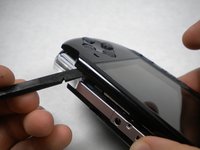
Slide the spudger in between the outer casing of the PSP, beginning at the "R" shoulder button, and gently pry off the casing.
-
Remove the front casing completely.
-
-
-
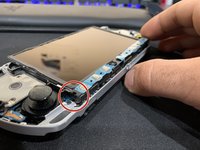
Push the homebar to the right to release the tab located on the right side of the LCD screen.
-
-
-
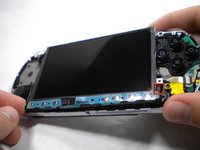
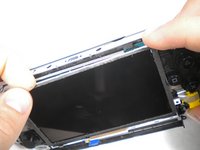
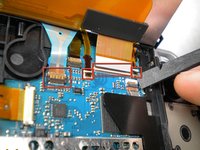
Flip the small brown locks on the four ribbon cable connectors up using a spudger or fingernail.
-
Pull all four ribbon cables out.
-
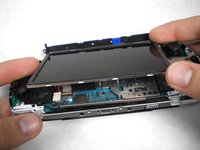
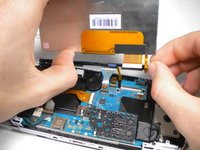
Now remove the LCD screen and homebar from the PSP.
-
-
-
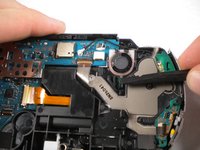
After removing the LCD Screen, the Button Pad should be easy to remove.
-
-
-
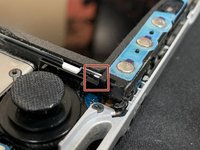
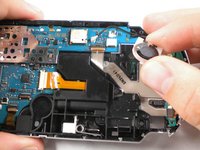
The speaker is spring loaded, so be sure to keep an eye on it in case it starts doing flips into the air when you push the tab. Be careful not to lose or damage it!
-


To reassemble your device, follow these instructions in reverse order.
To reassemble your device, follow these instructions in reverse order.
Отменить: Я не выполнил это руководство.
2 человек успешно провели ремонт по этому руководству.
1Комментарий к руководству
Really Helpful, but you could show how to change the left speaker