Перейти к основному содержанию

Packard Bell ms-Hera c Disassembly

Выберете то, что вам нужно

  1. Packard Bell ms-Hera c Disassembly, Unscrew the lid: шаг 1, изображение 1 из 3 Packard Bell ms-Hera c Disassembly, Unscrew the lid: шаг 1, изображение 2 из 3 Packard Bell ms-Hera c Disassembly, Unscrew the lid: шаг 1, изображение 3 из 3
    • Remove the battery.

    • Unscrew the red marked screws with a Phillips screwdriver.

    • Remove the DVD reader.

  2. Packard Bell ms-Hera c Disassembly, Disconnect the keyboard: шаг 2, изображение 1 из 3 Packard Bell ms-Hera c Disassembly, Disconnect the keyboard: шаг 2, изображение 2 из 3 Packard Bell ms-Hera c Disassembly, Disconnect the keyboard: шаг 2, изображение 3 из 3
    • Pry in the red marked spots to release the keyboard

    • Unplug the keyboard connector.

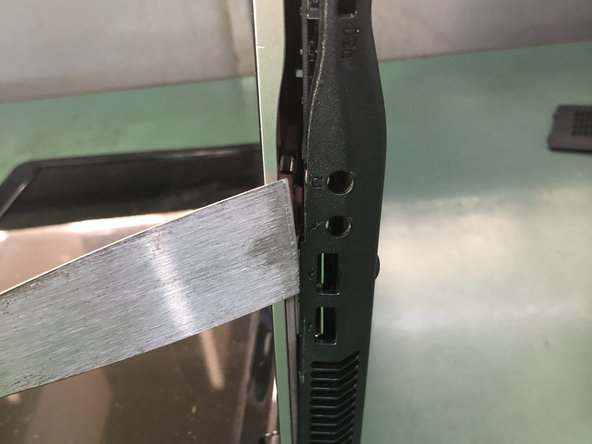
  3. Packard Bell ms-Hera c Disassembly, Unplug the cables: шаг 3, изображение 1 из 3 Packard Bell ms-Hera c Disassembly, Unplug the cables: шаг 3, изображение 2 из 3 Packard Bell ms-Hera c Disassembly, Unplug the cables: шаг 3, изображение 3 из 3
    • Unplug the 3 connectors on the motherboard

    • Remove the 2 screws holding the display in place

    • Use a thin tool to pry up the back cover of the laptop on the side

  4. Packard Bell ms-Hera c Disassembly, Unscrew the motherboard: шаг 4, изображение 1 из 3 Packard Bell ms-Hera c Disassembly, Unscrew the motherboard: шаг 4, изображение 2 из 3 Packard Bell ms-Hera c Disassembly, Unscrew the motherboard: шаг 4, изображение 3 из 3
    • Remove the back cover.

    • Remove the HDD.

    • Remove the screws that hold the motherboard.

  5. Packard Bell ms-Hera c Disassembly, Remove the display: шаг 5, изображение 1 из 3 Packard Bell ms-Hera c Disassembly, Remove the display: шаг 5, изображение 2 из 3 Packard Bell ms-Hera c Disassembly, Remove the display: шаг 5, изображение 3 из 3
    • Remove the marked screws and connectors.

    • Disconnect the display connector.

    • Remove the display.

  6. Packard Bell ms-Hera c Disassembly, Remove the heatsink: шаг 6, изображение 1 из 3 Packard Bell ms-Hera c Disassembly, Remove the heatsink: шаг 6, изображение 2 из 3 Packard Bell ms-Hera c Disassembly, Remove the heatsink: шаг 6, изображение 3 из 3
    • Remove the cooling fan.

    • Remove the heatsink.

    • Remove the screws on the connector.

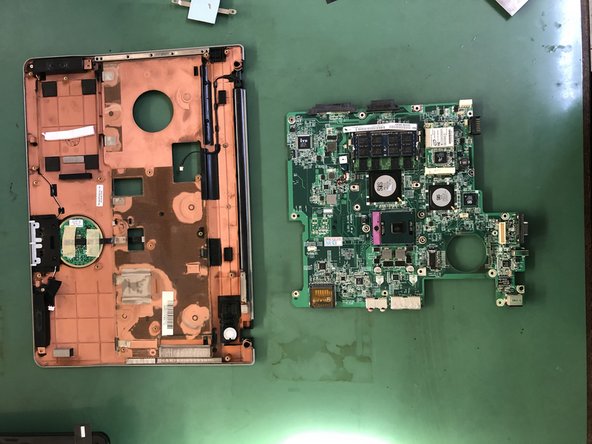
  7. Packard Bell ms-Hera c Disassembly, Remove the motherboard: шаг 7, изображение 1 из 2 Packard Bell ms-Hera c Disassembly, Remove the motherboard: шаг 7, изображение 2 из 2
    • Remove the screws to remove the motherboard.

Заключение

To reassemble your device, follow these instructions in reverse order.

Еще один человек закончил это руководство.

Особая благодарность этим переводчикам:

it en

100%

Эти переводчики помогают нам починить мир! Хотите внести свой вклад?
Начните переводить ›

Smilzo

Участник с: 11/09/13

11 276 Репутация

Автор 39 руководств

0 Комментариев

Добавить комментарий

Просмотр статистики:

За последние 24часов: 2

За последние 7 дней: 7

За последние 30 дней: 37

За всё время: 1,087