Эта версия возможно содержит некорректные исправления. Переключить на последнюю проверенную версию.
Выберете то, что вам нужно
-
Этот шаг не переведен. Помогите перевести
-
Press down on the back of the case and slide forward to remove it.
-
-
Этот шаг не переведен. Помогите перевести
-
Remove the battery by pulling up on the tab near the camera lens.
-
-
Этот шаг не переведен. Помогите перевести
-
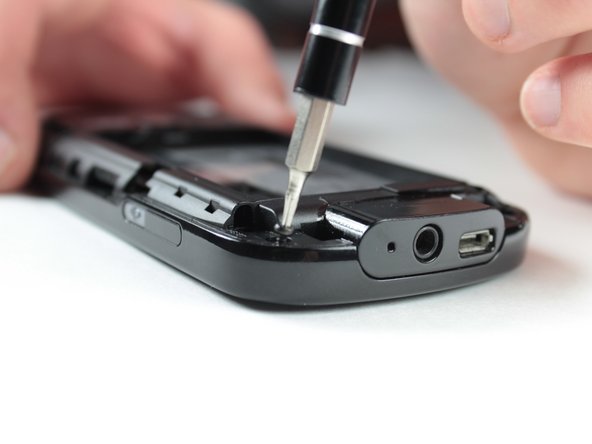
Use the Torx T5 screwdriver to remove the 5 visible 6mm screws on the back of the phone.
-
-
-
Этот шаг не переведен. Помогите перевести
-
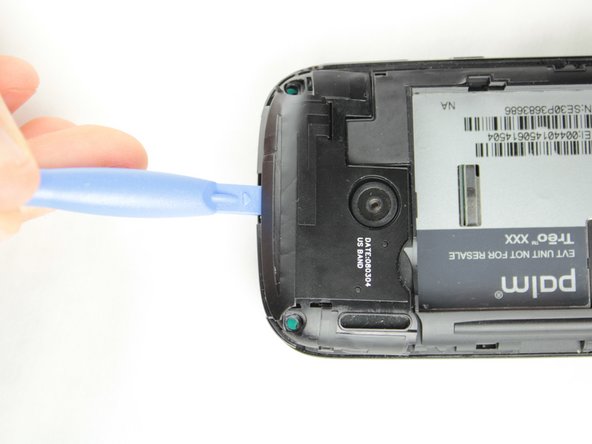
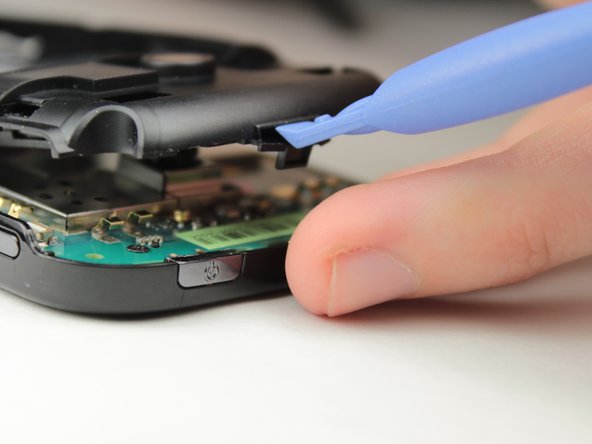
Use a plastic opening tool to remove the small panel on the top of the phone by prying underneath the black plastic around the camera.
-
-
Этот шаг не переведен. Помогите перевести
-
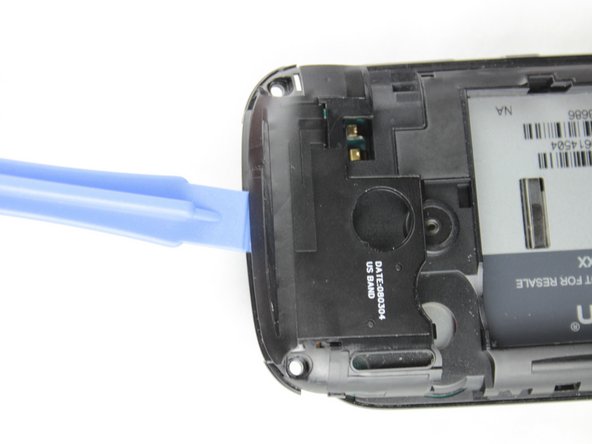
Remove the main plastic body
-
Insert the plastic opening tool into the slot on the top (indicated by the spudger) and pry the black part off phone.
-
-
Этот шаг не переведен. Помогите перевести
-
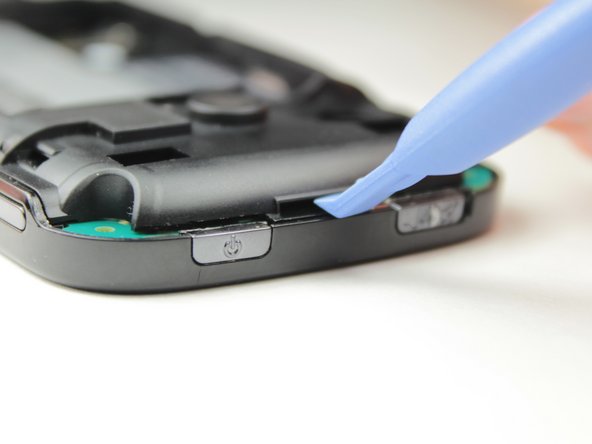
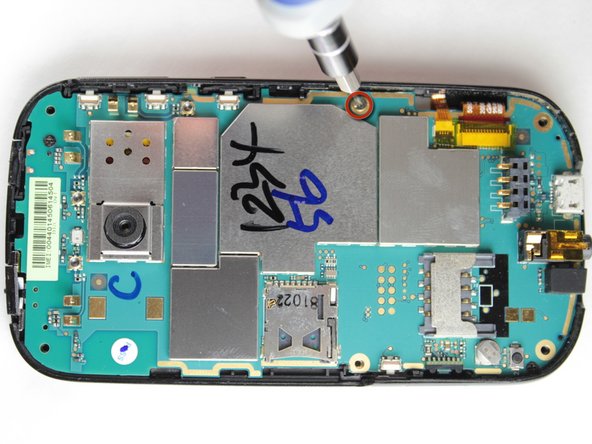
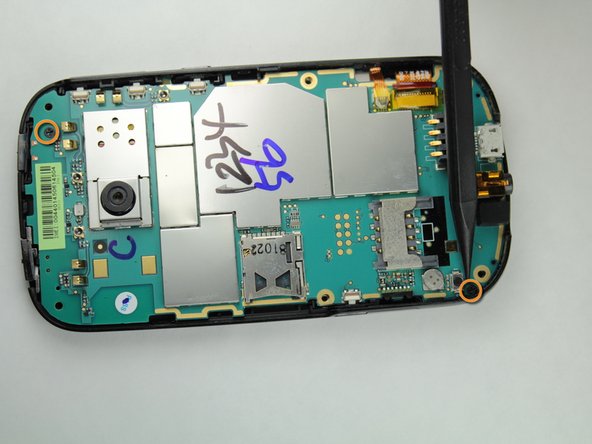
Use the Philips Head 00 screwdriver to unscrew the 3.5mm silver screw on the right hand side of the phone.
-
Use the Philips Head 00 screwdriver to unscrew the two 3mm black screws in the upper right and lower left corners of the motherboard.
-
-
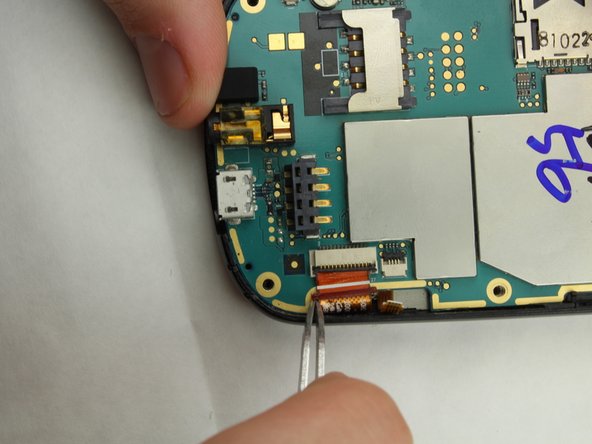
Этот шаг не переведен. Помогите перевести
-
Use tweezers to carefully remove the yellow piece of tape covering the two ribbon cables.
-
-
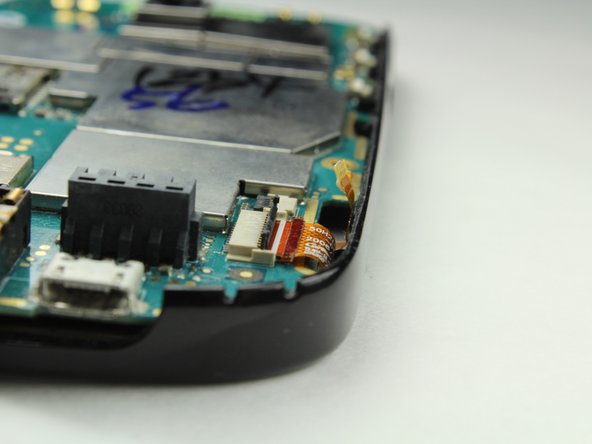
Этот шаг не переведен. Помогите перевести
-
There are two ribbon cables under the yellow tape.
-
Use tweezers to safely unplug the small ribbon cable first and then the large ribbon cable.
-
-
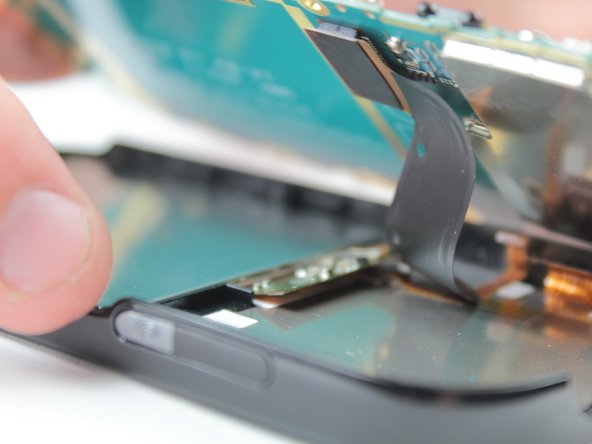
Этот шаг не переведен. Помогите перевести
-
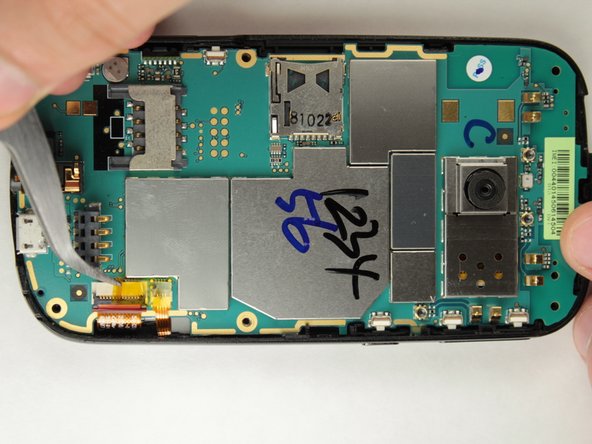
Use a plastic opening tool to lift the motherboard up and out of the phone case
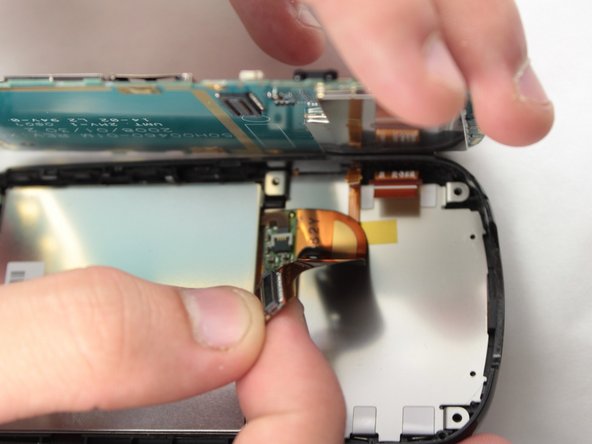
-
There is a black cable under the motherboard that must be disconnected while the motherboard is still in the phone
-
It can easily be disconnected with your fingers
-
The motherboard has now been completely removed
-


Отменить: Я не выполнил это руководство.
Еще один человек закончил это руководство.
Команда

Cal Poly, Team 8-59, Johann Spring 2013 Участник Cal Poly, Team 8-59, Johann Spring 2013
CPSU-JOHANN-S13S8G59
4 членов
Автор 12 руководств