Перейти к основному содержанию

Palm Vx Screen Replacement

Выберете то, что вам нужно

  1. Palm Vx Screen Replacement, Screen: шаг 1, изображение 1 из 1
    • Take protective cover off of organizer.

    • Note: cover slides off like pointer pen.

  2. Palm Vx Screen Replacement: шаг 2, изображение 1 из 1
    • Lay device face down on surface.

  3. Palm Vx Screen Replacement: шаг 3, изображение 1 из 2 Palm Vx Screen Replacement: шаг 3, изображение 2 из 2
    • Heat each side for 30 seconds individually.

    • Note: Be aware not to heat the screen, or any part to the point of damage.

    • Caution: Heating the metal case may cause burns.

  4. Palm Vx Screen Replacement: шаг 4, изображение 1 из 3 Palm Vx Screen Replacement: шаг 4, изображение 2 из 3 Palm Vx Screen Replacement: шаг 4, изображение 3 из 3
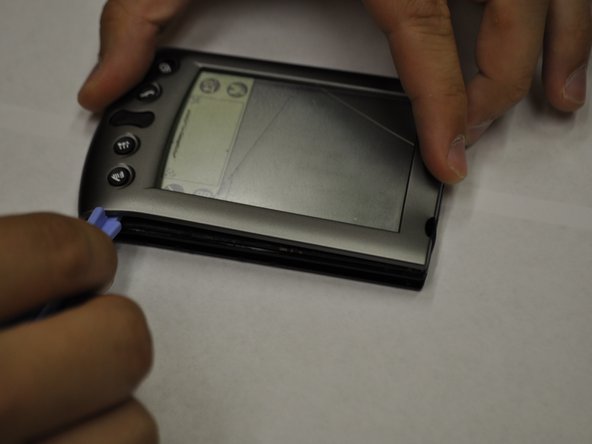
    • Pry off each side individually using a plastic pry bar.

    • Note: Using a plastic pry bar will keep from damaging the case. DO NOT use a metal screwdriver or similar tool.

    • Repeat for front and back of PDA.

    • Note: Do not lose the green power button that may fall out.

  5. Palm Vx Screen Replacement: шаг 5, изображение 1 из 1
    • Remove the screen from the plastic casing.

  6. Palm Vx Screen Replacement: шаг 6, изображение 1 из 2 Palm Vx Screen Replacement: шаг 6, изображение 2 из 2
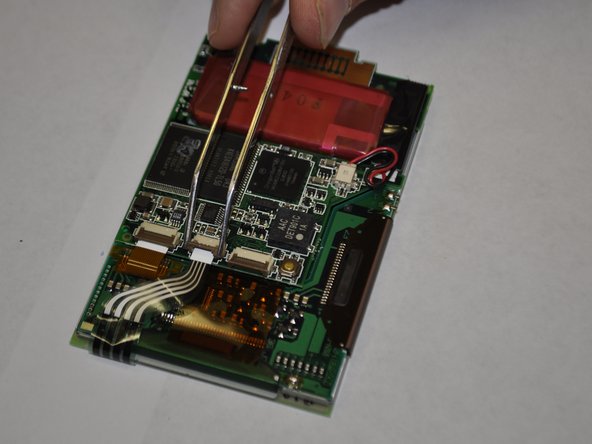
    • In order to seperate the screen from the motherboard you must disconnect the ribbon attached to the screen.

    • To do this, using tweezers, flip up the cable clamp that is connecting the ribbon to the screen.

    • Once the clamp is up you can use the tweezers to gently detach the ribbon.

  7. Palm Vx Screen Replacement: шаг 7, изображение 1 из 1
    • Now you must flip up the adjacent clamp as well, using tweezers like before.

    • After the clamp is flipped you can gently remove the second ribbon with tweezers.

  8. Palm Vx Screen Replacement: шаг 8, изображение 1 из 1
    • Before removing the screen you must detach one more wire, the battery connector.

    • Using the tweezers, squeeze the connector attached to the wire and genlty pull.

    • Do not pull on the wire.

  9. Palm Vx Screen Replacement: шаг 9, изображение 1 из 2 Palm Vx Screen Replacement: шаг 9, изображение 2 из 2
    • Now that both ribbons and the wire are disconeccted, you can apply a downward pressure to the battery. You will have to carefully rotate the frame so that the battery can go through.

Заключение

To reassemble your device, follow these instructions in reverse order.

Will Doornink

Участник с: 10/04/11

11 Репутация

1 руководство автора

Команда

UW Stout, Team 5-4, Zhou Fall 2011 Участник UW Stout, Team 5-4, Zhou Fall 2011

UWSTOUT-ZHOU-F11S5G4

4 членов

Автор 1 руководств

0 Комментариев

Добавить комментарий

Просмотр статистики:

За последние 24часов: 0

За последние 7 дней: 1

За последние 30 дней: 11

За всё время: 1,914