Введение
Use this guide to replace a screen that is cracked or otherwise broken. Ensure that the problem can't be eliminated any other way, such as with a reset. See the Zire72v1 Troubleshooting page for other techniques to use on a faulty device.
Выберете то, что вам нужно
-
-
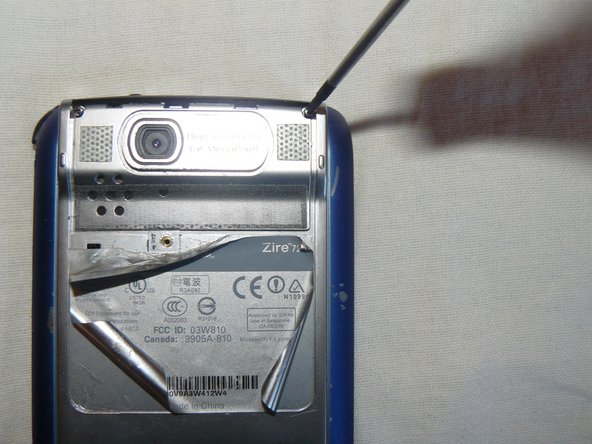
Peel back the information sticker.
-
Remove the one screw that connects the metal panel to the body of the Zire72.
-
-
-
Use the tip of your screwdriver to pop the metal panel off the top of the rear of the unit to expose two more screws on the top corners.
-
-
-
-
Insert the tip of your screwdriver in the seam where the front frame meets the body of the unit and pry the frame up to pop it off. Remove it.
-
-
-
Pull the back panel off the body of the unit to expose the motherboard in the body.
-
-
-
Unplug the two orange ribbon cables at the top of the motherboard and remove the motherboard from the body. All that is left is the LCD screen in the front housing of the unit.
-
-
-
Now that you have your Zire open, you can remove and replace the defective part.
-
-
-
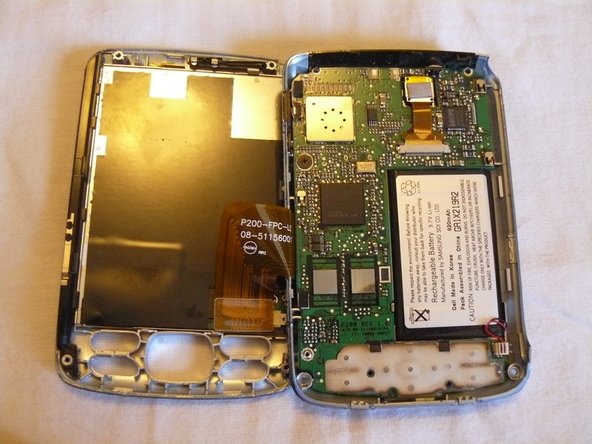
Having successfully completed the Palm Zire72v1 Teardown, your device should now closely resemble this picture.
-
The front and back panels should be separated and laid side-by-side.
-
The front panel is on the left and contains the screen and navigation buttons.
-
The back panel is on the right and contains the circuit board and battery.
-
-
-
To replace the screen, you will be working exclusively with the front (left) panel.
-
-
-
Remove the old screen by sliding it upward and out of the plastic shell.
-
The navigation panel may be removed if it interferes with screen replacement.
-
-
-
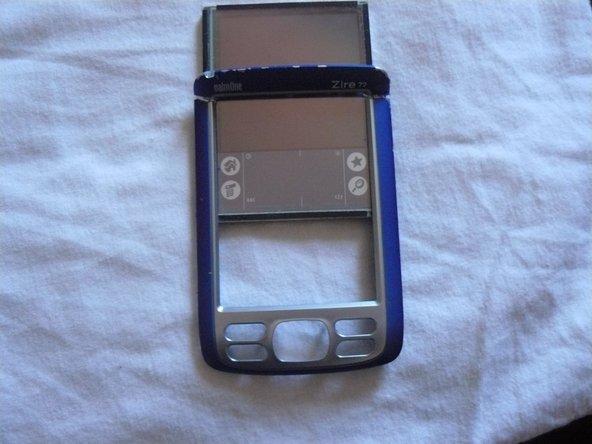
Once the old screen is completely, you be left with the plastic shell.
-
The new screen will be inserted into this case.
-
-
-
The old screen will be entirely separate from the rest of the device.
-
Dispose of this broken technology responsibly.
-
You are now set to insert the new screen and reassemble the device.
-


To reassemble your device, follow these instructions in reverse order.
To reassemble your device, follow these instructions in reverse order.
Отменить: Я не выполнил это руководство.
Еще один человек закончил это руководство.
Один комментарий
A very clear process description, thank you very much.
And the disassembly process described works for battery replacement too.
But where can I find a replacement screen? One that doesn't cost the earth? And where too can I find a battery replacement?
TIA,
JC in Canberra, Australia
jthadcarroll@yahoo.com.au