Перейти к основному содержанию

Panasonic KX-TG6641 Handset Display Screen Replacement

Выберете то, что вам нужно

  1. Panasonic KX-TG6641 Handset Display Screen Replacement, Battery: шаг 1, изображение 1 из 2 Panasonic KX-TG6641 Handset Display Screen Replacement, Battery: шаг 1, изображение 2 из 2
    • Remove the battery cover by sliding the cover piece down

  2. Panasonic KX-TG6641 Handset Display Screen Replacement: шаг 2, изображение 1 из 2 Panasonic KX-TG6641 Handset Display Screen Replacement: шаг 2, изображение 2 из 2
    • Remove the two AAA batteries.

  3. Panasonic KX-TG6641 Handset Display Screen Replacement, Earpiece: шаг 3, изображение 1 из 1
    • In order to remove the back of the phone, unscrew the two screws at the bottom corners on the back of the phone.

  4. Panasonic KX-TG6641 Handset Display Screen Replacement: шаг 4, изображение 1 из 2 Panasonic KX-TG6641 Handset Display Screen Replacement: шаг 4, изображение 2 из 2
    • In order to remove the back of the phone, pry the back open by inserting the iFixit Opening tool in the space between the front and back of the phone.

  5. Panasonic KX-TG6641 Handset Display Screen Replacement: шаг 5, изображение 1 из 2 Panasonic KX-TG6641 Handset Display Screen Replacement: шаг 5, изображение 2 из 2
    • Remove the earpiece cover by twisting the plastic earpiece clockwise to unlock.

  6. Panasonic KX-TG6641 Handset Display Screen Replacement: шаг 6, изображение 1 из 1
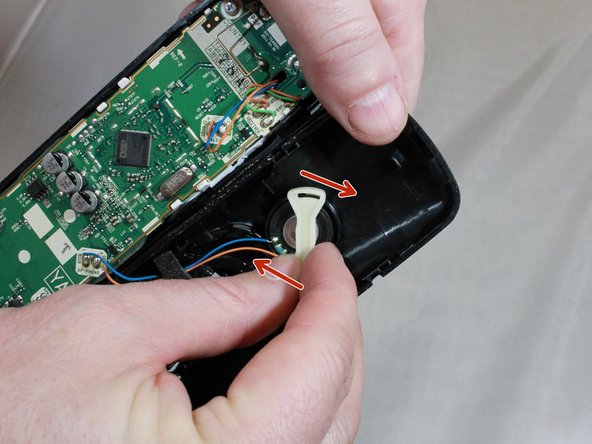
    • Replace earpiece by heating wires with soldering iron.

    • Solder wires back to earpiece after installing the replacement earpiece.

  7. Panasonic KX-TG6641 Handset Display Screen Replacement, Handset Display Screen: шаг 7, изображение 1 из 2 Panasonic KX-TG6641 Handset Display Screen Replacement, Handset Display Screen: шаг 7, изображение 2 из 2
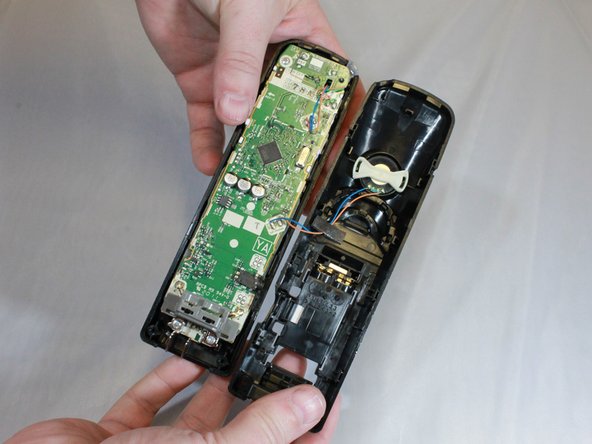
    • Unscrew two screws at the bottom of the motherboard in order to remove.

  8. Panasonic KX-TG6641 Handset Display Screen Replacement: шаг 8, изображение 1 из 1
    • Unhinge display screen from the motherboard and replace with the new screen.

Заключение

To reassemble your device, follow these instructions in reverse order.

Еще один человек закончил это руководство.

Joseph Byrne

Участник с: 04/08/19

472 Репутация

Автор 4 руководств

Команда

Eastern Washington University, Team S1-G2, Rowley Spring 2019 Участник Eastern Washington University, Team S1-G2, Rowley Spring 2019

EWU-ROWLEY-S19S1G2

4 членов

Автор 5 руководств

2 Комментариев

Thanks it makes it very easy

Chas Lewis - Ответить

Добавить комментарий

Просмотр статистики:

За последние 24часов: 1

За последние 7 дней: 7

За последние 30 дней: 34

За всё время: 2,542