Эта версия возможно содержит некорректные исправления. Переключить на последнюю проверенную версию.
Выберете то, что вам нужно
-
Этот шаг не переведен. Помогите перевести
-
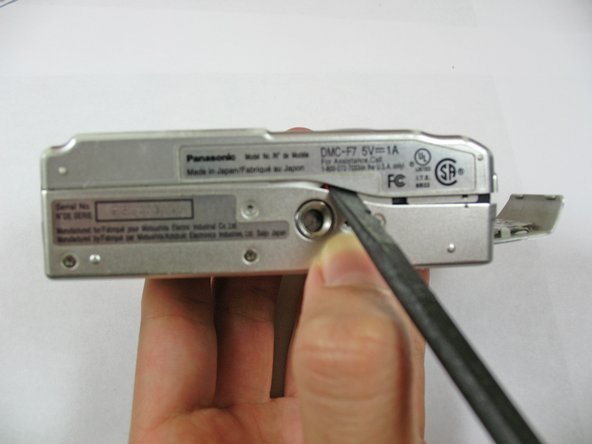
Slide the lock switch to the right so that it is in the unlocked position.
-
Use your finger to slide the battery hatch in the direction of the downward arrow so that the hatch is open.
-
-
Этот шаг не переведен. Помогите перевести
-
Open the battery hatch and then the black cover to expose the battery compartment.
-
Remove the battery.
-
-
Этот шаг не переведен. Помогите перевести
-
Using the Phillips #00 screwdriver, remove the two 2.8 mm screws located under the hatch.
-
-
-
Этот шаг не переведен. Помогите перевести
-
Use the Phillips #00 screwdriver to remove the three 2.8 mm screws on the bottom of the camera.
-
-
Этот шаг не переведен. Помогите перевести
-
Use the Phillips #00 screwdriver to remove the two 2.8 mm screws on the side of the camera.
-
-
Этот шаг не переведен. Помогите перевести
-
Use your fingers to carefully remove the back casing from the front of the camera.
-
-
Этот шаг не переведен. Помогите перевести
-
Place the camera on a flat surface with the front side facing down.
-
Use the spudger to flip up the retaining flap and slide the ribbon cable out of the connector.
-
Hold down on the camera's metal casing with one hand. Using your other hand, remove the back case from the rest of the camera.
-


Отменить: Я не выполнил это руководство.
Еще один человек закончил это руководство.
Команда

Cal Poly, Team 7-35, Regan Winter 2011 Участник Cal Poly, Team 7-35, Regan Winter 2011
CPSU-REGAN-W11S7G35
4 членов
Автор 10 руководств