Перейти к основному содержанию

Panasonic Lumix DMC-FX07 Motherboard Replacement

Выберете то, что вам нужно

  1. Panasonic Lumix DMC-FX07 Motherboard Replacement, Battery: шаг 1, изображение 1 из 1
    • Move the switch on the battery door to the Open position.

    • The door will automatically swing open after you let it go.

  2. Panasonic Lumix DMC-FX07 Motherboard Replacement: шаг 2, изображение 1 из 2 Panasonic Lumix DMC-FX07 Motherboard Replacement: шаг 2, изображение 2 из 2
    • Push the small gray tab on the top right corner to the left. The battery will pop out slightly.

    • Keep your finger clear of the battery when it pops out.

  3. Panasonic Lumix DMC-FX07 Motherboard Replacement, Memory Card: шаг 3, изображение 1 из 1
    • Push the memory card in and let go.

    • The memory card will pop out slightly.

    • Pull out the memory card.

  4. Panasonic Lumix DMC-FX07 Motherboard Replacement, Back Cover: шаг 4, изображение 1 из 2 Panasonic Lumix DMC-FX07 Motherboard Replacement, Back Cover: шаг 4, изображение 2 из 2
    • Unscrew the small screws on the sides of the camera.

    • The screws on the left side(#00P, 4.7mm) are longer than the screw on the right side(#00P, 3.3mm).

  5. Panasonic Lumix DMC-FX07 Motherboard Replacement: шаг 5, изображение 1 из 2 Panasonic Lumix DMC-FX07 Motherboard Replacement: шаг 5, изображение 2 из 2
    • Unscrew the three small screws on the bottom(#00P, 3.3mm).

    • The bottom will fall off.

  6. Panasonic Lumix DMC-FX07 Motherboard Replacement: шаг 6, изображение 1 из 3 Panasonic Lumix DMC-FX07 Motherboard Replacement: шаг 6, изображение 2 из 3 Panasonic Lumix DMC-FX07 Motherboard Replacement: шаг 6, изображение 3 из 3
    • Lift up the bottom back cover by prying the bottom edge with the spudger.

    • Gently lift up the back cover with your hand from the bottom to the top.

  7. Panasonic Lumix DMC-FX07 Motherboard Replacement: шаг 7, изображение 1 из 3 Panasonic Lumix DMC-FX07 Motherboard Replacement: шаг 7, изображение 2 из 3 Panasonic Lumix DMC-FX07 Motherboard Replacement: шаг 7, изображение 3 из 3
    • Lift the tabs on the ZIF connectors.

    • The ribbon cables should easily come out of the ZIF connectors.

  8. Panasonic Lumix DMC-FX07 Motherboard Replacement, Top Cover: шаг 8, изображение 1 из 2 Panasonic Lumix DMC-FX07 Motherboard Replacement, Top Cover: шаг 8, изображение 2 из 2
    • Using the spudger, pry off the top cover by gliding the spudger along the entire edge between the top cover and the front cover.

    • Be careful not to damage the cylindrical capacitor on the circuit board under the top cover.

  9. Panasonic Lumix DMC-FX07 Motherboard Replacement, Motherboard: шаг 9, изображение 1 из 1
    • Remove the small screw in the hole towards the top of the camera(#00P, 5.4mm).

  10. Panasonic Lumix DMC-FX07 Motherboard Replacement: шаг 10, изображение 1 из 2 Panasonic Lumix DMC-FX07 Motherboard Replacement: шаг 10, изображение 2 из 2
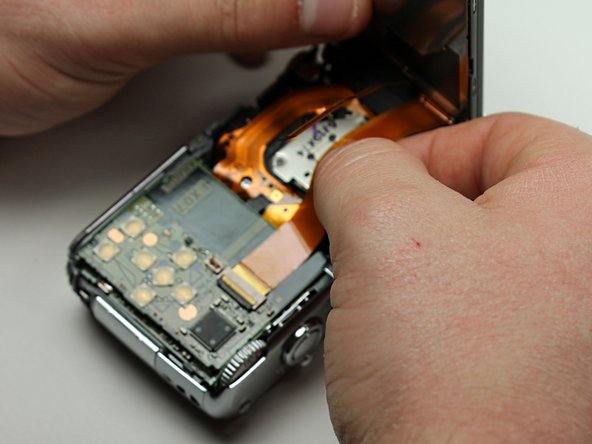
    • Use the spudger to lift up the back logic board.

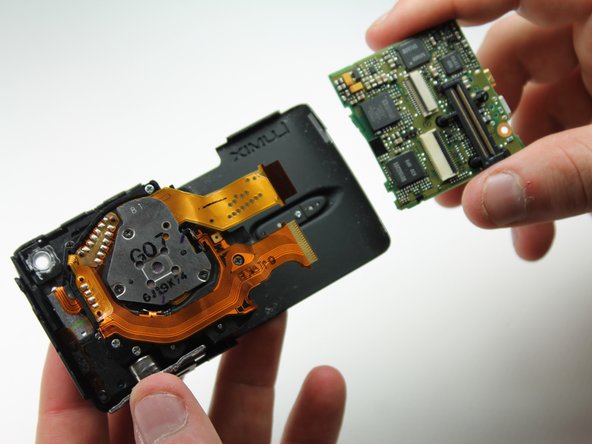
    • Using your fingers, gently wiggle and pull off the back motherboard.

    • You will hear a click when you lift it up.

  11. Panasonic Lumix DMC-FX07 Motherboard Replacement: шаг 11, изображение 1 из 1
    • Remove the small screw holding down the lower motherboard(#00P, 3.2mm).

  12. Panasonic Lumix DMC-FX07 Motherboard Replacement: шаг 12, изображение 1 из 3 Panasonic Lumix DMC-FX07 Motherboard Replacement: шаг 12, изображение 2 из 3 Panasonic Lumix DMC-FX07 Motherboard Replacement: шаг 12, изображение 3 из 3
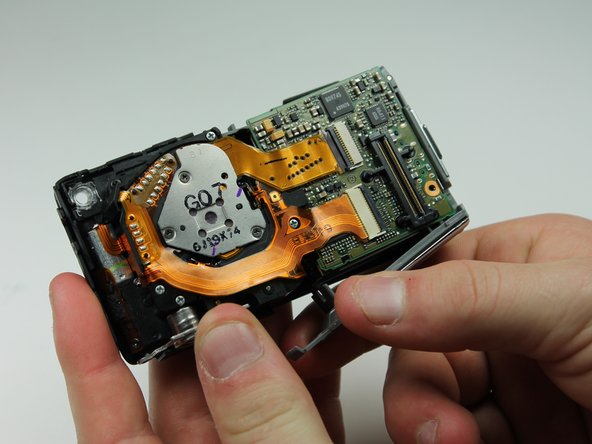
    • Use the spudger to lift the upper tab from the main housing.

    • Gently lift the lower tab from the main body by prying it with your finger.

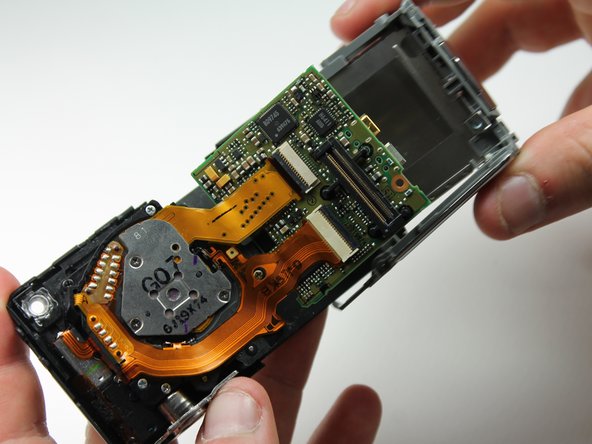
    • Gently pull off the plastic motherboard housing sideways.

  13. Panasonic Lumix DMC-FX07 Motherboard Replacement: шаг 13, изображение 1 из 3 Panasonic Lumix DMC-FX07 Motherboard Replacement: шаг 13, изображение 2 из 3 Panasonic Lumix DMC-FX07 Motherboard Replacement: шаг 13, изображение 3 из 3
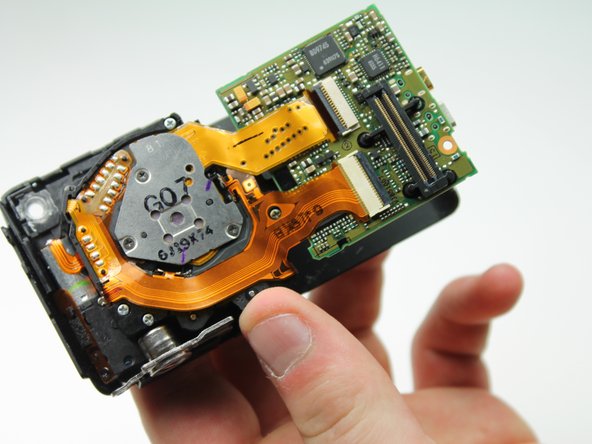
    • Gently lift the tabs on the ZIF connectors connecting the lens to the front motherboard.

    • Once you lift the tabs the ribbons should fall right out and the front motherboard should be free.

Заключение

To reassemble your device, follow these instructions in reverse order.

Karissa

Участник с: 04/13/12

50 Репутация

Автор 8 руководств

Команда

Cal Poly, Team 6-23, Amido Spring 2012 Участник Cal Poly, Team 6-23, Amido Spring 2012

CPSU-AMIDO-S12S6G23

4 членов

Автор 10 руководств

0 Комментариев

Добавить комментарий

Просмотр статистики:

За последние 24часов: 1

За последние 7 дней: 1

За последние 30 дней: 1

За всё время: 1,396