Перейти к основному содержанию

Panasonic Lumix DMC-ZS40 LCD Screen Replacement

Выберете то, что вам нужно

  1. Panasonic Lumix DMC-ZS40 LCD Screen Replacement, Battery: шаг 1, изображение 1 из 2 Panasonic Lumix DMC-ZS40 LCD Screen Replacement, Battery: шаг 1, изображение 2 из 2
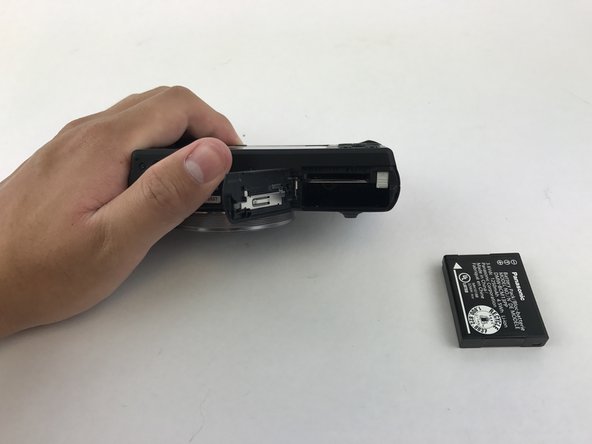
    • Find the battery/memory card door on the bottom right of the camera.

    • Use your finger or screw driver to slide the grey latch from the locked position to the open position. This will swing open the door.

  2. Panasonic Lumix DMC-ZS40 LCD Screen Replacement: шаг 2, изображение 1 из 1
    • Push up on the right-hand-side tab to release the battery.

  3. Panasonic Lumix DMC-ZS40 LCD Screen Replacement: шаг 3, изображение 1 из 2 Panasonic Lumix DMC-ZS40 LCD Screen Replacement: шаг 3, изображение 2 из 2
    • Remove battery from camera.

  4. Panasonic Lumix DMC-ZS40 LCD Screen Replacement, LCD Screen: шаг 4, изображение 1 из 3 Panasonic Lumix DMC-ZS40 LCD Screen Replacement, LCD Screen: шаг 4, изображение 2 из 3 Panasonic Lumix DMC-ZS40 LCD Screen Replacement, LCD Screen: шаг 4, изображение 3 из 3
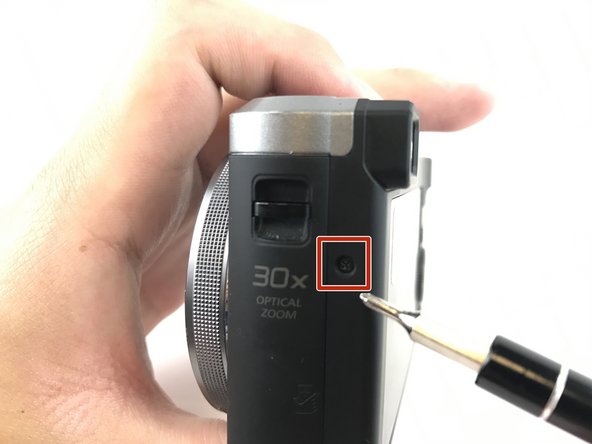
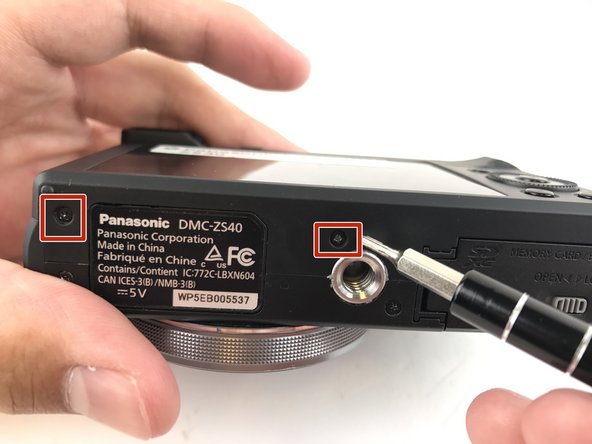
    • Unscrew the five 3mm screws located around the sides of the camera using a PH000 bit or Phillips 000 Screwdriver.

  5. Panasonic Lumix DMC-ZS40 LCD Screen Replacement: шаг 5, изображение 1 из 2 Panasonic Lumix DMC-ZS40 LCD Screen Replacement: шаг 5, изображение 2 из 2
    • Pry off the back casing of the camera and place the camera face down.

  6. Panasonic Lumix DMC-ZS40 LCD Screen Replacement: шаг 6, изображение 1 из 1
    • Flip the right hand side control dial circuit board up.

  7. Panasonic Lumix DMC-ZS40 LCD Screen Replacement: шаг 7, изображение 1 из 3 Panasonic Lumix DMC-ZS40 LCD Screen Replacement: шаг 7, изображение 2 из 3 Panasonic Lumix DMC-ZS40 LCD Screen Replacement: шаг 7, изображение 3 из 3
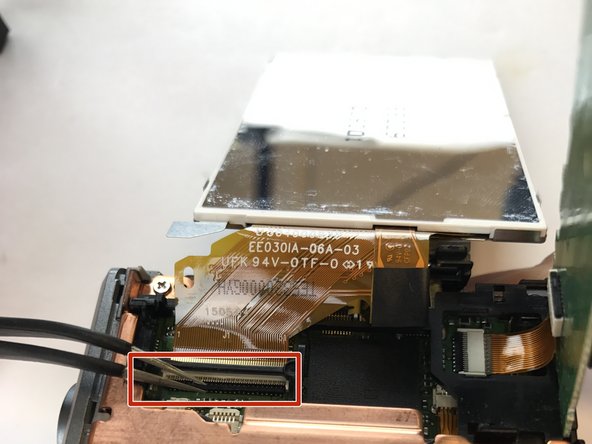
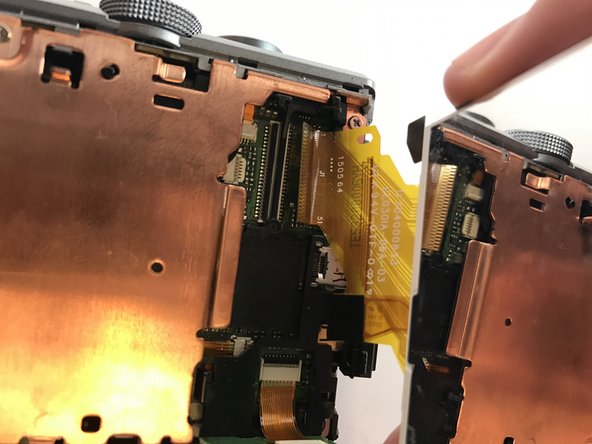
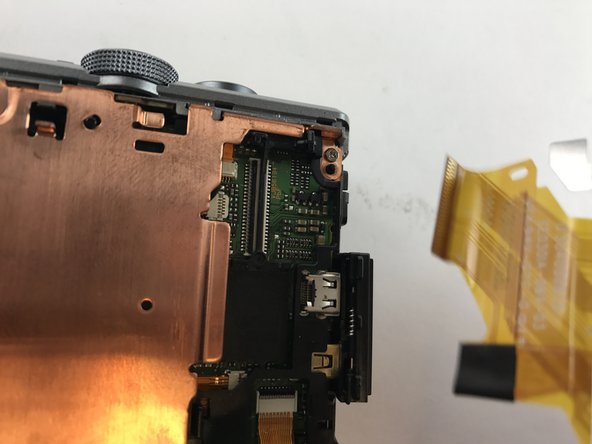
    • Turn the LCD screen over to the side exposing the connection to the motherboard.

    • Remove the display data cable connecting the LCD screen to the motherboard. Using tweezers, pry up the black retaining flap then gently pull the display data cable free.

    • Be careful when handling any display data cables in the camera as they are prone to tearing.

    • To close for reassembly, slide the display data cable back into the ZIF connector and close the retaining flap.

Заключение

To reassemble your device, follow these instructions in reverse order.

2 участников успешно повторили данное руководство.

Osayamen Orhue

Участник с: 02/14/17

174 Репутация

1 руководство автора

Команда

USF Tampa, Team 20-3, Remmell Spring 2017 Участник USF Tampa, Team 20-3, Remmell Spring 2017

USFT-REMMELL-S17S20G3

3 членов

Автор 10 руководств

2 Комментариев

The photo in step #7 is helpful but not sufficiently detailed to explain how the Panasonic ribbon connector works. Fortunately, Panasonic has a very detailed video about how these connectors work: https://www.youtube.com/watch?v=5-tBX1UN... (The helpful part of the video starts at 1:24)

It is recommended that you use a soft-tip instrument to flip the connector’s latching bar upward to release the ribbon cable. Then insert the ribbon cable from the replacement screen and carefully press the bar back down.

William Lee Roberts - Ответить

Do you need a #0000 Phillips as stated in another video, or will a #000 Phillips work to remove the screws. Will a JIS #0000 or #000 work better being it is a Japan Product. Please advise, Thanks

Robert Myers - Ответить

Добавить комментарий

Просмотр статистики:

За последние 24часов: 1

За последние 7 дней: 5

За последние 30 дней: 26

За всё время: 2,013