Эта версия возможно содержит некорректные исправления. Переключить на последнюю проверенную версию.
Выберете то, что вам нужно
-
Этот шаг не переведен. Помогите перевести
-
Using a Phillips screwdriver, remove the eight 9.5 mm screws on the left and right sides of the device.
-
-
Этот шаг не переведен. Помогите перевести
-
Lift the right side off of the device and place aside.
-
Repeat for left side.
-
-
Этот шаг не переведен. Помогите перевести
-
Lift the top gently but firmly from the back of the device. Allow it to rest on the back without reattaching it.
-
-
Этот шаг не переведен. Помогите перевести
-
Gently lift up on the indicated tabs to disengage them from the hooks holding them in place.
-
-
Этот шаг не переведен. Помогите перевести
-
Lift up the top while firmly sliding it towards the back of the device.
-
The next step is a zoom-in of the indicated area.
-
-
Этот шаг не переведен. Помогите перевести
-
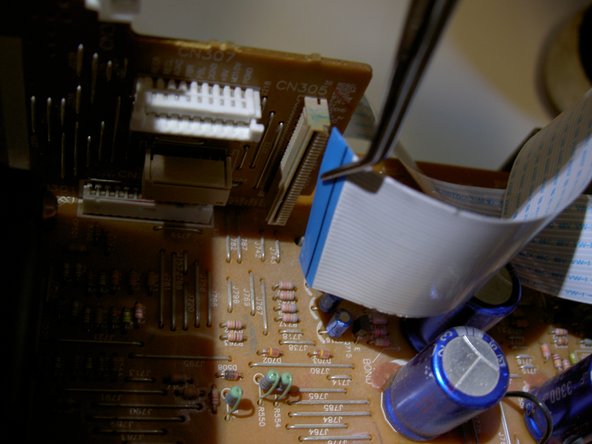
Using forceps or fingers, remove the small black wire indicated.
-
Grip the wire near its base and pull gently but firmly until it pops out of the slot.
-
-
-
Этот шаг не переведен. Помогите перевести
-
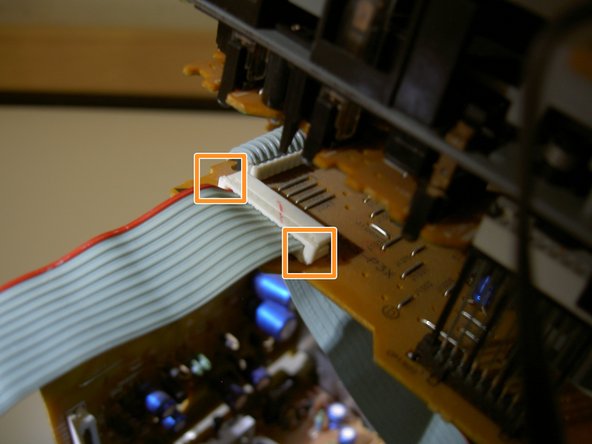
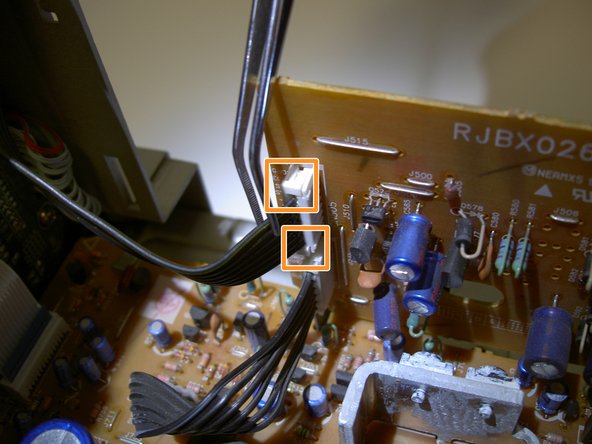
This step deals with the indicated area of the device.
-
Using fingers or tweezers, lift the indicated tabs out until the cord's restraint looks like the final picture.
-
Gently pull on the cord near its base until it comes free of the restraint.
-
-
Этот шаг не переведен. Помогите перевести
-
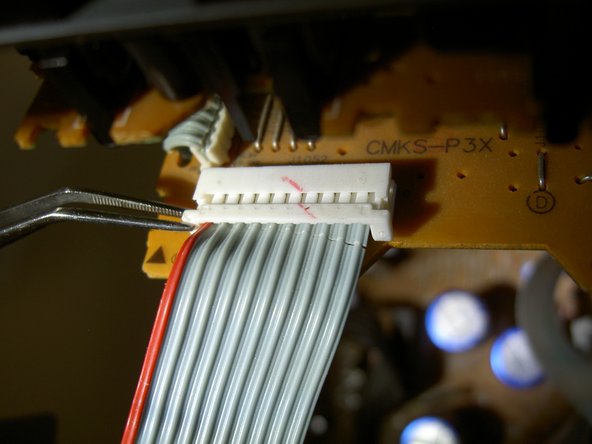
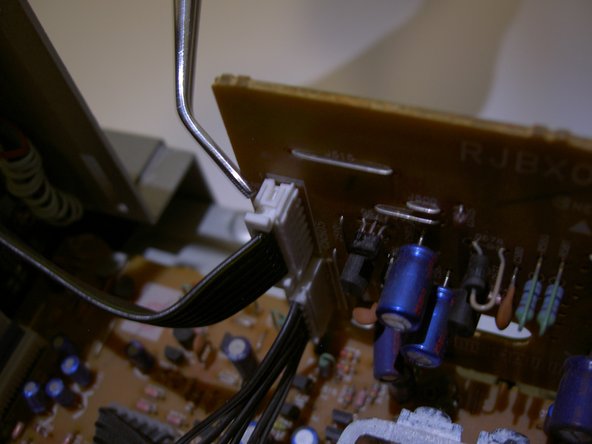
This step deals with the indicated area of the device.
-
Lift the indicated tabs out until the restraint looks like the final picture.
-
Gently pull on the cord until it comes free of the attachment.
-
The top section of the device should now be free of the body. Place it aside in a safe place.
-
-
Этот шаг не переведен. Помогите перевести
-
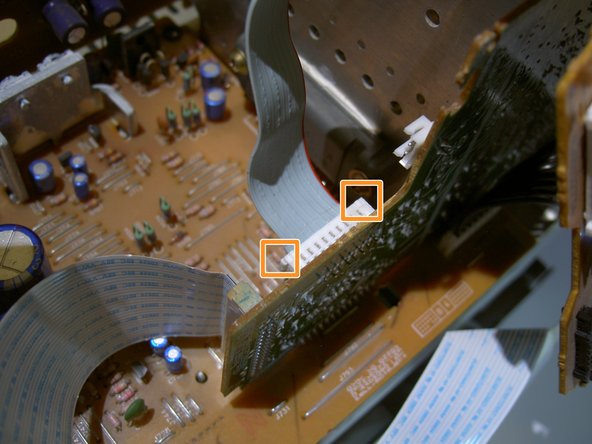
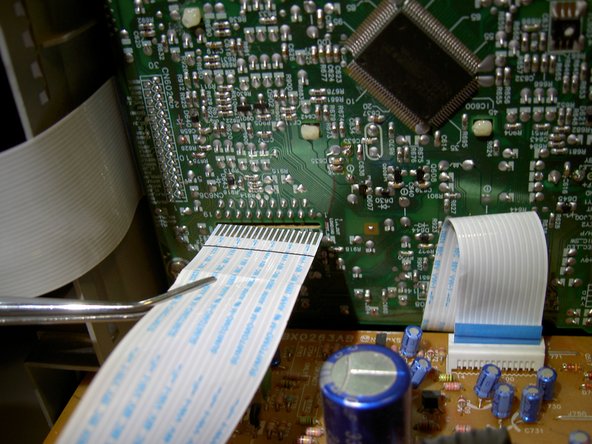
This step deals with the indicated portion of the the device.
-
Lift the indicated tabs out until they look like the final picture.
-
Gently pull on the cord until it comes free of its restraint.
-
-
Этот шаг не переведен. Помогите перевести
-
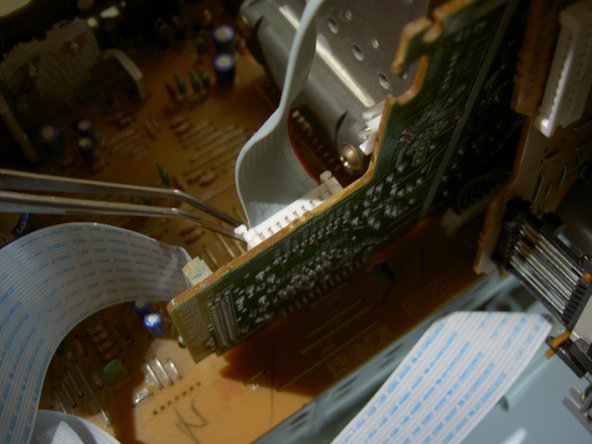
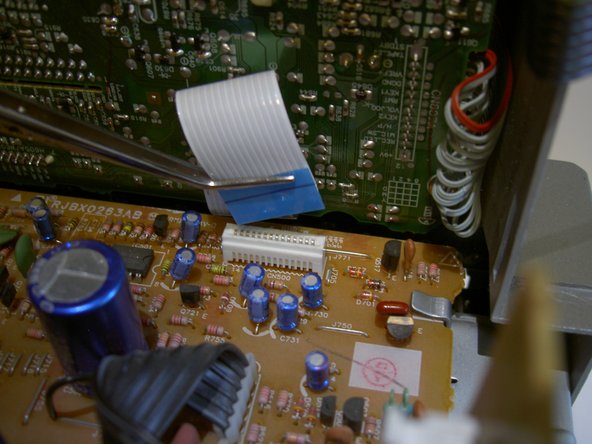
This step deals with the indicated area of the device.
-
Neither of the indicated cords have restraints on them like the previous ones. Use tweezers or fingers to pull firmly on the base of each cord until it comes free.
-
-
Этот шаг не переведен. Помогите перевести
-
This step deals with the indicated area of the device.
-
Use tweezers or fingers and firmly pull straight out on the cord until it comes free.
-
-
Этот шаг не переведен. Помогите перевести
-
This step deals with the indicated area of the device.
-
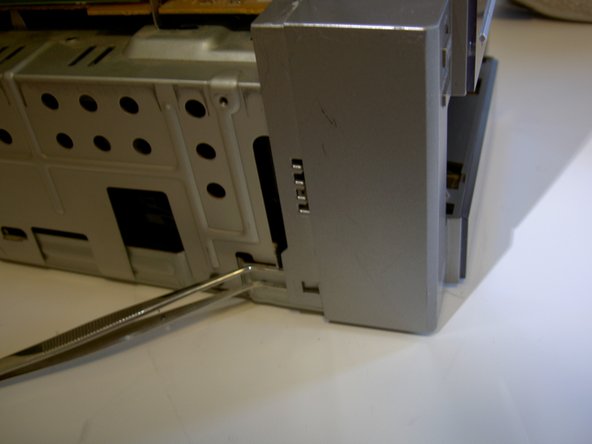
Using tweezers or fingers, lift gently on the tab indicated to free the front from the body of the device.
-
Rotate device 180 degrees and repeat for other side.
-
Rotate the front slightly forward to keep the tabs from re-engaging on their hooks.
-
-
Этот шаг не переведен. Помогите перевести
-
Wiggle the front gently while pulling it forward until it comes free of the body of the device.
-
-
Этот шаг не переведен. Помогите перевести
-
Remove the two 11.5 mm screws indicated and set aside in a safe place.
-
-
Этот шаг не переведен. Помогите перевести
-
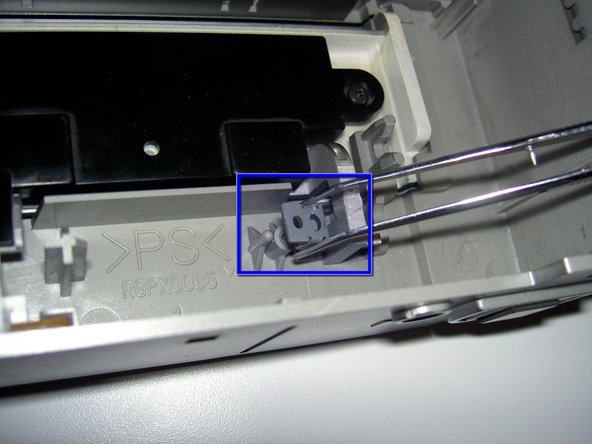
Using tweezers, remove the two restraints indicated and place with the screws removed in the previous step.
-
-
Этот шаг не переведен. Помогите перевести
-
Using tweezers or fingers, pull firmly on the base of this cord until it pops out of its slot.
-
-
Этот шаг не переведен. Помогите перевести
-
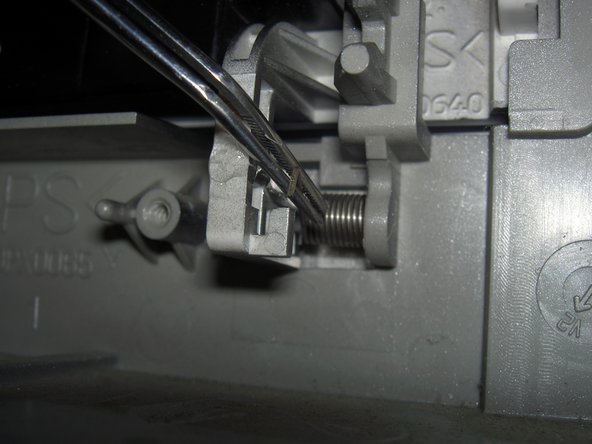
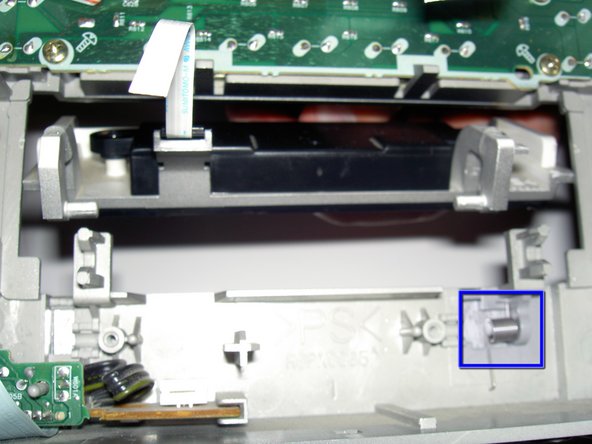
Lift the pegs of the cover up while rotating the rest of the part down and out of the device.
-
Do not to lose this spring while replacing the cover.
-


Команда

Cal Poly, Team 4-1, Regan Spring 2011 Участник Cal Poly, Team 4-1, Regan Spring 2011
CPSU-REGAN-S11S4G1
3 членов
Автор 5 руководств