Перейти к основному содержанию

Panasonic SDR-H40P Motherboard Replacement

Выберете то, что вам нужно

  1. Panasonic SDR-H40P Motherboard Replacement, Hard drive: шаг 1, изображение 1 из 3 Panasonic SDR-H40P Motherboard Replacement, Hard drive: шаг 1, изображение 2 из 3 Panasonic SDR-H40P Motherboard Replacement, Hard drive: шаг 1, изображение 3 из 3
    • Remove battery first.

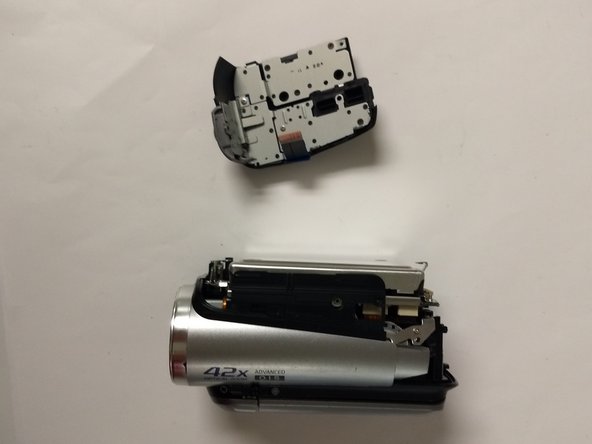
    • Remove right side shell. There are two screws that are right behind the strap that also need to be removed.

    • Prepare to keep track of many tiny screws.

    • Keep track of where all your screws unscrew from. Some of these screws have a slightly different size compared to others and will get stuck inside the holes when putting it back together.

  2. Panasonic SDR-H40P Motherboard Replacement: шаг 2, изображение 1 из 3 Panasonic SDR-H40P Motherboard Replacement: шаг 2, изображение 2 из 3 Panasonic SDR-H40P Motherboard Replacement: шаг 2, изображение 3 из 3
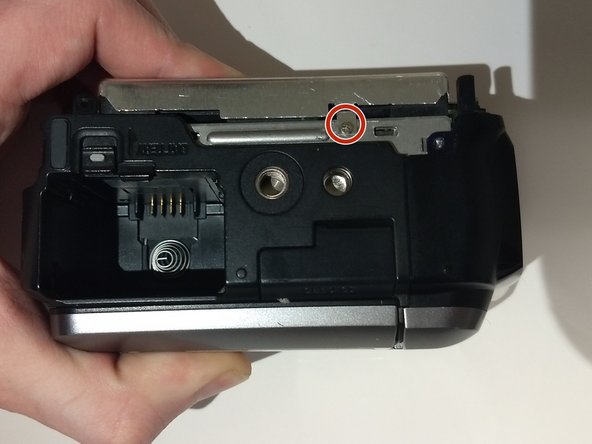
    • Remove indicated screws to release back panel.

  3. Panasonic SDR-H40P Motherboard Replacement: шаг 3, изображение 1 из 2 Panasonic SDR-H40P Motherboard Replacement: шаг 3, изображение 2 из 2
    • This is a continuation of Step 2.

    • Remove the last screw.

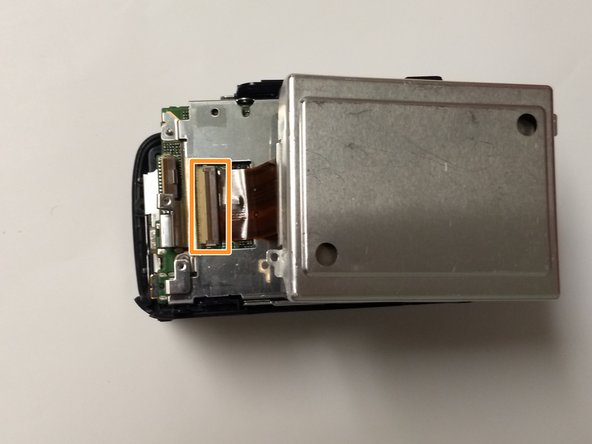
    • To remove the panel you simply pull it back.

    • There is a ribbon cable attached the the motherboard. Be sure to pull the panel back slowly, and detach the ribbon cable.

  4. Panasonic SDR-H40P Motherboard Replacement: шаг 4, изображение 1 из 3 Panasonic SDR-H40P Motherboard Replacement: шаг 4, изображение 2 из 3 Panasonic SDR-H40P Motherboard Replacement: шаг 4, изображение 3 из 3
    • Remove the three screws highlighted in the pictures shown.

    • Do not use force on the hard drive.

    • To avoid damaging the device, slowly pick up the hard drive to reveal an orange ribbon cable attached to the motherboard pull back on the dark brown tab and carefully pull out the ribbon cable . Then you may proceed with removing the hard drive.

  5. Panasonic SDR-H40P Motherboard Replacement, Motherboard: шаг 5, изображение 1 из 2 Panasonic SDR-H40P Motherboard Replacement, Motherboard: шаг 5, изображение 2 из 2
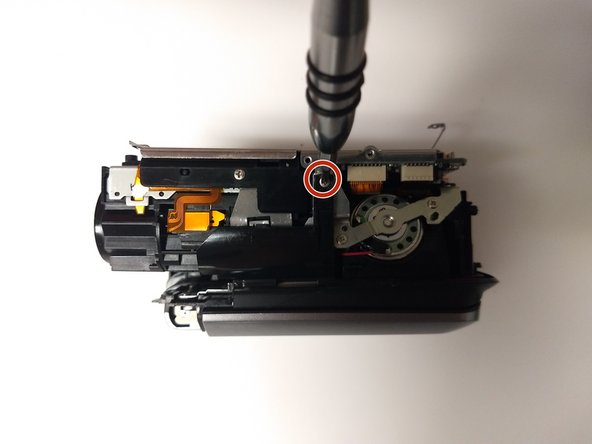
    • Remove the screws circled.

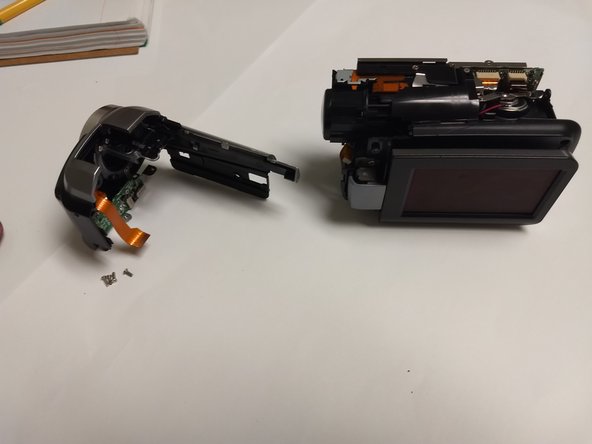
    • Pull front section away from the rest of the camera to remove it.

    • Front panel has a ribbon cable that's attached to the motherboard. Detach the motherboard end when pulling off the front panel.

  6. Panasonic SDR-H40P Motherboard Replacement: шаг 6, изображение 1 из 3 Panasonic SDR-H40P Motherboard Replacement: шаг 6, изображение 2 из 3 Panasonic SDR-H40P Motherboard Replacement: шаг 6, изображение 3 из 3
    • Remove the screws circled.

    • Carefully pull the motherboard away from the the rest of the camera.

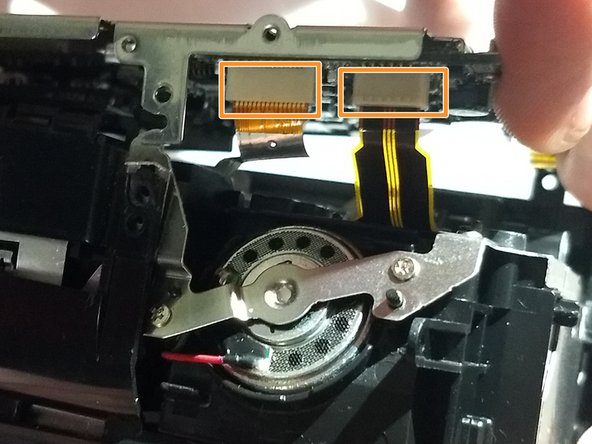
    • Detach the ribbon cables from the motherboard.

    • Be careful with the ribbon cables they applying too much force could damage them.

Заключение

To reassemble your device, follow these instructions in reverse order.

Andrew Waldschmidt

Участник с: 09/21/18

337 Репутация

Автор 4 руководств

Команда

University of North Texas, Team S6-G6, Thompson Fall 2018 Участник University of North Texas, Team S6-G6, Thompson Fall 2018

UNT-THOMPSON-F18S6G6

4 членов

Автор 10 руководств

0 Комментариев

Добавить комментарий

Просмотр статистики:

За последние 24часов: 0

За последние 7 дней: 0

За последние 30 дней: 1

За всё время: 119