Введение
You should try replacing the screen if your device is unresponsive to touch or experiences any problems with display. When replacing the screen,, be sure to unplug any connectors before pulling things apart, as you could accidentally tear a cable in half if you apply too much force.
Выберете то, что вам нужно
-
-
Pry off the second white panel, removing two clips underneath.
-
Start from the middle, and then work on the sides. The sides may be difficult to remove, so try to focus on one side and work your way around.
-
-
-
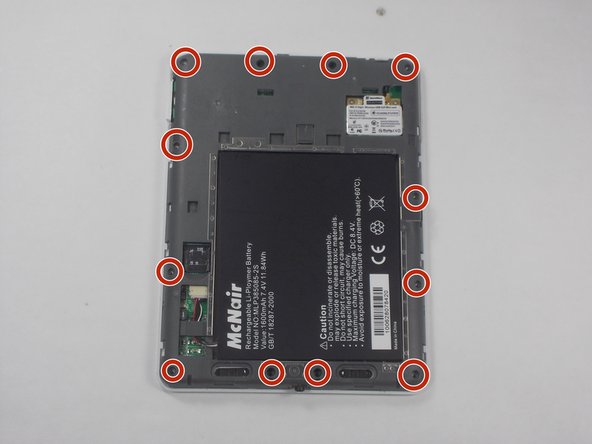
Using a Phillips #0 bit, remove the 12 4mm screws on the outer area of the gray area exposed by removing the back panels.
-
-
-
-
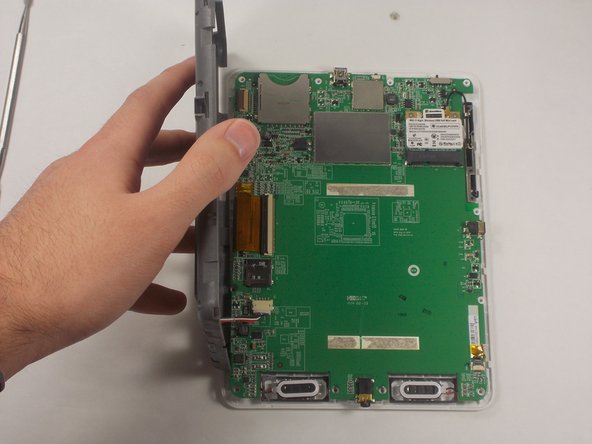
Carefully pry the back of the device from the front panel and motherboard. There are a series of clips holding them together that need to be separated.
-
-
-
Now, lift up the gray piece, unplug the battery connector, so the gray piece will come free from the rest of the device.
-
-
-
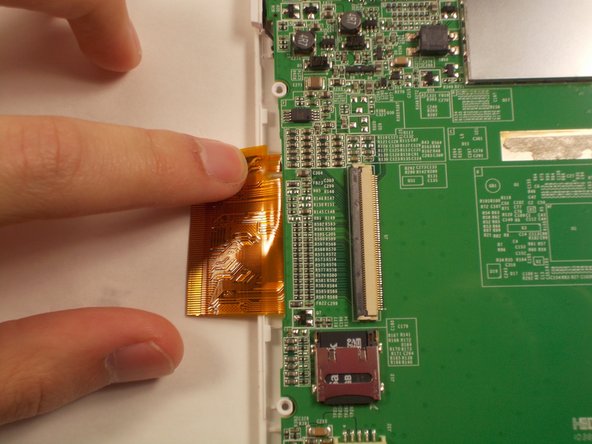
Use the tip of your plastic spudger or your fingernail to flip up the long retaining flap. The longer, gold ribbon cable can now be pulled out safely.
-
-
-
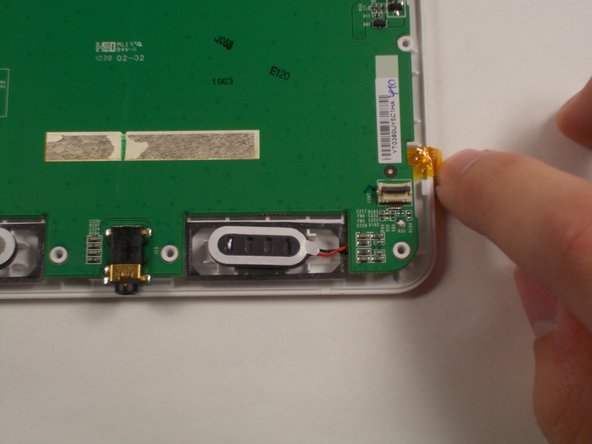
Use the tip of your plastic spudger or your fingernail to flip up the shorter retaining flap. The smaller gold ribbon cable can now be pulled out safely.
-
-
-
Starting from the side of the device, lift the motherboard off of the plastic standoffs.
-
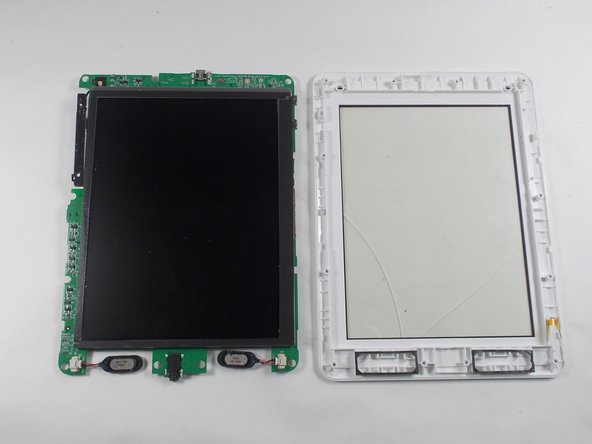
You will need to peel both speakers off of the device's plastic frame.
-
-
-
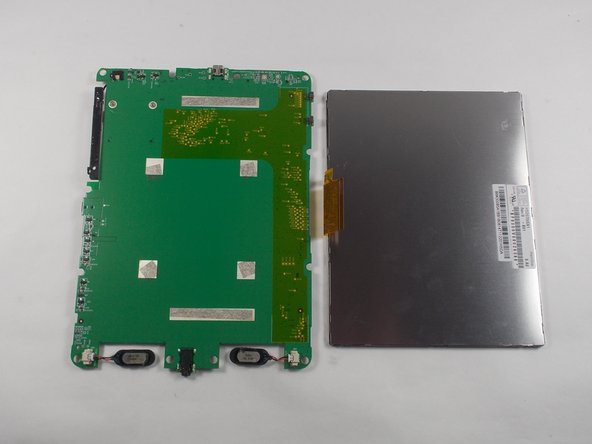
With the screen facing up, use a plastic opening tool along the sides of the screen to pry it away from the motherboard.
-
There are six adhesive pads holding the display in place.
-


To reassemble your device, follow these instructions in reverse order.
To reassemble your device, follow these instructions in reverse order.
Отменить: Я не выполнил это руководство.
2 участников успешно повторили данное руководство.
Команда

UMass Dartmouth, Team 3-7, Isaacson Fall 2016 Участник UMass Dartmouth, Team 3-7, Isaacson Fall 2016
UMASSD-ISAACSON-F16S3G7
3 членов
Автор 10 руководств