Перейти к основному содержанию

Pentax Optio WG-2 Menu Buttons Replacement

Архивированное руководство
Это руководство сохранено для исторических целей. Используйте его обновлённую версию, чтобы выполнить ремонт.

Выберете то, что вам нужно

  1. Careful: steps 1-6 are sourced from a guide that's marked as in-progress.

    Pentax Optio WG-2 Menu Buttons Replacement, Back Case: шаг 1, изображение 1 из 2 Pentax Optio WG-2 Menu Buttons Replacement, Back Case: шаг 1, изображение 2 из 2
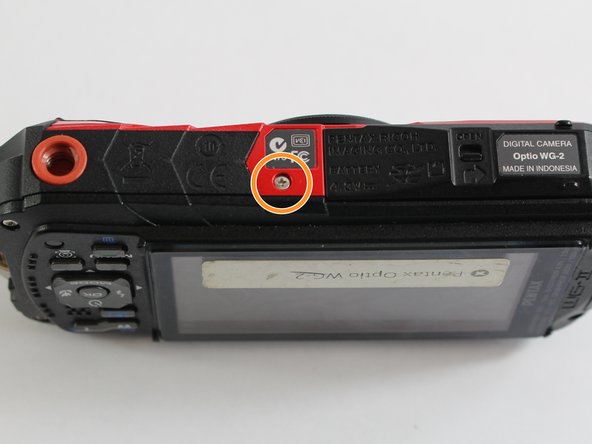
    • Remove all four 1 mm JIS #00 screws from the back of the camera.

  2. Pentax Optio WG-2 Menu Buttons Replacement: шаг 2, изображение 1 из 1
    • Use your finger to peel the grip off the top of the camera.

    • For best results, start from the right side of the camera, opposite the buttons.

    • Once the grip is removed, you will most likely lose the water-tight seal.

  3. Pentax Optio WG-2 Menu Buttons Replacement: шаг 3, изображение 1 из 1
    • Use the tweezers to remove the two buttons from the top of the camera.

    • The buttons may fall out while removing the grip.

  4. Pentax Optio WG-2 Menu Buttons Replacement: шаг 4, изображение 1 из 3 Pentax Optio WG-2 Menu Buttons Replacement: шаг 4, изображение 2 из 3 Pentax Optio WG-2 Menu Buttons Replacement: шаг 4, изображение 3 из 3
    • Remove the three 1 mm JIS #000 screws from the top.

    • Remove the 1 mm JIS #000 screw from the bottom.

  5. Pentax Optio WG-2 Menu Buttons Replacement: шаг 5, изображение 1 из 1
    • Carefully separate the back and the front of the camera.

    • There are three ribbon cables connecting the two boards. Be careful not to tear them.

  6. Pentax Optio WG-2 Menu Buttons Replacement: шаг 6, изображение 1 из 1
    • Use the tip of a spudger to flip up the small retaining flaps on the ribbon cable ZIF connectors.

    • Carefully pull the ribbon cables out of their sockets.

  7. Pentax Optio WG-2 Menu Buttons Replacement, Menu Buttons: шаг 7, изображение 1 из 2 Pentax Optio WG-2 Menu Buttons Replacement, Menu Buttons: шаг 7, изображение 2 из 2
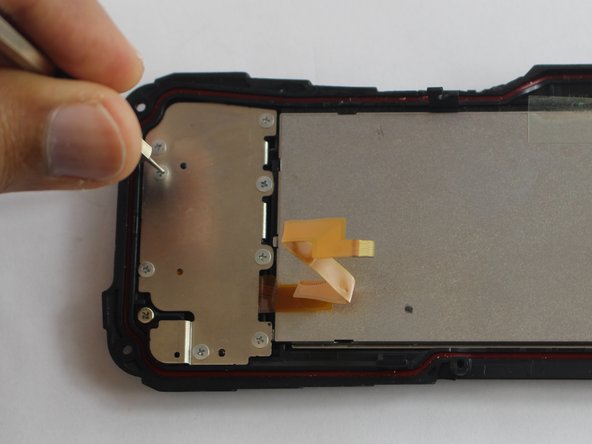
    • Remove the eight JS#000 screws using a screwdriver and lift panel up.

    • This screw does not need to be removed.

  8. Pentax Optio WG-2 Menu Buttons Replacement: шаг 8, изображение 1 из 1
    • Once panel is removed the button 'sheet' can be removed.

Заключение

To reassemble your device, follow these instructions in reverse order.

Matthew Bessette

Участник с: 03/04/16

658 Репутация

Автор 6 руководств

Команда

UMass Dartmouth, Team 6-7, Bhusal Spring 2016 Участник UMass Dartmouth, Team 6-7, Bhusal Spring 2016

UMASSD-BHUSAL-S16S6G7

3 членов

Автор 6 руководств

0 Комментариев

Добавить комментарий

Просмотр статистики:

За последние 24часов: 0

За последние 7 дней: 0

За последние 30 дней: 0

За всё время: 187