Эта версия возможно содержит некорректные исправления. Переключить на последнюю проверенную версию.
Выберете то, что вам нужно
-
Этот шаг не переведен. Помогите перевести
-
Eject the SmartBowl by pressing the button located at the front of the SmartFeeder base.
-
Remove the metal tray by using both hands and pulling out the bowl towards you.
-
-
Этот шаг не переведен. Помогите перевести
-
Turn the bowl tray side down by using both hands.
-
Remove seven 11 mm screws by using the Phillips #1 screwdriver.
-
-
Этот шаг не переведен. Помогите перевести
-
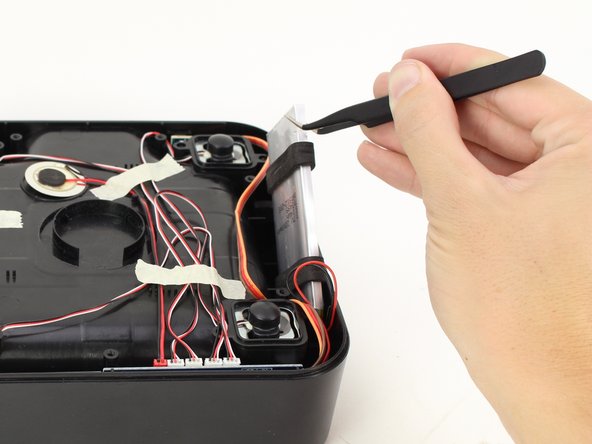
Take the battery out of the SmartBowl with tweezers, avoid pulling on any wires.
-
-
Этот шаг не переведен. Помогите перевести
-
Remove the tape, closest to the four white connectors, with your hands.
-
-
-
Этот шаг не переведен. Помогите перевести
-
Trace the wires with your hands from the battery to the motherboard.
-
Detach the three-prong connector between the battery and the motherboard by pulling the white connectors with your hands.
-
-
Этот шаг не переведен. Помогите перевести
-
Remove the remaining 3-prong connectors by carefully pulling outwards.
-
-
Этот шаг не переведен. Помогите перевести
-
Push both small gray pieces next to the ribbon connector towards the ribbon to put them in the “open” position using the nylon spudger.
-
-
Этот шаг не переведен. Помогите перевести
-
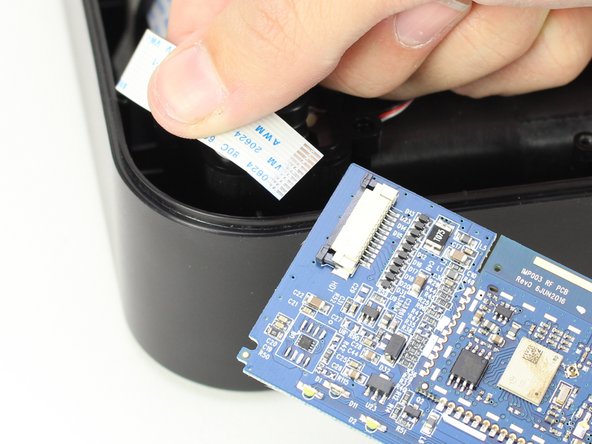
Remove the ribbon connector from its slot by pulling on it with a couple fingers.
-
-
Этот шаг не переведен. Помогите перевести
-
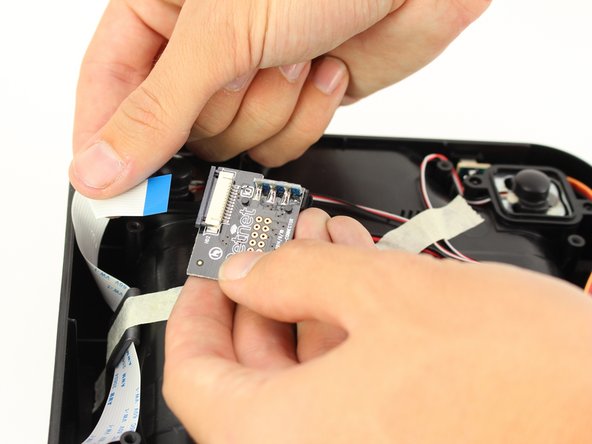
Use the nylon spudger to remove the charging assembly from the SmartBowl.
-
-
Этот шаг не переведен. Помогите перевести
-
Push the small gray pieces on the ribbon connector into the “open” position with the nylon spudger.
-
-
Этот шаг не переведен. Помогите перевести
-
Pull the ribbon connector out of its slot using one hand and another hand on the base of the charging assembly.
-


Команда

Cal Poly, Team S13-G7, White Fall 2018 Участник Cal Poly, Team S13-G7, White Fall 2018
CPSU-WHITE-F18S13G7
4 членов
Автор 5 руководств