Эта версия возможно содержит некорректные исправления. Переключить на последнюю проверенную версию.
Выберете то, что вам нужно
-
Этот шаг не переведен. Помогите перевести
-
Remove four 7.5 mm Phillips screws on the both sides (2 on each side).
-
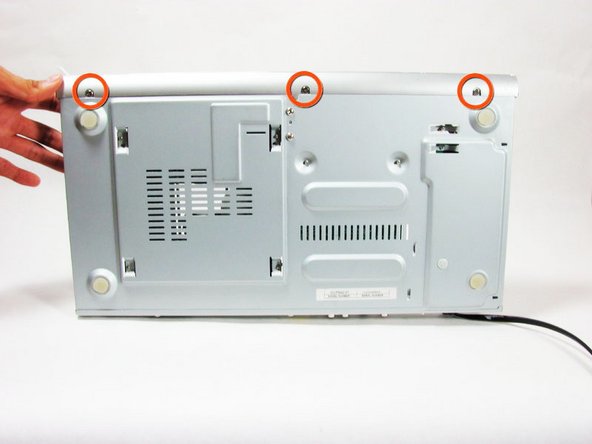
Remove five 7.5 mm Phillips screws on the back of the player.
-
-
Этот шаг не переведен. Помогите перевести
-
Lift the top panel from the back and remove. It should come off without being forced. There is a lip near the front so you many need to slide the top panel back slightly to remove it.
-
-
Этот шаг не переведен. Помогите перевести
-
Remove two 7.5 mm screws, one on each side of the player.
-
Remove three 7.5mm screws from the bottom of the player.
-
-
-
Этот шаг не переведен. Помогите перевести
-
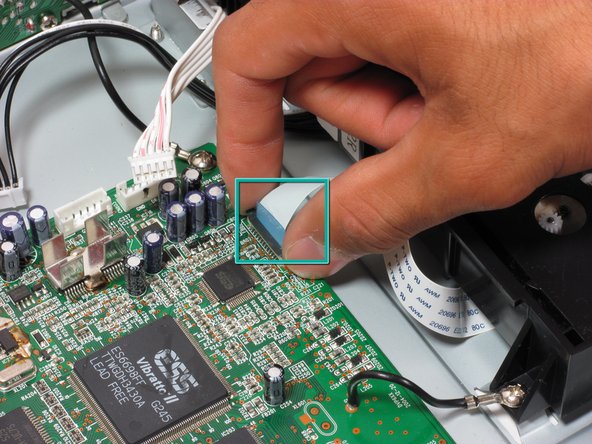
Detach all the ribbon wires (4) attached to the motherboard
-
-
Этот шаг не переведен. Помогите перевести
-
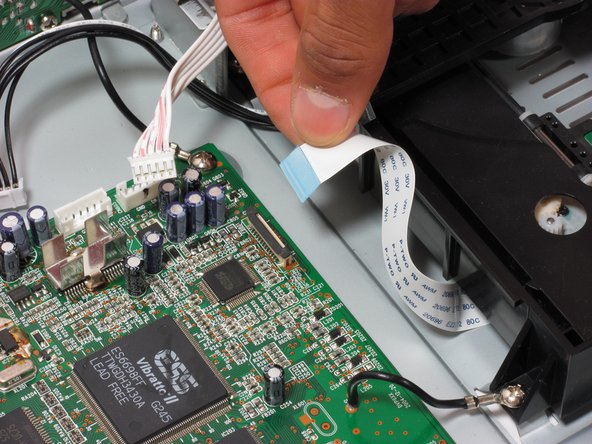
The first 3 ribbon wires can be removed by grasping near the head and gently pulling up.
-
Locate the skinny fourth ribbon wire near the top right of the motherboard.
-
-
Этот шаг не переведен. Помогите перевести
-
Now remove the remaining three 7.5 mm Phillips screws that hold the disc tray to the body.
-
Remove the 12 mm Phillips screw that secures the tray to the upright metal frame.
-
Remove the two 7.5 mm Phillips screws that attach the disc tray to the motherboard and front panel.
-
-
Этот шаг не переведен. Помогите перевести
-
Tilt the tray sideways and then pull back gently to separate the tray from the front panel.
-


Отменить: Я не выполнил это руководство.
6 участников успешно повторили данное руководство.
Команда

Cal Poly, Team 21-20, Maness Fall 2011 Участник Cal Poly, Team 21-20, Maness Fall 2011
CPSU-MANESS-F11S21G20
4 членов
Автор 7 руководств
3 Комментариев
If you work at it, inserting a small screwdriver at appropriate places, you can get the drawer front off (do this with drawer open). This is easier than removing the front panel from the player.
I failed huhuhu