Перейти к основному содержанию

Philips Hue LightStrip Plus AC power adapter Replacement

Выберете то, что вам нужно

  1. Philips Hue LightStrip Plus AC power adapter Replacement, Open Control Box: шаг 1, изображение 1 из 2 Philips Hue LightStrip Plus AC power adapter Replacement, Open Control Box: шаг 1, изображение 2 из 2
    Инструмент, используемый на этом этапе:
    TR7 Torx Security Screwdriver
    $5.99
    Купить
    • Using a TR7 Torx Security Screwdriver, unscrew the two screws securing the lid to the base of the control box.

    • Using three iFixit Opening Picks, separate the lid from the slides of the control box.

    • Using a Spudger at the point where the cable enters the control box, lift off the lid.

  2. Philips Hue LightStrip Plus AC power adapter Replacement, Desolder power cable from circuit board: шаг 2, изображение 1 из 3 Philips Hue LightStrip Plus AC power adapter Replacement, Desolder power cable from circuit board: шаг 2, изображение 2 из 3 Philips Hue LightStrip Plus AC power adapter Replacement, Desolder power cable from circuit board: шаг 2, изображение 3 из 3
    • Lift the circuit board out of the control box

    • Using your Soldering Skills, desolder the red and black cables from the circuit board.

  3. Philips Hue LightStrip Plus AC power adapter Replacement, Prepare new power cable: шаг 3, изображение 1 из 3 Philips Hue LightStrip Plus AC power adapter Replacement, Prepare new power cable: шаг 3, изображение 2 из 3 Philips Hue LightStrip Plus AC power adapter Replacement, Prepare new power cable: шаг 3, изображение 3 из 3
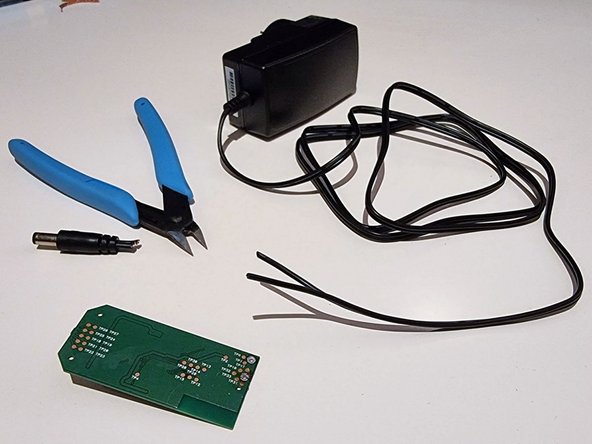
    • Purchase a reputable AC Adapter rated at exactly 24V and at least 0.83A as per the specifications written on the original adapter. For example, the Mean Well GE24I24-P1J. As this is a universal adapter, you will also need to purchase the appropriate Mean Well AC Plug for your region.

    • Using safety glasses and a wire cutter, cut the barrel connector off the end of the new AC Adapter.

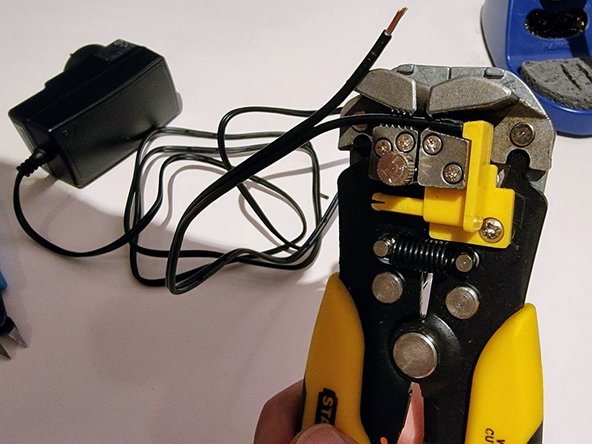
    • Using a wire stripper, expose 1cm of copper on the ends of the positive and negative wires.

  4. Philips Hue LightStrip Plus AC power adapter Replacement, Solder new power cable to circuit board: шаг 4, изображение 1 из 3 Philips Hue LightStrip Plus AC power adapter Replacement, Solder new power cable to circuit board: шаг 4, изображение 2 из 3 Philips Hue LightStrip Plus AC power adapter Replacement, Solder new power cable to circuit board: шаг 4, изображение 3 из 3
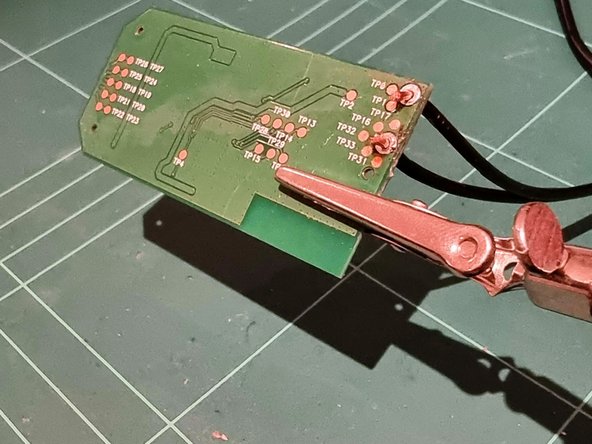
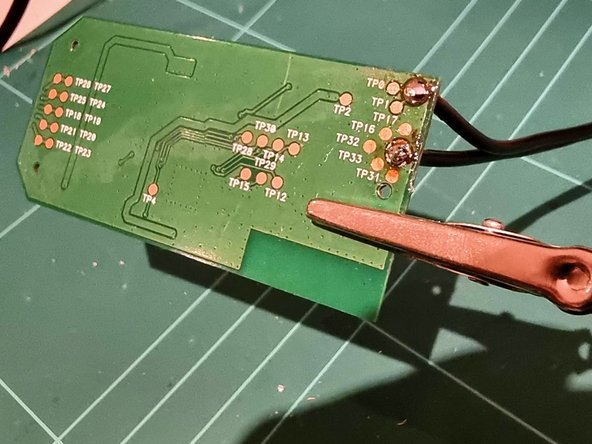
    • Insert the positive wire, differentiated with faint dashes, into the hole marked VBUS and solder it in place.

    • Insert the negative wire, into the hole marked GND and solder it in place.

  5. Philips Hue LightStrip Plus AC power adapter Replacement, Reassemble the control box: шаг 5, изображение 1 из 1
    Инструмент, используемый на этом этапе:
    TR7 Torx Security Screwdriver
    $5.99
    Купить
    • Place the circuit board back into the control box, aligning it with the 3 white plastic poles.

    • Guide the power cable through the strain relief as shown.

    • Using a TR7 Torx Security Screwdriver, secure the lid back in place with the two screws.

Финишная черта

Kris

Участник с: 05/25/23

121 Репутация

1 руководство автора

0 Комментариев

Добавить комментарий

Просмотр статистики:

За последние 24часов: 4

За последние 7 дней: 19

За последние 30 дней: 106

За всё время: 844