Введение
The circuit board is the large, flat, green rectangle in the middle of the device. This guide will detail the steps in how to replace the circuit board.
Выберете то, что вам нужно
-
-
Remove the back cover by sliding it off.
-
Remove the 3 AAA batteries.
-
-
-
Unscrew the nine exterior screws on the back panel using a PH0-size Philips-head screwdriver.
-
Remove the triangular end piece by pulling it straight off.
-
-
-
-
Remove the colored grill by sliding it off in the direction of the removed end piece.
-
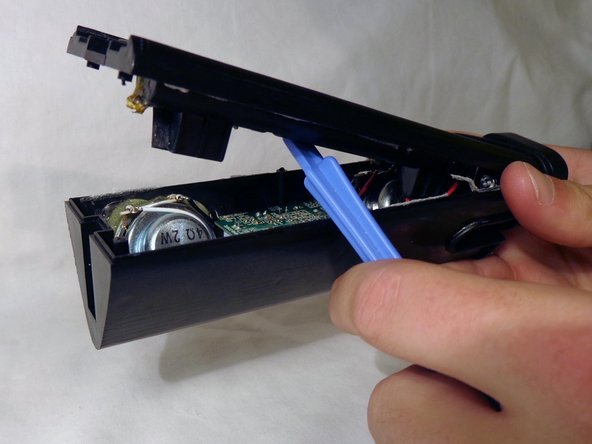
Pry off the back battery panel with the plastic opening tool.
-
-
-
Remove the two screws on opposite ends of the circuit board with the PH0 size philips head screw driver.
-
Remove the damaged circuit board from the device.
-
-
-
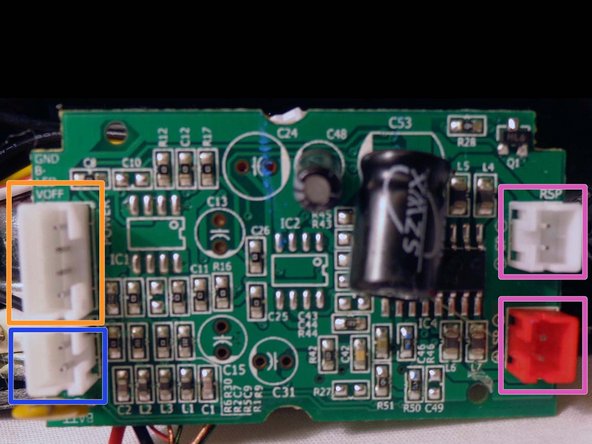
Remove the battery plug from the circuit board by pulling out the plugs to fully remove back panel.
-
Remove the speaker plugs from the circuit board by pulling out the plugs. They are located on opposite sides of the circuit board.
-
Remove the light plug from the circuit board.
-
Reassemble the device.
-


To reassemble your device, follow these instructions in reverse order.
To reassemble your device, follow these instructions in reverse order.
Отменить: Я не выполнил это руководство.
2 участников успешно повторили данное руководство.
Команда

Clemson, Team 14-4, Benson Fall 2013 Участник Clemson, Team 14-4, Benson Fall 2013
CLEM-BENSON-F13S14G4
3 членов
Автор 4 руководств
2 Комментариев
Is that one of those cheap pam amps that run from 5v?