Перейти к основному содержанию

Philips Sonicare ProtectiveClean 6500 Power Button, Mode Button Replacement

Выберете то, что вам нужно

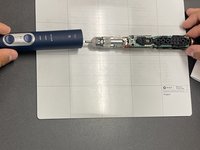
  1. Philips Sonicare ProtectiveClean 6500 Power Button, Mode Button Replacement, Internal Assembly: шаг 1, изображение 1 из 3 Philips Sonicare ProtectiveClean 6500 Power Button, Mode Button Replacement, Internal Assembly: шаг 1, изображение 2 из 3 Philips Sonicare ProtectiveClean 6500 Power Button, Mode Button Replacement, Internal Assembly: шаг 1, изображение 3 из 3
    • Pry the bottom cap away from the toothbrush body.

    • Pry the bottom cap away from the toothbrush body until it releases.

    • Remove the bottom cap by hand.

  2. Philips Sonicare ProtectiveClean 6500 Power Button, Mode Button Replacement: шаг 2, изображение 1 из 2 Philips Sonicare ProtectiveClean 6500 Power Button, Mode Button Replacement: шаг 2, изображение 2 из 2
    • Use a metal spudger to release the two retaining clips inside the device.

    • The clips release when pried inward.

  3. Philips Sonicare ProtectiveClean 6500 Power Button, Mode Button Replacement: шаг 3, изображение 1 из 2 Philips Sonicare ProtectiveClean 6500 Power Button, Mode Button Replacement: шаг 3, изображение 2 из 2
    • Slide the internal assembly out of the chassis.

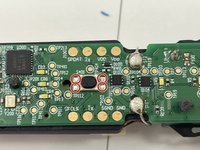
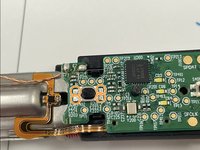
  4. Philips Sonicare ProtectiveClean 6500 Power Button, Mode Button Replacement, Power Button, Mode Button: шаг 4, изображение 1 из 2 Philips Sonicare ProtectiveClean 6500 Power Button, Mode Button Replacement, Power Button, Mode Button: шаг 4, изображение 2 из 2
    • Locate the power button (solder locations circled in orange).

    • Locate the mode button (solder locations circled in red).

    • Both buttons are attached by four soldered pins each.

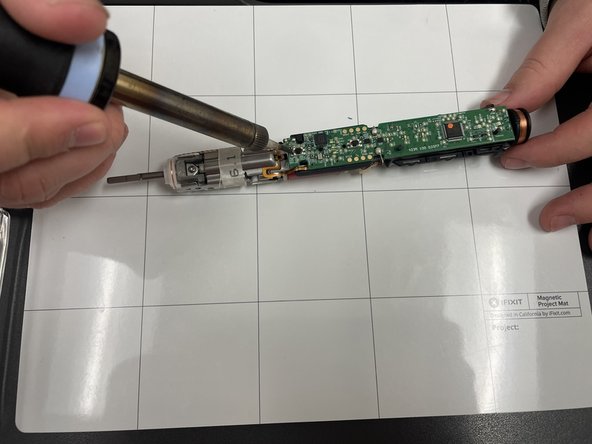
  5. Philips Sonicare ProtectiveClean 6500 Power Button, Mode Button Replacement: шаг 5, изображение 1 из 2 Philips Sonicare ProtectiveClean 6500 Power Button, Mode Button Replacement: шаг 5, изображение 2 из 2
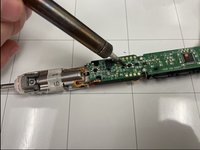
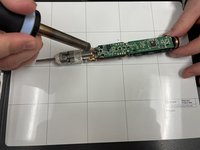
    • Heat the soldering iron.

    • Soldering can cause burns and fires. Always solder in a well-ventilated area.

    • To test if the soldering iron is ready, place on the solder and if the solder melts easily and quickly, your soldering iron is ready.

    • Use the soldering iron to desolder all of the connections.

  6. Philips Sonicare ProtectiveClean 6500 Power Button, Mode Button Replacement: шаг 6, изображение 1 из 2 Philips Sonicare ProtectiveClean 6500 Power Button, Mode Button Replacement: шаг 6, изображение 2 из 2
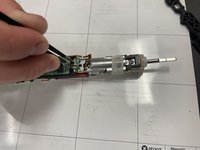
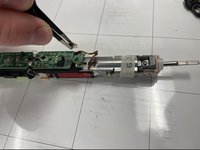
    • Use tweezers to remove the buttons from the board.

    • Place new button onto board and repeat previous steps in reverse to reassemble.

Заключение

To reassemble your device, follow these instructions in reverse order.

Liam Casto

Участник с: 04/01/24

354 Репутация

Автор 3 руководств

Команду

IUPUI, Team 1-4, Harley Spring 2024 Участник IUPUI, Team 1-4, Harley Spring 2024

IUPUI-HARLEY-S24S1G4

3 членов

Автор 3 руководств

0 Комментариев

Добавить комментарий

Статистика просмотров:

За последние 24 час(ов): 1

За последние 7 дней: 10

За последние 30 дней: 29

За всё время: 230