Введение
Hi!
This guide will explain how to replace the laser for the PS2 Slim.
Note: There are 2 different lasers available for the PS2 Slim, this guide is only for replacing the SPU-3170(G).
Выберете то, что вам нужно
-
-
Disconnect all cables from the console and flip the unit over to reveal its base.
-
-
-
Locate the 6 feet on the base of the unit. Pry them off using a spudger to reveal the screws.
-
-
-
Remove all six 4.0 mm screws from the base of the unit using a #1 Phillips screwdriver.
-
-
-
Starting at the corner at which the power and Ethernet ports are located, pry open the outer shell using a spudger and continue around the entire unit.
-
-
-
-
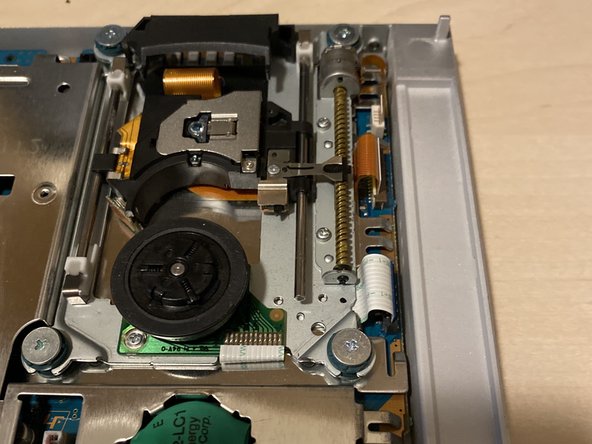
Remove the 2 philips screws, marked in red.
-
Remove the white plastic slider holder.
-
Picture 3 shows how it should be done.
-
-
-
Remove the slider as shown in the picture. You could do this with your fingers, otherwise take tweezers to remove it.
-
-
-
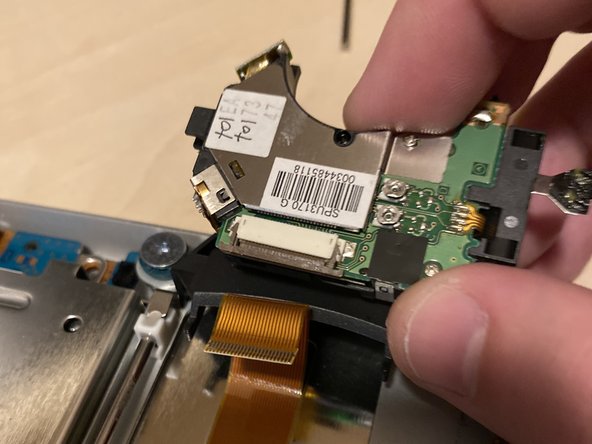
Take the laser out of the rail and rotate it.
-
Open up the connector by both sides with your fingernail or spudger. Be EXTREME carefull here, as it can break easily! (if the laser is broken, it won't matter, you can even practice on the broken laser).
-
Take the ribbon cable out, it should come out with ease.
-
-
-
Remove the philips screw from the laser and take off the slider.
-
Transfer the slider to the new laser and screw it down.
-
-
-
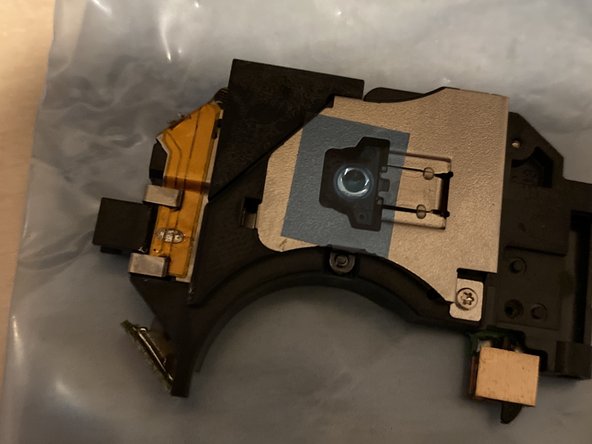
Most of the lasers have some solder on it for the anti-static security. You NEED to remove the solder, otherwise it won't work. Remove the solder with desolder wick.
-
2nd picture shows how it should be done. If you have the same result, your good to go. If you are not sure, just use your soldering iron again to remove some more (don't hold it too long on it, otherwise you could damage something).
-
-
-
Remove the blue sticker from the laser (if it has one). Put the laser back in and all other removed components (follow guide in reverse order). When you've put everything back, it should look like the provided picture.
-


To reassemble your device, follow these instructions in reverse order. Do not forget to transfer the slider from the old laser to the new one!
To reassemble your device, follow these instructions in reverse order. Do not forget to transfer the slider from the old laser to the new one!
Отменить: Я не выполнил это руководство.
4 участников успешно повторили данное руководство.

Команда

Protectors Of The Game Systems Участник Protectors Of The Game Systems
Community
4 членов
Автор 24 руководств
3 Комментариев
Hi there,
Do you need to worry about the laser cd/dvd parameters when installing the new one?
Thanks
Simon
Hi Simon! No, for the PS2 slim, this is not the case. Regarding the "PS2 Phat", sometimes it is required to adjust the parameters, same for the PS1.