Перейти к основному содержанию

Эта версия возможно содержит некорректные исправления. Переключить на последнюю проверенную версию.

Выберете то, что вам нужно

  1. Этот шаг не переведен. Помогите перевести

    : шаг 1, изображение 1 из 1
    • Turn off the console and disconnect all cables.

  2. Этот шаг не переведен. Помогите перевести

    : шаг 2, изображение 1 из 3 : шаг 2, изображение 2 из 3 : шаг 2, изображение 3 из 3
    • You must remove the warranty sticker and 4 screws.

  3. Этот шаг не переведен. Помогите перевести

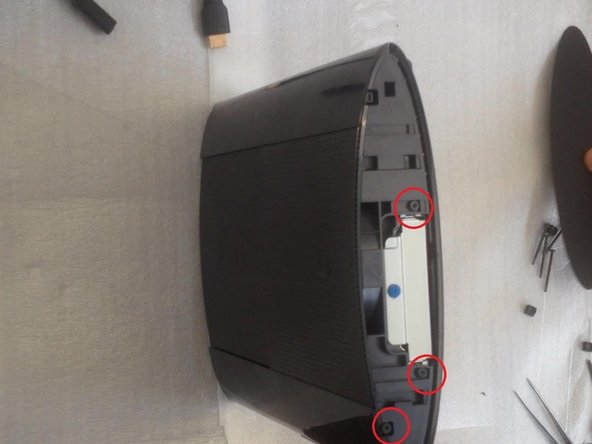
    : шаг 3, изображение 1 из 3 : шаг 3, изображение 2 из 3 : шаг 3, изображение 3 из 3
    • After removing HDD bay cover, you will see another 3 screw.

  4. Этот шаг не переведен. Помогите перевести

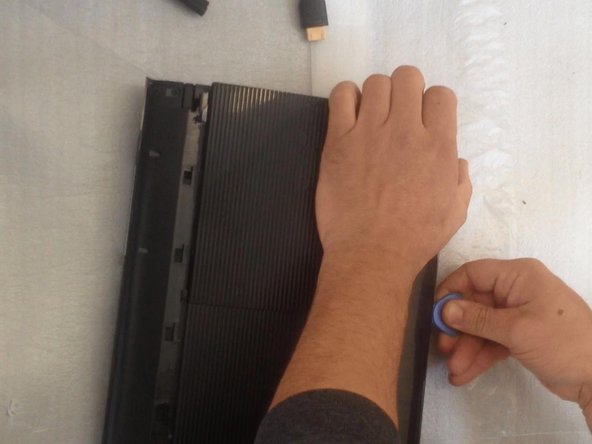
    : шаг 4, изображение 1 из 3 : шаг 4, изображение 2 из 3 : шаг 4, изображение 3 из 3
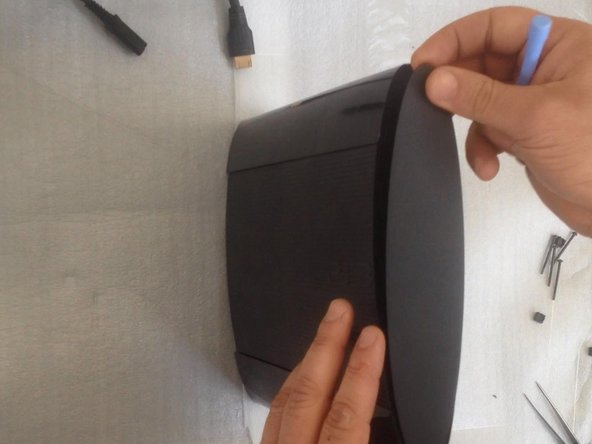
    • Push there to release and remove upper back bezel.

  5. Этот шаг не переведен. Помогите перевести

    : шаг 5, изображение 1 из 3 : шаг 5, изображение 2 из 3 : шаг 5, изображение 3 из 3
    • The upper front bezel is harder to remove.

  6. Этот шаг не переведен. Помогите перевести

    : шаг 6, изображение 1 из 3 : шаг 6, изображение 2 из 3 : шаг 6, изображение 3 из 3
    • Remove 7 screws to release top cover.

  7. Этот шаг не переведен. Помогите перевести

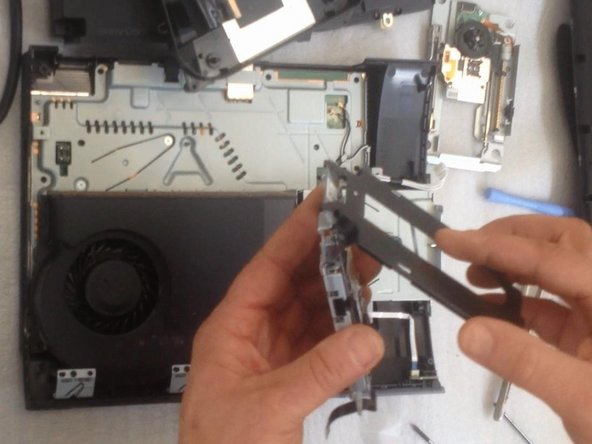
    : шаг 7, изображение 1 из 3 : шаг 7, изображение 2 из 3 : шаг 7, изображение 3 из 3
    • Disconnect two flex-cables and move the Laser Unit. Remove the two screws and the small cable and then take out the Power Supply Unit.

  8. Этот шаг не переведен. Помогите перевести

    : шаг 8, изображение 1 из 3 : шаг 8, изображение 2 из 3 : шаг 8, изображение 3 из 3
    • To release the laser unit disconnect this flex-cable.

  9. Этот шаг не переведен. Помогите перевести

    : шаг 9, изображение 1 из 3 : шаг 9, изображение 2 из 3 : шаг 9, изображение 3 из 3
    • One flex-cable, for rubbers and the metal bezel.

  10. Этот шаг не переведен. Помогите перевести

    : шаг 10, изображение 1 из 3 : шаг 10, изображение 2 из 3 : шаг 10, изображение 3 из 3
    • Disconnect this flex-cable and attach it to the new spare part. Let's start assembling.

  11. Этот шаг не переведен. Помогите перевести

    : шаг 11, изображение 1 из 3 : шаг 11, изображение 2 из 3 : шаг 11, изображение 3 из 3
    • Assembling, assembling...

  12. Этот шаг не переведен. Помогите перевести

    : шаг 12, изображение 1 из 2 : шаг 12, изображение 2 из 2
    • Let's test the device before fully assembling it.

Финишная черта

10 участников успешно повторили данное руководство.

ZFix

Участник с: 12/09/13

191 341 Репутация

Автор 330 руководств

Команда

Master Techs Участник Master Techs

Community

322 членов

Автор 2 540 руководств

5 Комментариев

I have found that there are to types of lasers do you sell the second one that does not have the black screws on top but are silver. I have found the one with the silver screws has a smaller laser flex cable and plug. its for the cech-43xx

jack blevinski - Ответить

My only problem now is how to purchase the right Laser unit? Any specs for the right Laser unit? Thanks

Sebasttain Tuscano - Ответить

I’ve done this but my ps3 still doesn’t read disks it spins it up 4 odd times but doesn’t read them and it sounds like the disk skims the top of the laser unit but it hasn't done any damage and it does it with both units, I’m so lost on what to do.

Dome Bucket - Ответить

I am replacing the optical drive in my console. But didn't note where the drive ribbon was positioned!? Every video I have found, they just pop right in...my original and replacement drives, have larger receptacles than the ribbon it self. There are at least 5 pins, that don't have (potentially) anything connecting them, to the ribbon. I don't want to randomly place the ribbon in one of the possible (7?) positions and fry something in the process...so where do I connect the smaller ribbon?!

Robert Shelton - Ответить

Добавить комментарий

Просмотр статистики:

За последние 24часов: 5

За последние 7 дней: 32

За последние 30 дней: 97

За всё время: 23,791