Введение
This guide will show the steps to dismantle the move controller and remove the battery in order to have it replaced.
Выберете то, что вам нужно
-
-
Using a Phillips #0 screwdriver, remove the four 10mm screws located on the back of the device.
-
-
-
Insert the plastic opening tool at the indent.
-
Gently use a forward and backward motion to safely pop open the cover.
-
Using your hands to further pull it apart.
-
-
-
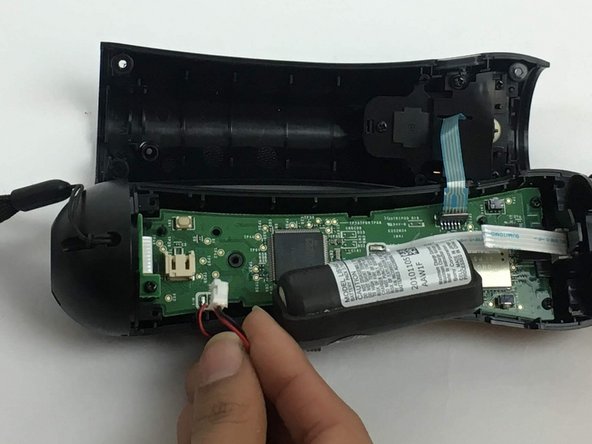
Once the device is opened, lift the battery out of the black plastic holder.
You can disconnect the back/trigger assembly ribbon cable at this point by proceeding to Steps 13/14 (without the other steps for disassembly as they are unnecessary for replacing just the trigger).
-
-
-
-
Using a Phillips head screwdriver, remove the 9mm screw located to the right of the battery, which is connected to the inner plastic frame.
-
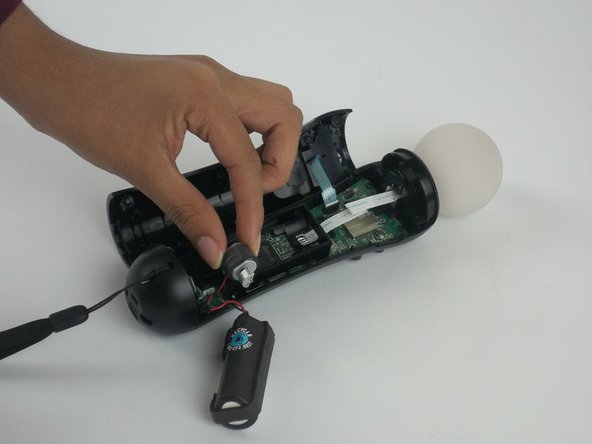
Using the plastic opening tool carefully take out the grey cylindrical piece (vibrator) that is also attached to a wire.
-
-
-
Using tweezers, remove the small piece with a cylindrical top that is located to the left of the inner plastic frame.
-
-
-
Using one hand to hold the device, and the other hand to squeeze the inner plastic frame.
-
Remove by squeezing the inner plastic frame, lift and pull it towards you.
-


To reassemble your device, follow these instructions in reverse order.
To reassemble your device, follow these instructions in reverse order.
Отменить: Я не выполнил это руководство.
8 участников успешно повторили данное руководство.
Команда

USF Tampa, Team 3-3, Passmore Fall 2016 Участник USF Tampa, Team 3-3, Passmore Fall 2016
USFT-PASSMORE-F16S3G3
4 членов
Автор 8 руководств
4 Комментариев
When putting the plastic battery rig back in on my second time doing this, I bent one of the little plastic pins that fits into a hole in the PCB. Definitely want to be careful with that. To make it a bit easier, I unscrewed the bottom port PCB part of the way so I could take the bottom plastic housing and put the plastic battery rig in straight. It made it a lot easier.
Worked great! Thanks for this. I did not need to take out the black battery / motor piece. Tweezers worked great to remove and install the battery cable
Any recommended online / physical store to buy new batteries for this because ifixit doesn’t have them?