Введение
This guide will show you how to safely replace a speaker on you Plum Optimax 10 tablet.
NOTE: If following this guide, it is only necessary to clip and solder the wires from one side of the speaker wires. If your replacement speaker has a long lead wire, clip the wire from the motherboard connection and solder there, while if your replacement speaker has no lead wires you should only clip and solder the connections at the speaker end.
Выберете то, что вам нужно
-
-
Use a metal spudger to remove the small panels to the immediate left and right side of the camera.
-
-
-
Use a metal spudger to begin lifting the back cover.
-
Then, create leverage and gently remove the entire cover.
-
-
-
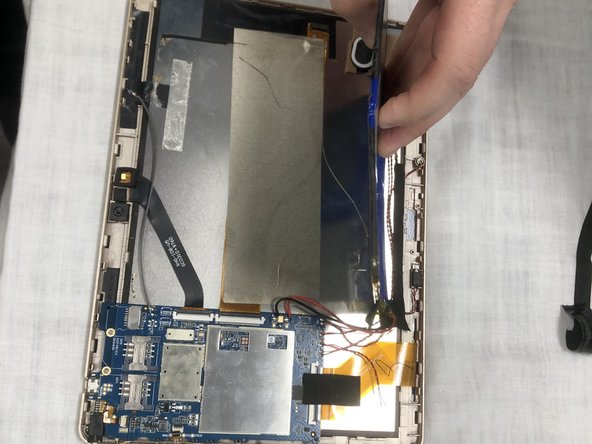
Use flathead screwdriver tool to remove the three 2.5 mm screws shown in the photo. Two screws are located at the base of the motherboard and there is one screw located at the top.
-
-
-
-
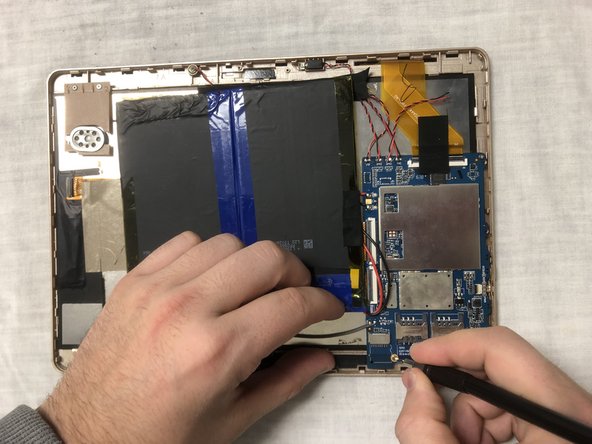
Use the spudger as a wedge underneath the battery to assist in removal.
-
Once loosened with the spudger, the battery is now removed from the device.
-
-
-
On the top side of the motherboard (where the black and red wires are), locate and look closely for the "SPK1" lead.
-
Use a pair of wire cutters to clip the wires from the "SPK1" lead.
-
The speaker will pop out of its place and use the wire cutters to remove the wires connected from "SPK1" from the speaker.
-
-
-
Once the wires are located, strip 2mm of the rubbing casing around the top of the wire for the black and red wires. You need to see the aluminum inside.
-
-
-
Using a soldering iron, gently make a connection with solder to the red wire while also making contact to the right contact plate of the speaker.
-
Repeat for black wire for contact plate on speaker.
-
-
-
Strip the bottom of the black and red wire by the motherboard.
-
Make a connection with the solder to the board where the black wire is on the negative contact.
-
Connect the red wire to the positive contact on the motherboard and solder.
-


To reassemble your device, follow these instructions in reverse order.
To reassemble your device, follow these instructions in reverse order.

Команда

The Citadel Military College of South Carolina, Team S1-G17, Eggleston Fall 2019 Участник The Citadel Military College of South Carolina, Team S1-G17, Eggleston Fall 2019
CMCSC-EGGLESTON-F19S1G17
3 членов
Автор 3 руководств