Введение
Many users of the Pokémon GO Plus+ complain about the very bright catch light, follow this guide to learn how to dampen the brightness of the lights.
Выберете то, что вам нужно
-
-
Flanking both sides of the charging port are J00 Screws. Remove these.
-
-
-
When looking at the front of the device, with the charging point at the bottom the device has a hinge clip and wires on the top right.
-
With a fingernail or some kind of slim pry tool, gently lift from the bottom left corner.
-
There is adhesive that is holding the faceplate on, If you have difficulty pulling it off, use a plastic spudger by inserting it in on the bottom left then slowly hinge the device open while applying pressure to the adhesive pad to loosen it.
-
-
-
-
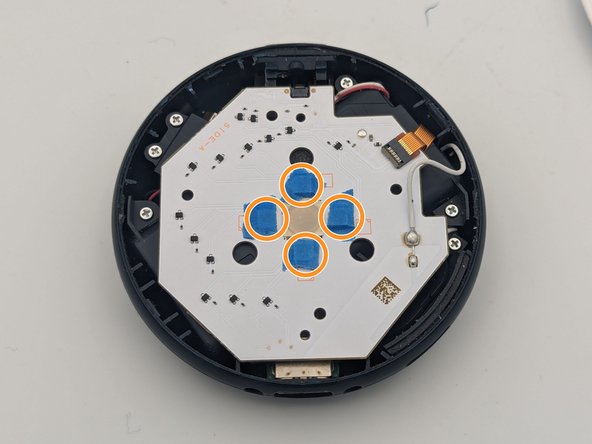
Once you've got the faceplate off, on the backside of the faceplate you will see a white PCB with 4 J00 screws securing it, remove those 4 screws
-
There are two alignment posts holding the board in place, while removing the board be careful not to damage these posts
-
While the flat flex cable can be disconnected, the white wire is soldered to the other side of the board, so be very careful to not damage it.
-
-
-
Once you remove the PCB from the faceplate you'll have access to the RGB LEDs that make up the center button light.
-
Cut to size whatever you're using to dampen the LEDs, and apply them to each of the 4 LEDs.
-


To reassemble your device, follow these instructions in reverse order.
To reassemble your device, follow these instructions in reverse order.
Отменить: Я не выполнил это руководство.
Еще один человек закончил это руководство.
