Введение
This Polaroid A10 Screen Replacement guide might be needed if the screen is damaged, shattered, and/or scratched. Before you begin make sure you have properly taped the screen to not only protect yourself, but to also make sure the glass is secured down to avoid further damage. To acquire further information regarding the Polaroid A10 Screen Replacement, follow this efficient guide to escort you through the replacement procedures.
Выберете то, что вам нужно
-
-
Begin by having the side with volume and power button face up towards you.
-
Insert a plastic opening tool between the display and the back cover.
-
Once you have one plastic opening tool in, you can insert another one. While holding one in place, slide the other along the gap to release the tabs.
-
-
-
Begin by inserting the flat end of a spudger underneath the battery to separate the glue from the battery.
-
Gently lift up the battery as you continue to separate the glue from the battery.
-
Once the glue has been separated, gently lift up the battery and you will notice two wires attached to the motherboard.
-
-
-
Follow the (Black and Red) wires from the battery to the motherboard.
-
The two wires (Black and Red) must be removed from the motherboard, as they are connected to the battery.
-
-
-
The camera head is located on the upper middle section of the device, close to the battery.
-
-
-
Start by locating the two left and right screws which hold the camera head in place.
-
Using the Phillip's 000 screwdriver, remove the two 7 mm screws located in the picture by rotating the screw counter-clockwise.
-
-
-
-
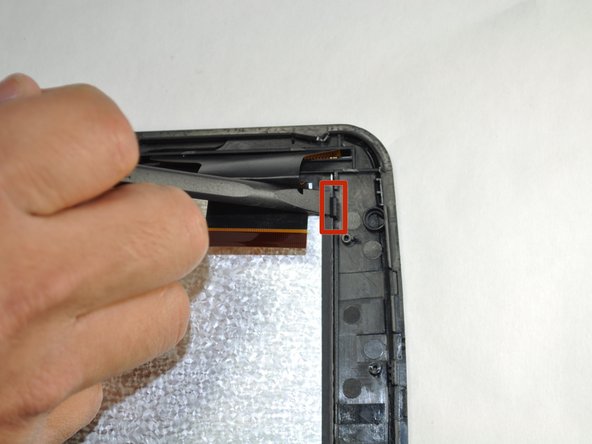
Locate the camera ribbon cable that is connected to the motherboard.
-
With a spudger, remove the camera ribbon cable base from the motherboard connector.
-
With one finger, delicately remove the camera ribbon cable by sliding down.
-
-
-
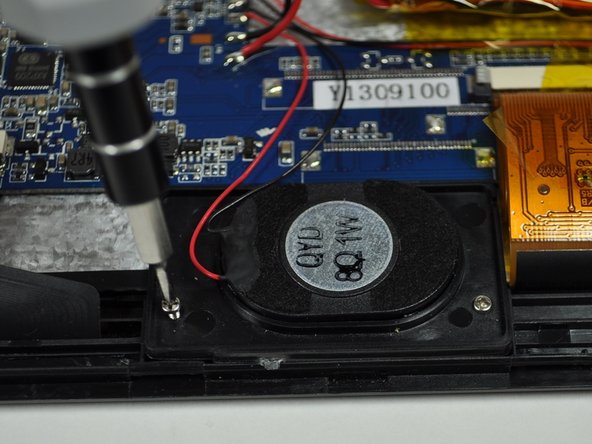
The speakers are located on the bottom of the device, below the battery and adjacent to the motherboard.
-
-
-
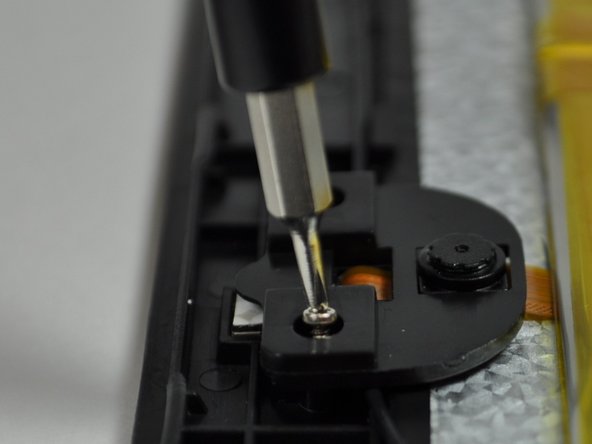
Using the Phillips #000 screwdriver, remove the two 7 mm screws located in the picture by rotating the screw counter-clockwise.
-
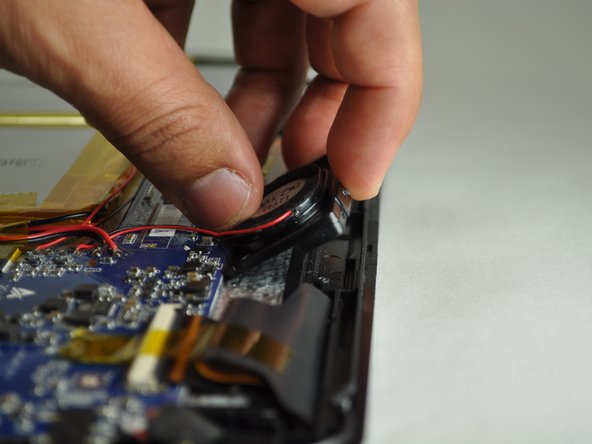
Carefully remove the speakers from original position without pulling out the wires.
-
-
-
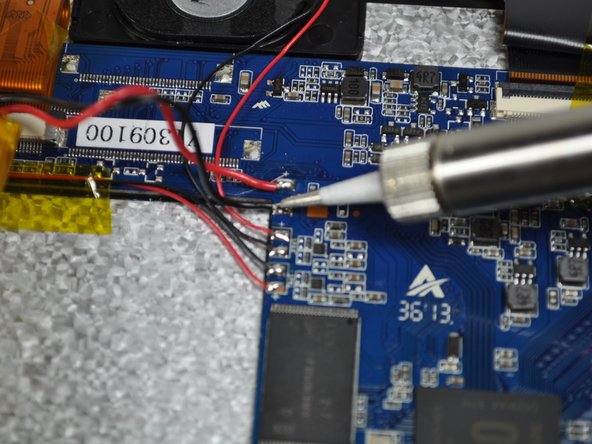
Using the soldering tool, remove the two small black wires and two small red wires from the motherboard.
-
The wire connections are located on the motherboard next to the corner of the battery closest to the motherboard.
-
-
-
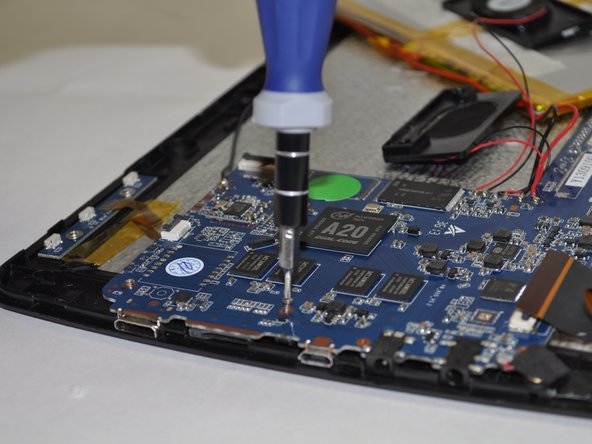
Take off yellow tapes that are surrounding the motherboard.
-
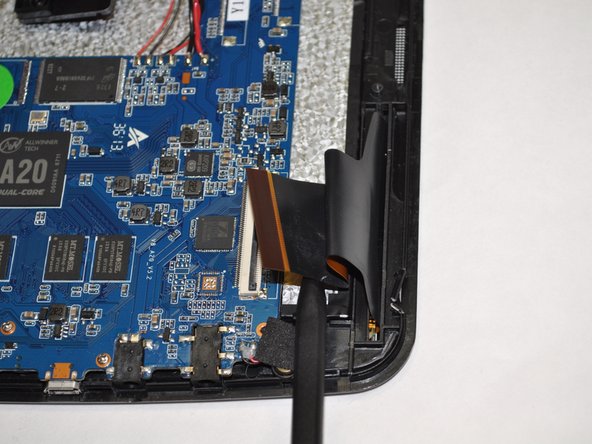
Use the plastic opening tools to disconnect the three ribbon cables: battery, screen, and volume/power buttons.
-
-
-
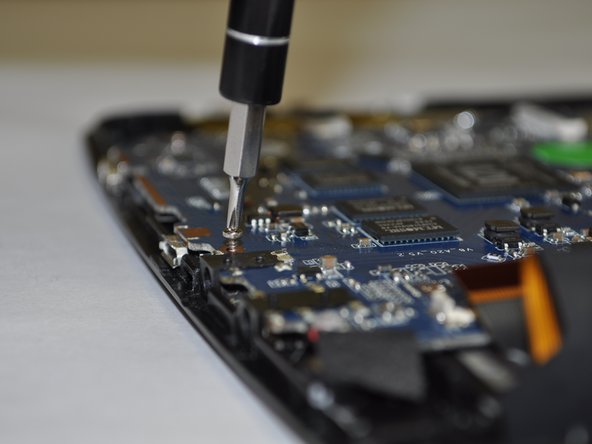
Using the Phillips #000 screwdriver, remove the four 5 mm screws located in the picture by rotating the screw counter-clockwise.
-
-
-
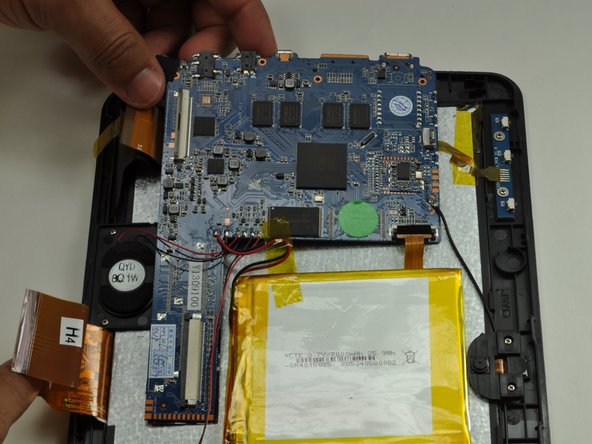
Use the soldering tool to unsolder the two bigger metals from the wires of the battery.
-
Use the same soldering tool to unsolder the four smaller metals from the wires of the speakers.
-
Use the same soldering tool to unsolder the ground wire.
-
-
-
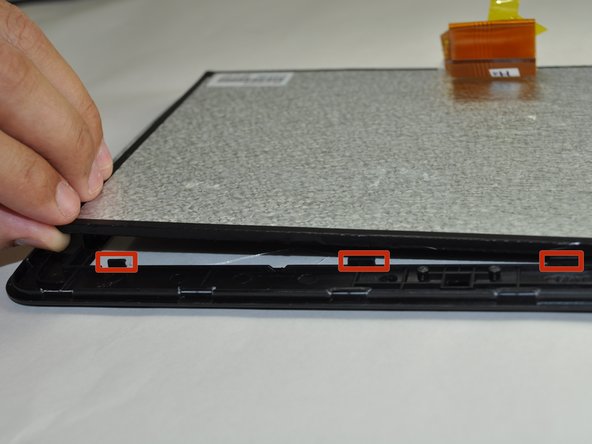
Hold the outer plastic rim (the black plastic that holds the LCD display in place), as shown in the first picture.
-
Use your hand that is holding the device and start by pushing the glass screen upwards from the back with your fingers while pulling the outer plastic rim downwards from the display with your thumb.
-
Using your free hand, use the flat end of the spudger to pry apart the clips holding the LCD screen in place.
-


To reassemble your device, follow these instructions in reverse order.
To reassemble your device, follow these instructions in reverse order.

Команда

UW Tacoma, Team 3-3, Rose Winter 2015 Участник UW Tacoma, Team 3-3, Rose Winter 2015
UWT-ROSE-W15S3G3
4 членов
Автор 12 руководств