Введение
If you've been experiencing issues with the functionality of your L and R buttons while using your PowerA Enhanced Wireless Controller for Nintendo Switch, you're not alone. These buttons are crucial to the operation of the controller and can often become less responsive over time due to wear and tear. This guide will walk you through the necessary steps to access and replace or clean these buttons, restoring your controller to peak performance.
This repair will address common issues such as marginal response of the L and R buttons, L and R buttons sticking due to dust or residue build up and/or physical damage on the L and R buttons.
Before beginning the repair process, it's important to remove the batteries from your controller to ensure your safety during the repair and prevent any potential issues with the motherboard. Step 1 of this guide will show you how to access the battery compartment.
Выберете то, что вам нужно
-
-
Remove the battery cover by pressing down on the lever located on the top of the cover.
-
Apply pressure until it clicks out of place, and pull it off.
-
-
-
-
Insert the iFixit opening tool into the seam and gently pry the cover plate up.
-
Remove the cover plate once it is loosened.
-
-
-
Remove all three screws securing the motherboard using the J00 screwdriver.
-
Remove the motherboard.
-
-
-
Lift the two white latches using the iFixit opening tool.
-
Lift the white covering off.
-
-
-
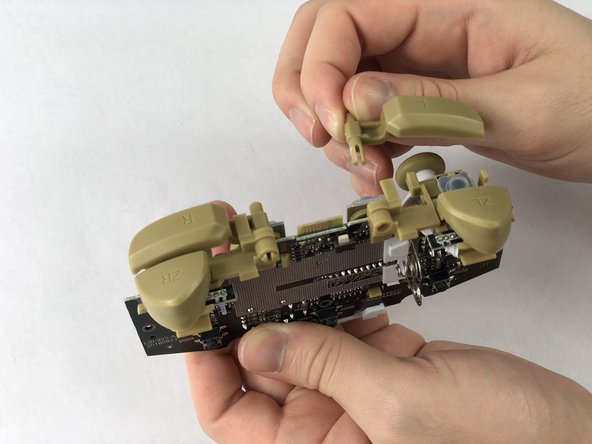
Squeeze the buttons with rubber tweezers and push them in.
-
Grab it from the back and pull it out.
-


To reassemble your device, follow these instructions in reverse order.
To reassemble your device, follow these instructions in reverse order.
Отменить: Я не выполнил это руководство.
Еще один человек закончил это руководство.
Команда

USF Tampa, Team S1-G5, Leahy Fall 2019 Участник USF Tampa, Team S1-G5, Leahy Fall 2019
USFT-LEAHY-F19S1G5
3 членов
Автор 10 руководств
2 Комментариев
I need to know how to fix the ZR and the ZL buttons, like a faster response time