Введение
When it comes to a controller, the performance of the analog sticks are essential, and when they malfunction, it renders the controller useless for many games and apps. It’s normal for an analog stick to lose performance overtime due to use, but rather than just throw it away, consider taking a few steps to fix it and save yourself the cost of buying another. This replacement guide outlines the equipment you will need and the necessary steps to take in order to disassemble and fix your PowerA Fusion Xbox One Controller's analog stick. Please be aware that soldering and desoldering is required to replace the analog stick, so experience with a soldering iron and desoldering braid is required.
Выберете то, что вам нужно
-
-
Remove the (9) nine 9.2mm screws with a JIS #1 screwdriver.
-
Lift off the two bottom grip covers of the controller.
-
-
-
Remove the remaining (2) two 9.2mm screws holding the back cover with a JIS #1 screwdriver.
-
Carefully lift and remove the back cover of the controller.
-
-
-
-
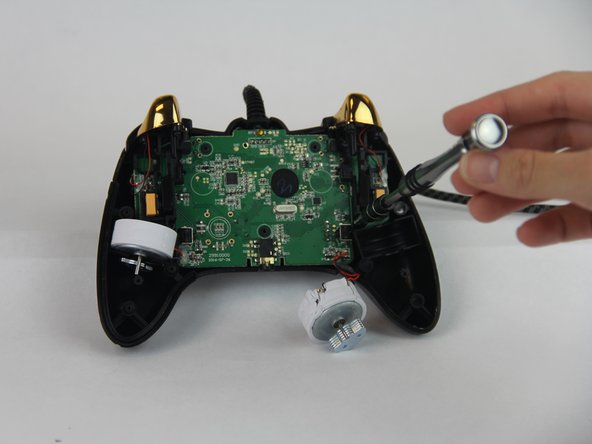
Carefully remove the (5) five 9.2mm screws holding the motherboard with a JIS #1 screwdriver.
-
Lift the motherboard and rest it face up to the right of the controller front plate.
-
-
-
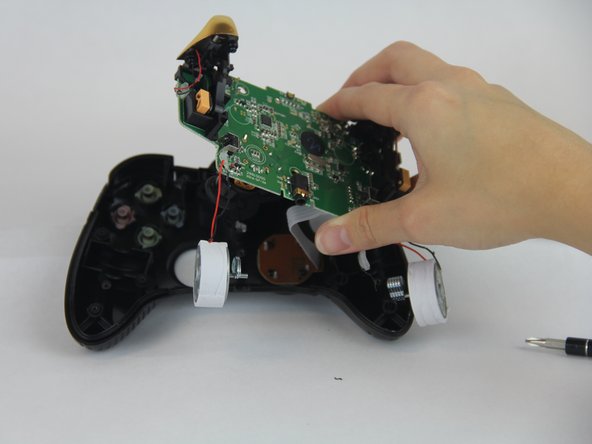
Remove the (4) four 9.2mm screws that are holding the motherboard to the controller.
-
Remove the motherboard from the face plate of the controller.
-
-
-
Use the tweezers to unclip the (4) four metal teeth of the analog stick.
-
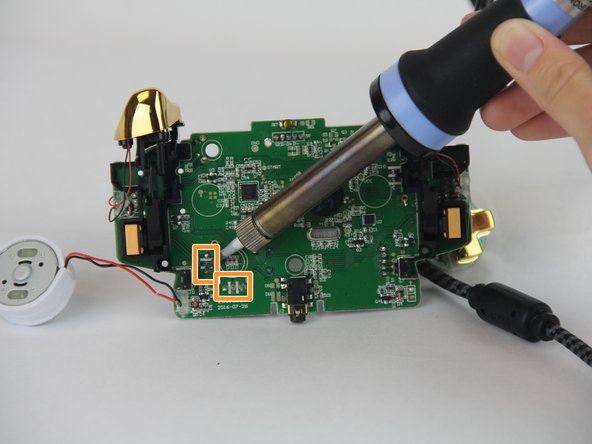
Use the soldering iron and desoldering braid to desolder the analog stick sensor module from the back of the motherboard.
-
Place the new analog stick sensor module and solder it back.
-


To reassemble your device, follow these instructions in reverse order.
To reassemble your device, follow these instructions in reverse order.
Отменить: Я не выполнил это руководство.
7 участников успешно повторили данное руководство.
Команда

USF Tampa, Team S14-G4, Boczar Fall 2017 Участник USF Tampa, Team S14-G4, Boczar Fall 2017
USFT-BOCZAR-F17S14G4
4 членов
Автор 5 руководств
3 Комментариев
Hi I’m looking those analog stick but I’m only finding the plastic and they are to big they are called different or something ?
Have you found a replacement yet? I ran into the same problem a couple of months ago, the potenciometers that I ordered did not fit into the motherboard. I even tried some other ones from a generic USB controler to no avail. Manufacturers do not report the sizes of the potenciometers, so it’s a bet everytime. I yet have to find a potentiometer that fits…
Any joy on purchasing these