Перейти к основному содержанию

Эта версия возможно содержит некорректные исправления. Переключить на последнюю проверенную версию.

Выберете то, что вам нужно

  1. Этот шаг не переведен. Помогите перевести

    : шаг 1, изображение 1 из 1
    • Turn the keyboard locking screw so that it is parallel to the space bar.

    • Pull the keyboard release tabs toward you and lift up on the keyboard until it pops free.

    • Lift the keyboard out by pulling it up and away from you. Rest the keyboard, face down, on top of the track pad.

  2. Этот шаг не переведен. Помогите перевести

    : шаг 2, изображение 1 из 1
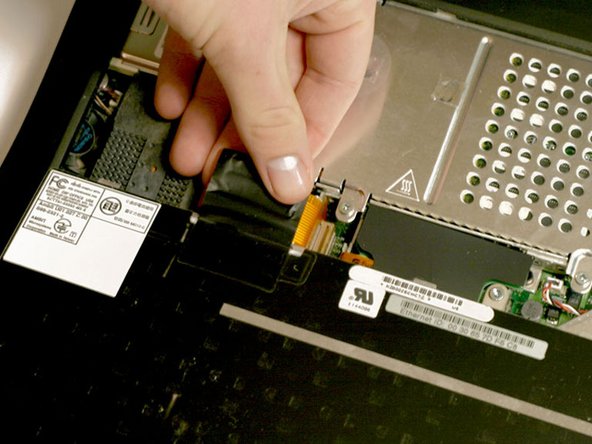
    • Pull the keyboard ribbon straight up from the logic board. Place the keyboard aside.

    • The connector may be tight. Gently rock the connector from side to side while pulling directly upward to free it. You can use this technique on many of the cards and cables you'll be disconnecting.

    • Make sure you have removed the laptop battery and CD/DVD modules from the expansion bays before proceeding.

  3. Этот шаг не переведен. Помогите перевести

    : шаг 3, изображение 1 из 1
    • Your laptop should look approximately like this.

  4. Этот шаг не переведен. Помогите перевести

    : шаг 4, изображение 1 из 1
    • Remove the two silver Phillips #1 screws that attach the heat shield to the internal metal framework.

    • Lift the heat shield up and pull it toward you.

  5. Этот шаг не переведен. Помогите перевести

    : шаг 5, изображение 1 из 1
    • Your laptop should look approximately like this.

Финишная черта

2 участников успешно повторили данное руководство.

Прикрепленные документы

iRobot

Участник с: 09/24/09

1 Репутация

Автор 636 руководств

0 Комментариев

Добавить комментарий

Просмотр статистики:

За последние 24часов: 0

За последние 7 дней: 1

За последние 30 дней: 2

За всё время: 3,110