Эта версия возможно содержит некорректные исправления. Переключить на последнюю проверенную версию.
Выберете то, что вам нужно
-
Этот шаг не переведен. Помогите перевести
-
Remove the single Phillips screw from the lower left and right corners of the display.
-
-
Этот шаг не переведен. Помогите перевести
-
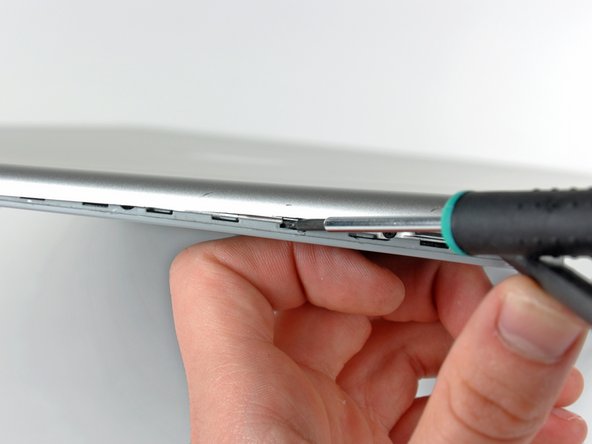
Insert the flat end of a spudger between the front display bezel and the plastic rim attached to the rear bezel near the lower right corner of the display.
-
While carefully prying the rear display bezel away from the display assembly, use a small flathead screwdriver to pry the small steel clip nearest the bottom right corner of the display away from the edge of the front display bezel.
-
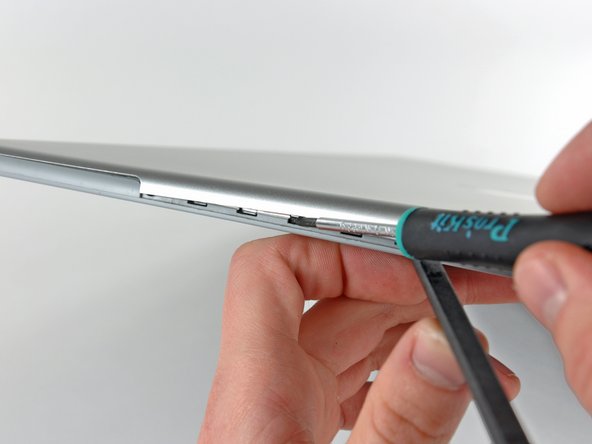
Repeat the above procedure until you've released all the clips along the right side of the display.
-
-
-
Этот шаг не переведен. Помогите перевести
-
Slightly lift the recently-freed corner of the rear display bezel to separate the clips along the span of the clutch hinges.
-
-
Этот шаг не переведен. Помогите перевести
-
Insert the flat end of a spudger between the rear display bezel and the plastic surround of the front display bezel near the lower left corner of the display.
-
Carefully pry the rear display bezel away from the front display bezel to release a metal clip.
-
-
Этот шаг не переведен. Помогите перевести
-
Repeat the previous procedure to release the clips along the left side of the rear display bezel.
-
-
Этот шаг не переведен. Помогите перевести
-
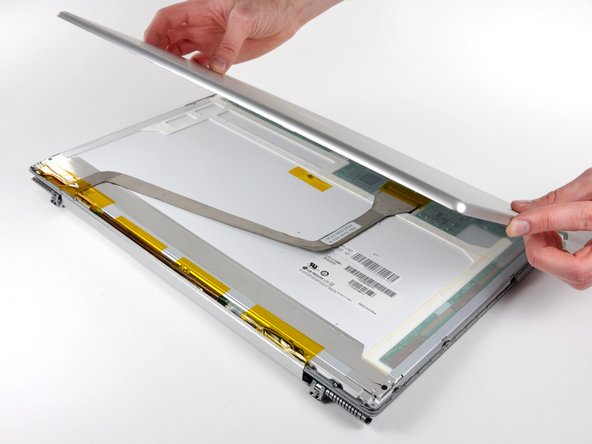
Slightly lift the lower edge of the rear display bezel and push it toward the top edge of the display, releasing the clips along the top edge of the rear display bezel.
-
Remove the rear display bezel and set it aside.
-


Отменить: Я не выполнил это руководство.
Еще один человек закончил это руководство.
