Перейти к основному содержанию

ProScan PLT7050 Motherboard Replacement

Выберете то, что вам нужно

  1. ProScan PLT7050 Motherboard Replacement, Open Device: шаг 1, изображение 1 из 1
    • Make sure device is unplugged and turned off while working on the device.

    • Remove 2 Phillips head, 4.3 mm screws from the bottom side of the tablet with a PH00 screwdriver.

  2. ProScan PLT7050 Motherboard Replacement: шаг 2, изображение 1 из 1
    • Use the plastic opening tools to pry the back of the tablet open.

    • You may need to slide the tool along the sides of the device to get it to open. You might hear some popping noises, it is okay.

    • May be helpful if you start by the microSD slot.

  3. ProScan PLT7050 Motherboard Replacement, Motherboard: шаг 3, изображение 1 из 2 ProScan PLT7050 Motherboard Replacement, Motherboard: шаг 3, изображение 2 из 2
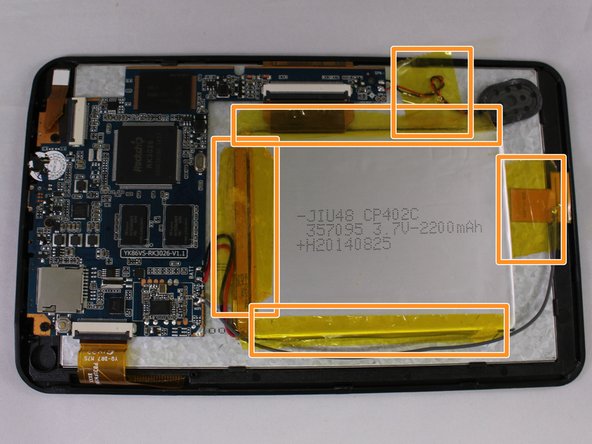
    • Remove the 3 black pieces of tape from the device.

    • Remove the 5 yellow pieces of tape from the device.

  4. ProScan PLT7050 Motherboard Replacement: шаг 4, изображение 1 из 2 ProScan PLT7050 Motherboard Replacement: шаг 4, изображение 2 из 2
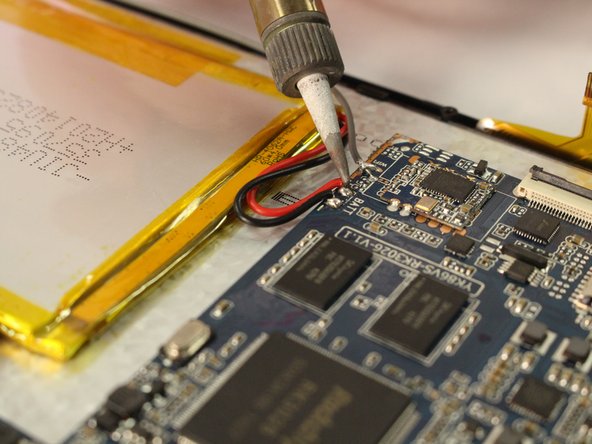
    • Use the soldering tool to remove the 3 wires from the mother board to the battery (black, red, gray).

    • Soldering tool will get hot.

  5. ProScan PLT7050 Motherboard Replacement: шаг 5, изображение 1 из 2 ProScan PLT7050 Motherboard Replacement: шаг 5, изображение 2 из 2
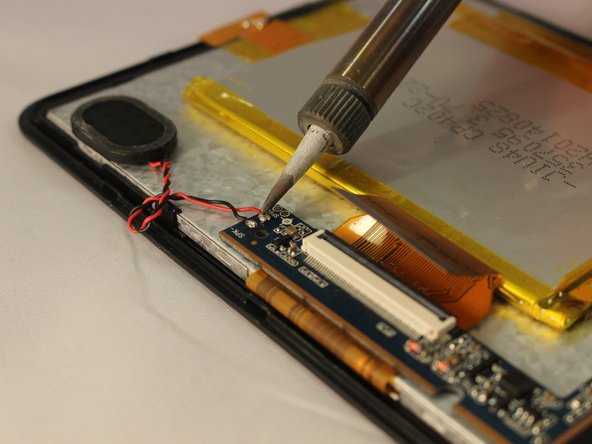
    • Remove the speaker wires from the motherboard with the soldering tool.

  6. ProScan PLT7050 Motherboard Replacement: шаг 6, изображение 1 из 1
    • Remove 3 Phillips head, 4.3 mm screws from the bottom side of the tablet with a PH00 screwdriver.

  7. ProScan PLT7050 Motherboard Replacement: шаг 7, изображение 1 из 3 ProScan PLT7050 Motherboard Replacement: шаг 7, изображение 2 из 3 ProScan PLT7050 Motherboard Replacement: шаг 7, изображение 3 из 3
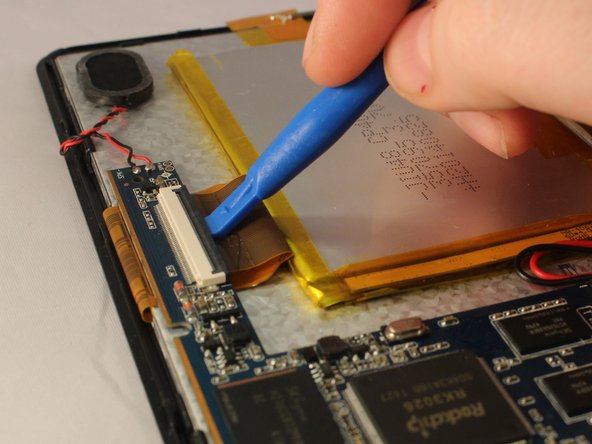
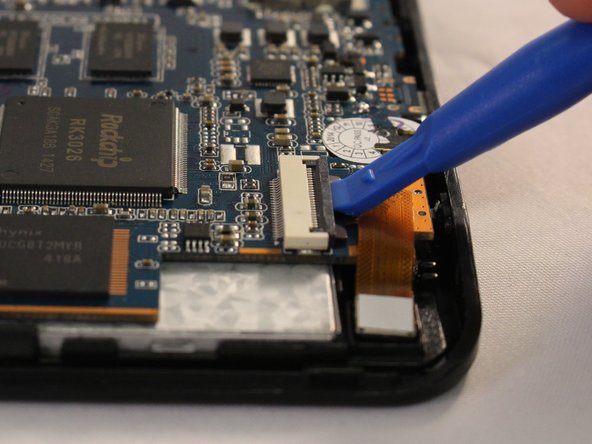
    • Use the plastic opening tool to pop open all 3 ZIF connector tabs connected to the motherboard.

    • Remove each ribbon from the ZIF connector port.

  8. ProScan PLT7050 Motherboard Replacement: шаг 8, изображение 1 из 1
    • Lift the motherboard off the device taking care to pull the ports out of the casing.

Заключение

To reassemble your device, follow these instructions in reverse order.

Valerie Landguth

Участник с: 01/19/17

320 Репутация

Автор 3 руководств

Команда

Eastern Washington University, Team 1-4, Mathisen Winter 2017 Участник Eastern Washington University, Team 1-4, Mathisen Winter 2017

EWU-MATHISEN-W17S1G4

5 членов

Автор 12 руководств

0 Комментариев

Добавить комментарий

Просмотр статистики:

За последние 24часов: 1

За последние 7 дней: 2

За последние 30 дней: 6

За всё время: 351