Эта версия возможно содержит некорректные исправления. Переключить на последнюю проверенную версию.
Выберете то, что вам нужно
-
Этот шаг не переведен. Помогите перевести
-
Turn the 3D printer on using the power switch.
-
Move the head to the highest position on the Z axis. This provides working room to access the head.
-
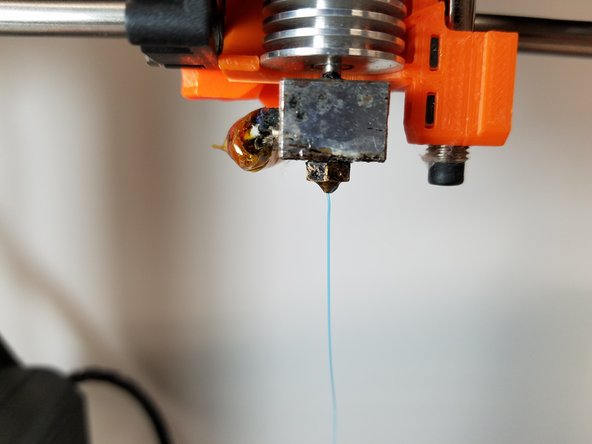
Heat the nozzle up. This step depends on what type of filament is currently in the machine (e.g. 190 for PLA, 220 for ABS).
-
Remove filament from the 3D printer.
-
Clean off the old nozzle with tweezers.
-
-
Этот шаг не переведен. Помогите перевести
-
Remove the 1 X M3 Bolt holding on the fan shroud on the outlet of the fan.
-
Remove the fan shroud.
-
Remove the 2 X M3 Bolts holding on the blower fan.
-
Remove the fan and place it in a safe location.
-
-
-
Этот шаг не переведен. Помогите перевести
-
Remove the two M3 Bolts that are holding on the Extruder Cooling Fan.
-
Remove the Extruder Plate carefully, and avoid touching the hot metal print head.
-
-
Этот шаг не переведен. Помогите перевести
-
Use an adjustable crescent wrench and a 7mm wrench or socket to remove the old nozzle.
-
-
Этот шаг не переведен. Помогите перевести
-
Screw in the new nozzle using a socket to get the threads started.
-
Use a crescent wrench and a 7mm wrench or socket to tighten a quarter turn past hand tight.
-
Insert some new filament and push it through to test the connection.
-


Отменить: Я не выполнил это руководство.
6 участников успешно повторили данное руководство.
Команда

Michigan Tech, Team S5-G5, Galliah Fall 2017 Участник Michigan Tech, Team S5-G5, Galliah Fall 2017
MTU-GALLIAH-F17S5G5
2 членов
Автор 1 руководств